Fidget Spinner With M6 Nuts
thingiverse
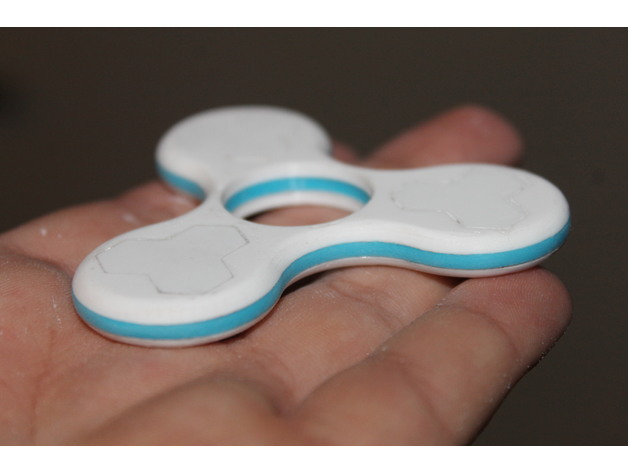
I made a Fidget Spinner so I could have it in different colors and use M6 nuts with it. To hide the small nuts on each arm, I chose not to use one big M10 or M12 nut instead. This way, only the bearing in the middle shows. The spinner is 7mm tall, while standard M6 nuts are 5.1mm tall. That's why I made the covers 0.9mm tall. I sanded mine to remove the "3D printing lines" so the top is smooth. To glue it, line up the two pieces using the nuts. For example, press the nuts into the middle part and then add glue to the top/bottom part, pressing it in place. Let it sit for 10-15 seconds, then quickly push out the nuts. Then let the part dry completely. Repeat on the other side. The covers are a press fit, but I glued everything together. I have uploaded three files: "fidgetspinner_m6_bottom_1.stl" is the top and bottom of the print (see the pictures above), "fidgetspinner_m6_middle_1.stl" is the middle of the print (see the pictures above), and "FidgetSpinner_M6_Cover.stl" are the covers for the nuts. These might need some filing, depending on your printer's accuracy. Edit: I have added a new file called "fidgetspinner_m6_topbottom_v2.stl." This one has the covers built into the top/bottom part, making the spinner look cleaner. I will still keep the original v1 file available so you can change the color of the covers as you like. Make sure to upload a picture of your version of this spinner! And I would love some feedback!
With this file you will be able to print Fidget Spinner With M6 Nuts with your 3D printer. Click on the button and save the file on your computer to work, edit or customize your design. You can also find more 3D designs for printers on Fidget Spinner With M6 Nuts.