FIFO Rolling Can Pantry Organizer
pinshape
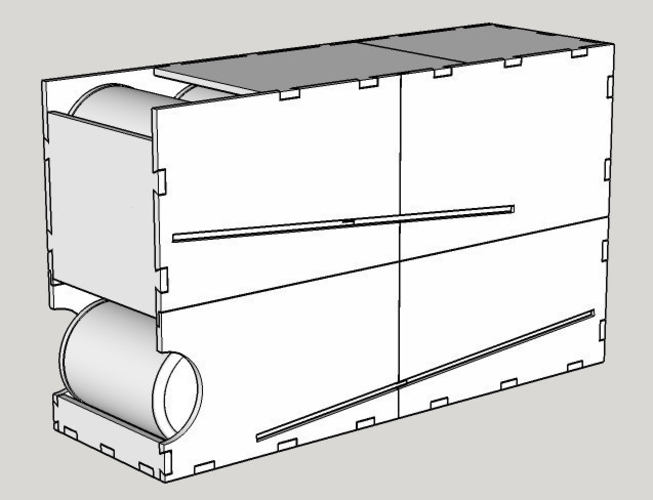
So, this is, to date, my largest and most complicated design/print yet! If you are like me and have cabinets full of canned goods - always be prepared! - you know what a hassle it is to keep those rotated so that the oldest cans can be taken first. This solves that problem. Simply drop your can into the opening on top and it will roll down to the bottom. As you take a can from the bottom opening, the next can in line will roll down to take it's place. By filling the rack from the top and taking from the bottom, you ensure that the oldest can is always pulled first. There are two versions included here. The build plate on my Tevo Tarantula is the standard 200x200 so I had to cut the model into pieces to make it fit. For those with larger beds, or those having this printed, I have also included the original model with full size panels as a ZIP file. You can ignore this if you will be printing this piece by piece. A word of warning, this does take a LOT of filament. My print utilized 351.55m and 1004g - right at, or just over, a typical 1kg roll. Use the cheapest filament you can. Looks are not important here. You can always sand it and paint it after assembly if you want. Print Settings Supports: Yes Resolution 0.3mm Infill: 10% Notes: Most of these pieces print best when the text is face down, with supports, if your bed is large enough - keep reading for more details. The four shelf panels need to be laid flat against the bed. Cura has a button under [Rotate] that does that automatically, otherwise the angle is 5°. As I said, my build plate is the original 200x200mm. These panels do NOT fit on a bed that size laying flat. I know, but there was nothing I could do about that. The first panel I printed, I printed standing on edge diagonally across the bed. For this you will need supports enabled everywhere. This printed good - maybe even with more strength - but there is a lot of cleanup. For the rest of the panels, I cheated. I cut a piece of glass 200x 250 and placed that on the heat bed with the edge hanging over slightly at the front. I then moved the Y-axis end stop back so that the printer could home to the left front corner. I also had to tell Cura and OctoPrint that I was using a larger bed and I had to modify the maximum XY size in the Marlin firmware. It works, though! I did let the bed heat up for an addition 10 minutes or so so that the heat could migrate to the unsupported glass, but not a single print failed. I recommend that this be printed at the fastest speed your printer will allow. The cheap filament I was using didn't bond together at anything over 60mm/sec, so I was only able to print three to four panels a day. Post-Printing This is designed to fit together like a jigsaw puzzle. You will notice that each panel is labeled as to it's position as well as to which tabs go together. If you can put together IKEA furniture, then you can assemble this. I used Duco cement on some panels and E6000 cement on others. Either seems to hold together just fine, but I would probably suggest the E6000 for this application since the longer cure time seems to indicate a stronger bond. Assembly is easier if the rear panel is attached last. A friend commented on how plain the front was. We decided that the upper front panel is a great place to paste the label of the cans stored in each rack. How I Designed This This was designed in my go-to CAD program - Sketchup. Contrary to popular opinion, this is a GREAT program that is easy to use and creates perfectly 3D printable models if you know what you are doing. Like any program, there is a learning curve, but it's nothing like that of Blender or FreeCAD! I tried to cut a slew of 20mm diameter holes in the sides to cut down on the amount of filament necessary, but that didn't result in a significant drop in filament use. The reason, I think, is this... As designed, 99% of the panel is 10% infill with only the outer edges needing full fill. Now when I cut holes, yes the total surface area is reduced, but the edges around each hole now need full fill. This adds almost as much filament as the holes themselves remove. If you can figure out a way to reduce the amount of filament needed, I would LOVE to see it.
With this file you will be able to print FIFO Rolling Can Pantry Organizer with your 3D printer. Click on the button and save the file on your computer to work, edit or customize your design. You can also find more 3D designs for printers on FIFO Rolling Can Pantry Organizer.