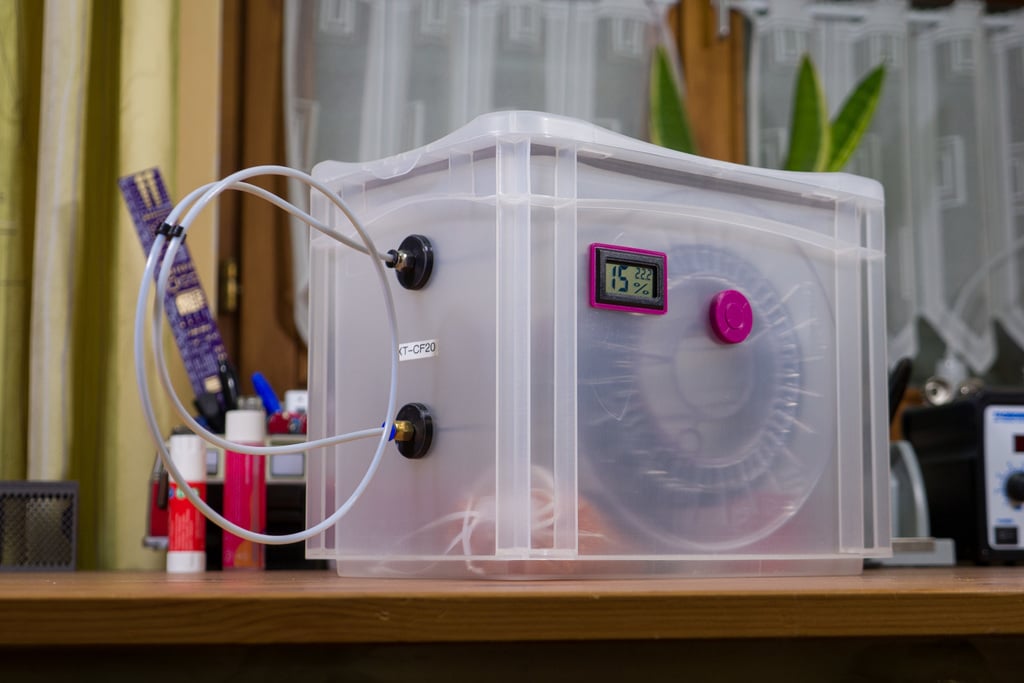
Filament-Drybox (1.75mm)
thingiverse
I wanted to store my Filament Spools in a Dry Enviroment, while also having them in that Enviroment during Printing. So i made those Dryboxes. The Parts can be installed on every Box that is big enough for a Filament Spool, has two (nearly) Parallel sides for the Rod, is able to be sealed and has the right Wall Thickness (not too Thick). This version is only for 1.75mm Filament. But the Fusion360 File is also included if you want to change anything. The Spools can be stored in a seald Container on the Rod, together with Silica Gel to keep it Dry. The Outlet gives access to the Filament, while the PTFE-Tube keeps it guided an Protected. A Second Outlet can be used the lead the PTFE-Tube back in to the Container to keep the end dry and to have the whole Tube neatly tucked away. A Hygometer can be installed as well, to monitor the Humidity in the Box. I noticed that the Cheap ones are not really good in measuring Low Humidity, but it is still a easy way to see if everything is allright. ----- Box: I used "Euroboxes" for my Dryboxes. They have the right size and shape and i am able to seal the Lid with a gasket for Windows. Rod: The Rod for Mounting the Spools, has a 8mm Diameter and needs to be ~5mm shorter than the inside of the Box, because each Rodholder adds 2mm. But it can be a little bit Longer than that, to let the Rod push the walls to the side for a stronger fit. To install the Rod holder, you need the top edge of the Spool hole. Just position the Spool in the box so it can spin freely. Then mark the top. The rod is Shifted down in the Holder to have its top right at the Center line of the holder (1mm deeper than that in reality), so you can mark the Hole with the Nut at the center of the top of the Spool hole and cut it out. The same hole needs to be done directly on the opposite side. Stick the Rodholder through the hole and tighten it with the Nut. Outlet: The Outlet works the same way. Mark the Hole with the Nut where it seems the best, cut it out and screw it in. I made 3 different versions for different Fittings. Two for a M6x1 thread. One where the PTFE-Tube fits through and one where its not. And one for a M10x1 thread, where the Tube fits through. The Supports need to be removed and the Hole punched through. Supports are in the Model an dont have to be added. Hygrometer: I used Cheap Hygrometer from Amazon. If you have the same, then you can use the Frames to mark the cutout and make it look better. If not, just make a cutout that fits yours and dont use the Frames. Misc: I also added a Clip for the PTFE-Tube and a Clip mith two M10x1 threads to Clip it on the Spoolholder of my Prusa i3MK3, to have a nice way to mount the Tube on the Printer. The Last one should not be useable for everyone, but i included it because i had it anyway. The PTFE-Tube from the Drybox can also go directly to the Extruder or be straped somewhere whith Zip-Ties, so that the Extruder can pull the Filament from there. Whatever works best.
With this file you will be able to print Filament-Drybox (1.75mm) with your 3D printer. Click on the button and save the file on your computer to work, edit or customize your design. You can also find more 3D designs for printers on Filament-Drybox (1.75mm).
