Filament Holder for 3D Printer
thingiverse
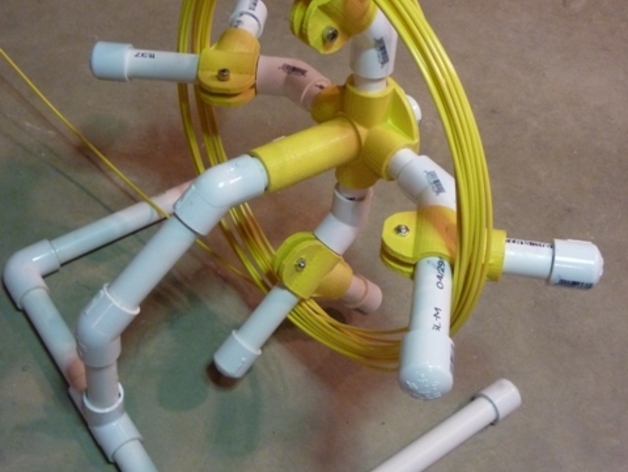
I needed a filament holder for my 3D printer. The brackets are printed and then assembled with 1/2" PVC pipe and fittings. Instructions Filament Holder Assembly Print out using ABS: 1 Axel Hub 4 Spoke Clamps Go down to the hardware store and get: 8 feet of 1/2†PVC pipe and the following 1/2" fittings 1 - Tee 2 - 90 Degree Elbows 6 – 45 Degree Elbows 3 – Caps (get 8 more Caps if you want them on the spoke ends) 1 – small can of ABS / PVC all purpose cement 4 - 5mm by 20mm machine screws 4 – 5mm nuts Filament support spoke assembly: Cut 4 lengths of PVC 1.5†long. Cut 4 lengths of PVC 6†long. Glue the short and long pieces together with 4 of the 45 degree bends to make 4 spokes. Then glue the 4 spokes into the axel hub angled back so the filament will be positioned over the axel hub bearing region. Cut 4 lengths of PVC 4†long and glue into the Spoke Clamps. Put the screws and nuts through the clamps. I found that by putting a spacer between the clamp surfaces I could tighten the screw and draw the nut down into the socket. Slide the Spoke Clamp assemblies on to the spokes. Glue on the 8 PVC Caps if you chose this option. The caps might just be pressed in place so they could be removed later if desired. Cut 1 length of PVC 5.5†long for the axel. Glue a cap on one end, put it through the axel hub (with the cap on the end by the spokes) and glue a 45 degree elbow on the other end. Note: don’t get glue between the axel hub and the PVC axel for obvious reasons. Base assembly: Cut 2 lengths of PVC 5†long Cut 2 lengths of PVC 10†long Glue a PVC Cap on one end of the 10†lengths and a 90 degree elbow on the other end. Glue the 5†pieces into the other end of the 90 degree elbow. Cut 2 lengths of PVC 4†long Glue these 4†lengths into a 45 degree elbow. Glue this piece into the right angle part of the Tee (not the straight through section). Align it so the bend goes off at a right angle to the straight through Tee section. Glue the two 5†pieces into the straight through part of the Tee. Align the parts so the “feet†are flat on the floor and the part with the 45 angle is vertical. Glue the 45 degree elbow in the axel / hub assembly to the base. Align the axel parallel to the feet. Rotate two spoke clamps to drop on the filament coil. Rotate them back to hold the coil in place. Print with no tangles!!!!!
With this file you will be able to print Filament Holder for 3D Printer with your 3D printer. Click on the button and save the file on your computer to work, edit or customize your design. You can also find more 3D designs for printers on Filament Holder for 3D Printer.