Filament Splicing Fixture
thingiverse
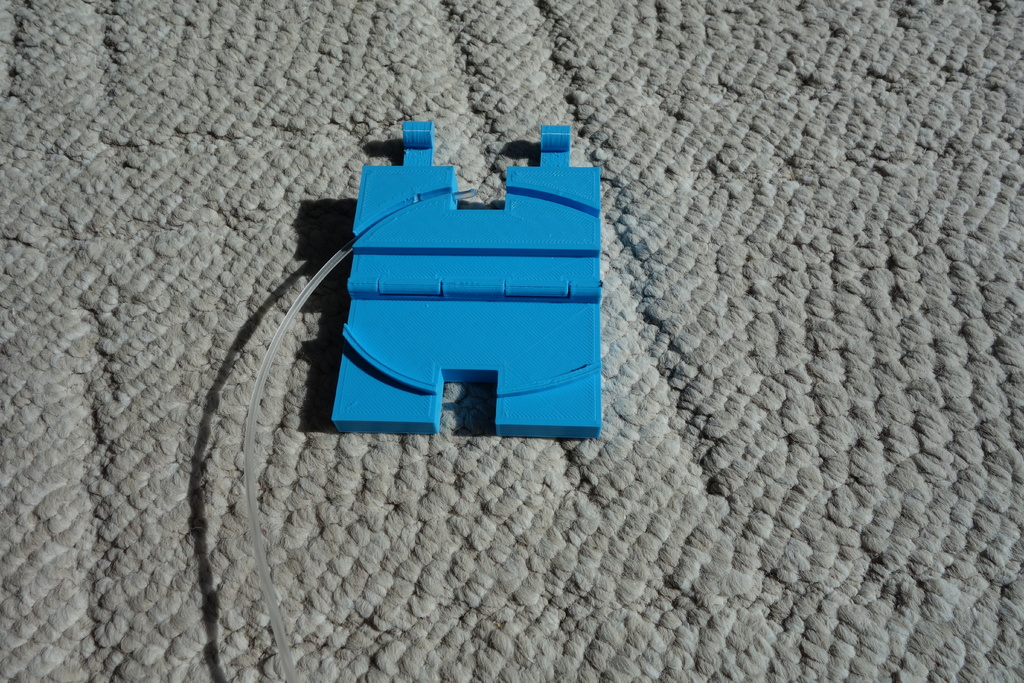
This is a fixture to hold the ends of filament together in alignment when splicing. It is currently designed for 2.85mm filament, but is parameterized, so it could easily be modified for other diameters. The channel that hold the filament is curved to match the curve of the filament as it comes off the reel. One side is curved at a smaller radius to match the curve of filament at the end of the reel, the other has a larger radius to match the start of a new reel. I built this when I started a print and did not have enough filament to finish the object. Rather than abort, I used a soldering iron to melt the ends of the filament together. Hand holding the filament lead to misaligned filament, and the joint breaking when I tried to trim the excess plastic off the joint. I eventually succeeded, but I built this so I could get this right on the first attempt. How to use: One side has a set screw that can be adjusted to keep the filament from sliding when the lid is clamped closed, the other allows the filament to slide in, so you can push the ends together. One would put the two ends of the filament into the box, close it and latch it, then heat both ends with a soldering iron while pushing the unclamped piece of filament against the clamped piece. Once they are well bonded, and cooled, one should trim the excess plastic from the joint before opening the box and removing the box from the filament. I had some dowel rod from an old broken printer that I used for the hinge pins. I designed the hinge holes with no clearance, and they ended up smaller than designed. I reamed out the holes with a number 52 drill for the holes I wanted ho hold the pins, this is a friction fit that allows the pins to be inserted, and holds them pretty well, I used a number 51 drill for the holes I wanted the pin to spin freely in. This worked pretty well. I designed the set screw hole for a M4 set screw. I reamed the hole after printing with a drill that was nearly the 3.25 mm drill the tap table suggests for aluminum or brass (I had a 3.2mm drill, but not a 3.25mm drill), and then tapped out the hole. This works fine, and there is enough friction that the set screw will not move on its own. Things I learned: Do not cut off the hinge pins after they are inserted, the cutoff wheel heats the pins and melts the plastic. Cut them to length before inserting. Do not attempt to drill out the hinge pin holes when the print first comes off the printer. It is still hot, and will shrink a bit when it cools. I had to re-drill the holes after the print had cooled because the pins would not fit.
With this file you will be able to print Filament Splicing Fixture with your 3D printer. Click on the button and save the file on your computer to work, edit or customize your design. You can also find more 3D designs for printers on Filament Splicing Fixture.