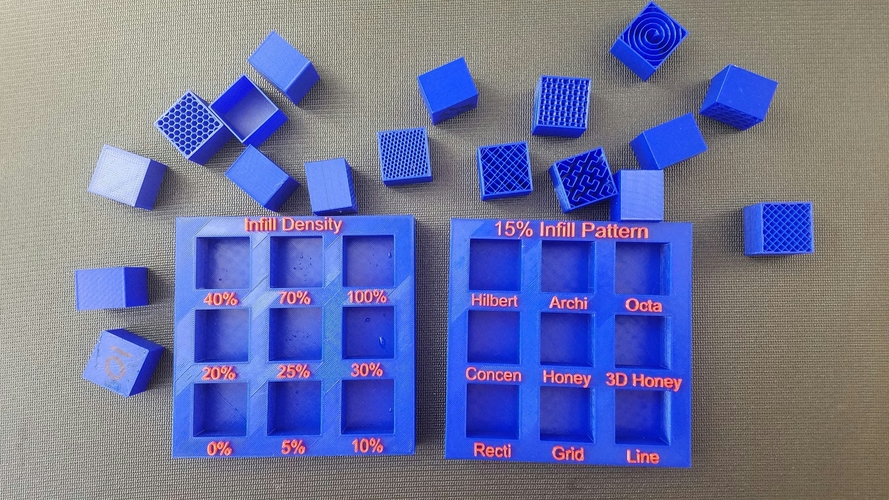
Display Tray for Infill Pattern and Infill Density
pinshape
I am a hands on learner so I wanted sample trays that I could physically hold and look at to decide which infill to use. I saw similar designs already out there but I wasn't completely satisfied with them so I designed my own. Cube The cube's designed height is 25mm tall but actual height is 20mm. To do this, first I chose the infill type and percent I wanted. I then input the gcode into ColorPrint (http://prusaprinters.org/colorprint-is-out) and chose to change color at 20.150mm. Finally I printed the cube and when it got the the color change part, and the cube was 20mm tall, I would just cancel the print and that would leave the infill exposed. I am not sure if this software works for everyone so another way to do this would just be cancel the print when it gets to 80% and the cubes should be roughly 20mm tall too. Trays The trays total heaight is 22mm tall (3mm of which is the lettering). I also used ColorPrint (http://prusaprinters.org/colorprint-is-out) to change the colors of the lettering. I did the color change at 19.150 so the entire lettering were a different color. This is an unnecessary step but I think it looks much better. I designed the lettering to be the same height as the cubes so everything is flush on top.
With this file you will be able to print Display Tray for Infill Pattern and Infill Density with your 3D printer. Click on the button and save the file on your computer to work, edit or customize your design. You can also find more 3D designs for printers on Display Tray for Infill Pattern and Infill Density.