Filastruder Vertical Mounting Bracket
thingiverse
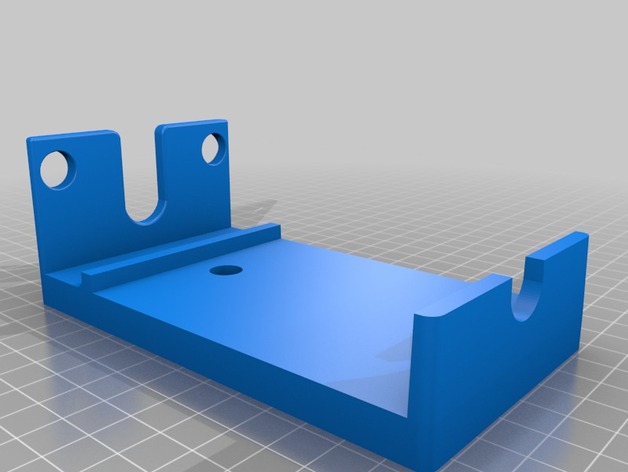
I needed to mount my Filastruder Vertically and didn't want to drill some holes in it and mount it to a board. 1) This bracket is mounted to the backboard by 2x 4mm screws. 2) The Filastruder is clipped in using using the rear motor mounts and and gravity to hold it in place. This allows for easy installation and removal without modifying the filastruder. Ive found since installing my filastruder in the vertical position that extrusions diameters are more consistent and less noodle fails due to filament brushing against something. Print Settings Printer: E3d Bigbox Dual Rafts: No Supports: No Resolution: 0.6mm Infill: 25% Notes: I used e3D 0.8 mm nozzle to allow quick printing, but anything will work. Post-Printing Cleanup A 10mm Drill may need to be run through the big holes just be careful as holes are close to the edge A 4mm may need to be run through the mounting holes. To Install Filastruder Step 1: Angle Rear of filastruder abd Locate Motor mounts into two holes of bracket With Filastruder at 45Deg locate rear motor mounts into bracket and make sure that are firmly located into the bracket. Step 2: Push down Front of filastruder push down front of filastruder to locate into bracket To Remove Filastruder Step1: Lift Front of filastruder up at an angle Step2: Lower Filastruder from motor mounts
With this file you will be able to print Filastruder Vertical Mounting Bracket with your 3D printer. Click on the button and save the file on your computer to work, edit or customize your design. You can also find more 3D designs for printers on Filastruder Vertical Mounting Bracket.