Film Development Tank 35mm 250ml
prusaprinters
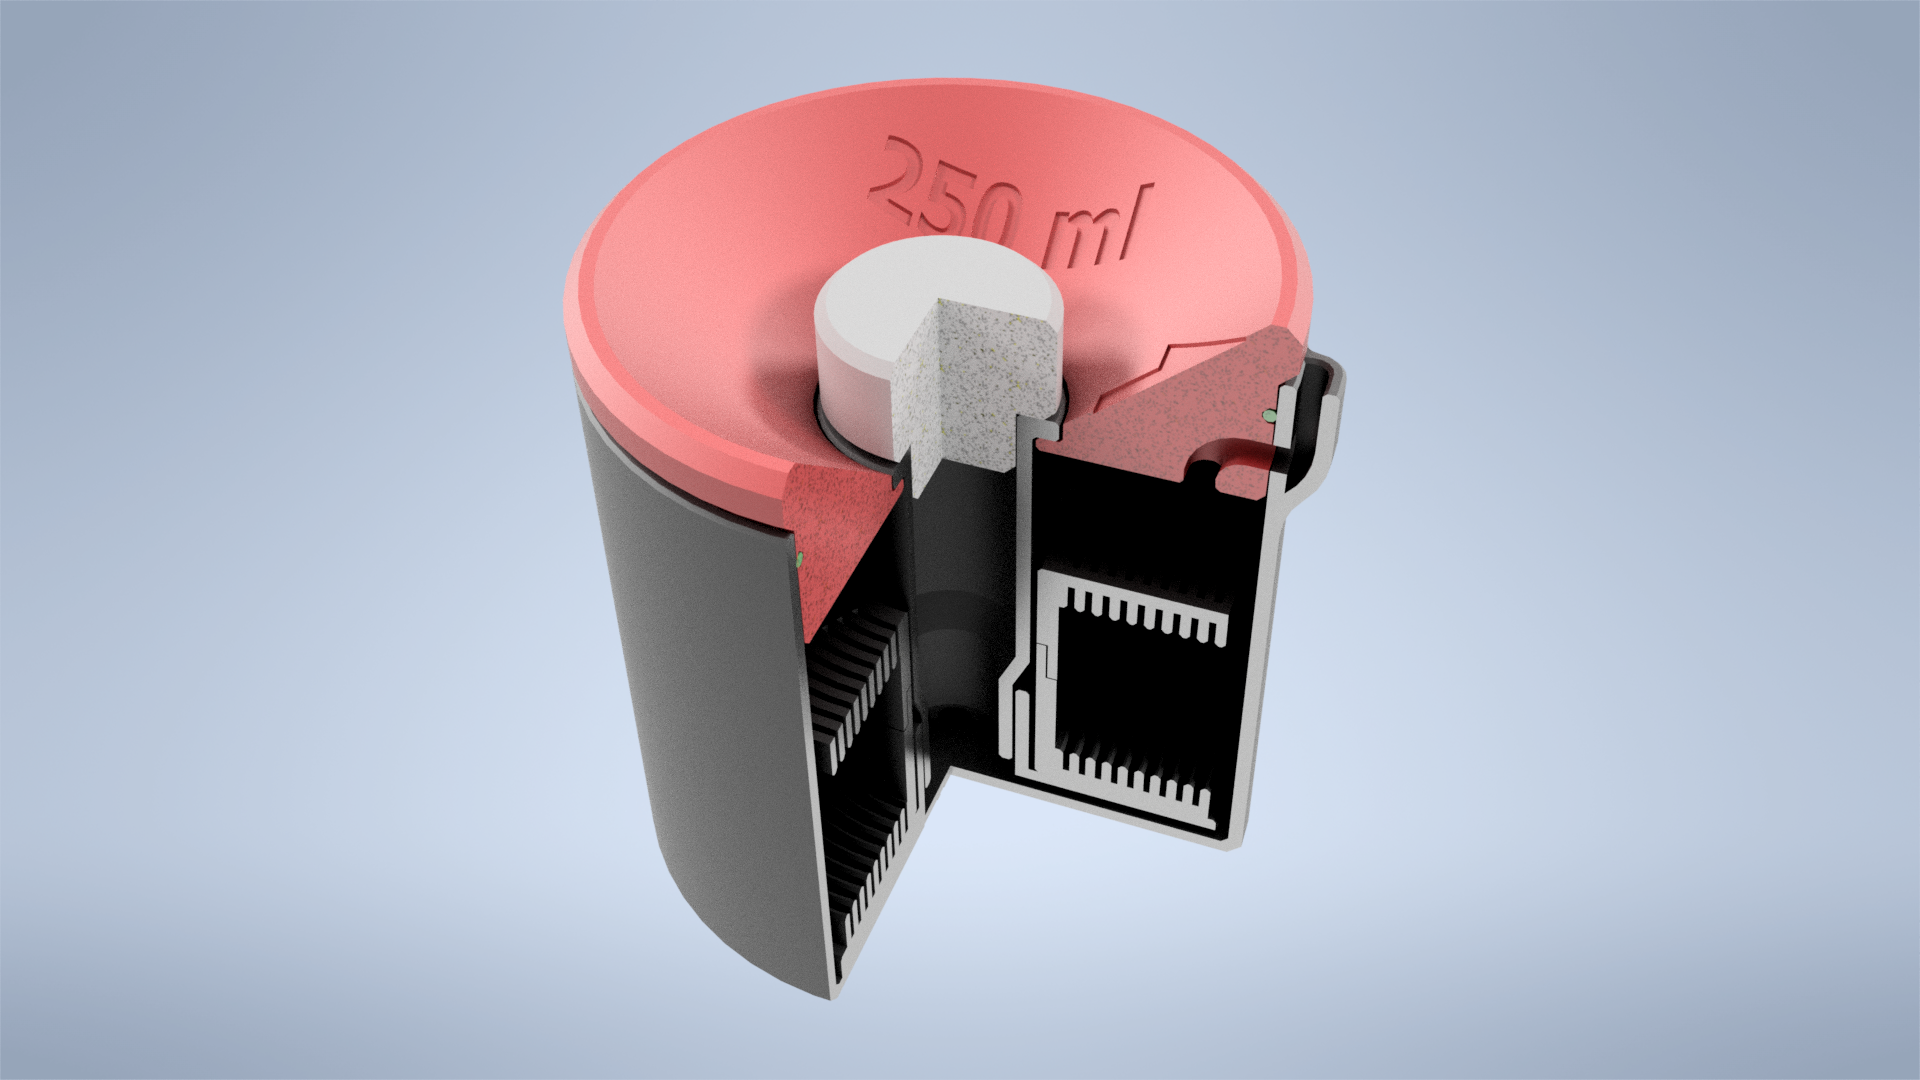
<p>After paying a ton of money on chemicals it seemed really stupid to spend another 30€ on a simple plastic container. So I designed this fully 3D printed development tank.</p><p>If you're cheap like me I guess you don't really need to develop more than one 35mm roll at a time and this design is made just for that.</p><p>It's small volume (250ml) allows you to avoid wasting those precious chemicals. With 250ml of developer you should be able to develop between 3 and 5 35mm 24 exposures rolls.</p><p>This is not a conventional Paterson tank so please read the instructions on how to fill and drain the tank.</p><p>I included the Inventor file so that you can edit it. You can use Fusion360 to work on it if you don't have Inventor.</p><p> </p><p>ENJOY!!!!</p><p> </p><p><strong>THE MODEL</strong></p><p>There are two options for the lid:</p><ol><li>with TPU seal</li><li>without TPU seal</li></ol><p>I would suggest to try the sealed version if you have a little bit of TPU laying around. You don't actually need to print it, you just need a small piece of filament.</p><p>The version without the seal works just fine but you may need to pay a little more attention wen agitating the tank.</p><p><strong>MATERIALS</strong></p><ol><li>3D printed components</li><li>a small piece of 1.75mm flexible filament (optional)</li><li>glue (CA, epoxy or similar)</li></ol><p><strong>INSTRUCTIONS</strong></p><ul><li><strong>Reel assembly</strong></li></ul><p>Take the two halves of the reel, put some glue along the mating surfaces and align the two halves so that the entrance of the spiral is aligned on both sides.</p><figure class="image image_resized" style="width:100%;"><img src="https://media.printables.com/media/prints/235685/rich_content/7555b55e-5b5c-4a1d-8275-b9ec1f52b690/20220630_144042.jpg#%7B%22uuid%22%3A%224e2534e4-aeb6-4f46-abfe-359c13789557%22%2C%22w%22%3A4032%2C%22h%22%3A3024%7D"></figure><figure class="image"><img src="https://media.printables.com/media/prints/235685/rich_content/8e9cdb92-0fcb-4888-b1a8-128b8fce37cc/20220630_144257.jpg#%7B%22uuid%22%3A%22bdb8d75c-f02d-4b5f-bed6-049ee2bafeaa%22%2C%22w%22%3A4032%2C%22h%22%3A3024%7D"></figure><figure class="image"><img src="https://media.printables.com/media/prints/235685/rich_content/67e955e8-1045-4325-9200-4d415882c473/20220630_144541.jpg#%7B%22uuid%22%3A%22b598ea10-e23c-43df-9664-2d6a527e22f4%22%2C%22w%22%3A4618%2C%22h%22%3A3464%7D"></figure><p> </p><p> </p><ul><li><strong>Seal glueing (only needed for sealed lid)</strong></li></ul><p>Remove the built in supports in the lid. Cut a small piece of flexible filament to length. Put some glue in the oring groove in the lid. Place the flexy filament in place and wipe the excess glue.</p><p>IMPORTANT NOTE: if you find the lid to be too tight i suggest to use the edge of a utility blade to smooth the inner surface of the tank so that the lid can slide easier. I also suggest you to stretch the flexy filament while glueing it in place so that it slightly reduces in diameter.</p><figure class="image"><img src="https://media.printables.com/media/prints/235685/rich_content/912d9908-17b9-41c0-8ced-4739efff25e3/20220701_110034.jpg#%7B%22uuid%22%3A%22f5e8213e-8fd3-40d2-8a95-00d017db1c67%22%2C%22w%22%3A4032%2C%22h%22%3A3024%7D"></figure><figure class="image"><img src="https://media.printables.com/media/prints/235685/rich_content/6b3e0950-5a2f-4cff-8cb9-ee36819b4a7d/20220701_111408.jpg#%7B%22uuid%22%3A%22ba564753-25d4-4f8e-9a9b-024162e798df%22%2C%22w%22%3A4032%2C%22h%22%3A3024%7D"></figure><figure class="image"><img src="https://media.printables.com/media/prints/235685/rich_content/6821513d-4d44-47fc-b04e-30c3c2c447ac/20220701_111844.jpg#%7B%22uuid%22%3A%22f227d7fd-cebb-4e53-8f1c-0fef91b90711%22%2C%22w%22%3A4032%2C%22h%22%3A3024%7D"></figure><p> </p><p> </p><ul><li><strong>Lid assembly</strong></li></ul><p>Take the two pieces of the lid (the actual lid and the tube). Put some glue on the mating surfaces and glue together. Pretty easy…</p><figure class="image"><img src="https://media.printables.com/media/prints/235685/rich_content/eaee8683-9d02-4736-991c-f0362f3833fc/20220701_125511.jpg#%7B%22uuid%22%3A%2209f57ca3-1a41-42b9-8a30-88039f8b5d44%22%2C%22w%22%3A4032%2C%22h%22%3A3024%7D"></figure><figure class="image"><img src="https://media.printables.com/media/prints/235685/rich_content/bb2cb9e5-1a24-48fd-a1bd-cc390651ea5e/20220701_125553.jpg#%7B%22uuid%22%3A%2274493f5c-5b36-48c4-ad74-d3ea00746b86%22%2C%22w%22%3A4032%2C%22h%22%3A3024%7D"></figure><figure class="image"><img src="https://media.printables.com/media/prints/235685/rich_content/833c9382-18b9-46ca-a92b-f60945df2531/20220701_125712.jpg#%7B%22uuid%22%3A%22fe98d3d2-bb19-407a-942d-87bc080dfade%22%2C%22w%22%3A3024%2C%22h%22%3A4032%7D"></figure><p> </p><p> </p><ul><li><strong>You're done with the assembly!</strong></li></ul><figure class="image"><img src="https://media.printables.com/media/prints/235685/rich_content/10f42019-0493-4e4c-a286-1cceebbf616e/20220701_125852.jpg#%7B%22uuid%22%3A%22cbe7342a-8a38-4a4c-abcf-54c9125cb177%22%2C%22w%22%3A4032%2C%22h%22%3A3024%7D"></figure><p> </p><p> </p><p><strong>DEVELOPMENT INSTRUCTIONS</strong></p><p>Now, the actual development process will vary depending on the film you're shooting and the specific brand of chemicals you have. I'll just explain how to properly fill and drain the tank and how to agitate.</p><ul><li><strong>Filling</strong></li></ul><p>Remove the cap from the lid (DO NOT REMOVE THE LID ONCE THE FILM IS INSIDE), rotate the lid so that the arrow is pointing the drainage port on the side of the tank. </p><p>Fill the tank with the chemical you need. Fill it untill the fluid is around 10mm (½ in) below the top, so that you can put the cap back on the lid. This is roughly 250ml of fluid.</p><p>Rotate the lid so that the arrow is no longer pointing the drain. Put the cap back on.</p><p>You now have a water tight container (pretty much).</p><ul><li><strong>Agitating</strong></li></ul><p>Make sure the cap is on the lid and the arrow on the lid is NOT pointing the drainage port on the tank. Swirl the tank as you would a glass of red wine, well maybe more vigorously than that.</p><p>I encourage you to do some test runs with water to check how strongly you can agitate without the tank leaking. If you use the version with the seal you sould be able to really shake it without any issue.</p><ul><li><strong>Draining</strong></li></ul><p>Rotate the lid so that the arrow is pointing to the drain port. Take the cap off. Drain.</p><p> </p><p> </p><p><strong>If you like this design remember to leave a like! Thanks!</strong></p>
With this file you will be able to print Film Development Tank 35mm 250ml with your 3D printer. Click on the button and save the file on your computer to work, edit or customize your design. You can also find more 3D designs for printers on Film Development Tank 35mm 250ml.