Final Fantasy XIV: Bravura Axe
pinshape
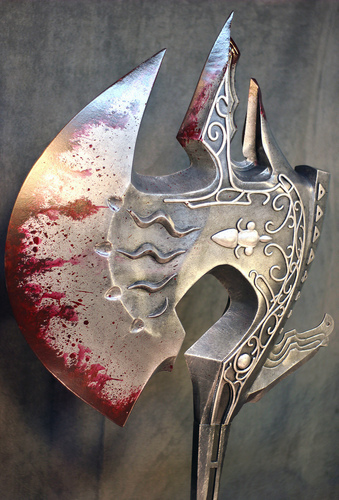
Legend tells of heroes known as the Zodiac Braves who saved the world from certain destruction. Bearing arms that shone with the light of a thousand stars, they rose to banish the gathering darkness. Inspired by this legend, a Near Eastern alchemist named Jalzahn has traveled to Eorzea. His sole objective: to create mighty weapons that would rival even those wielded by the heroes of old. The Head Because this massive weapon and most common printers are limited to 8"x 8" x 8", the entirety of this prop has been processed to fit within this build area. While ABS is a very strong material, at this scale I would not trust it to hold up to the abuses of a convention on its own. To give a little more strength to the axe .25" sockets were run through the major sections of the head in order to hold delrin, acrylic, or wood pins. These pins assist in part alignment as well as greatly increase the prop's ability to withstand shearing force across the sections. The axe head surface can be processed by using a combination of acetone chemical smoothing and various grits of sandpaper. Depending on how nicely your prints come out I'd recommend starting at 150 grit and working your way up to 320 before smoothing and unifying the surface with a rag or paper towel wet with acetone. Make sure you wear proper protective equipment (gloves, goggles, shop apron) when working with chemicals - 3D printing is fun but not at the cost of your health! Surface details on the axe are printed separately and then heat formed to fit the head contours using a standard heat gun (Surface details_1.jpg). This allows for an easier print for both parts and a much quicker clean-up process. These features can be affixed to the surface of the head using super glue or by using an acetone slurry if you printed in ABS. After post-processing to smooth the surface of your print, you can paint your parts using standard rattle-can enamels and heavy-body acrylics. The flourishes and details were hand painted using liquid leaf to make them stand out a little more against the background. Additional Hardware Needed -.25" dowel pins - delrin works very well. -A ~6" section of 1/2" threaded rod will need to be epoxied into the base (Axe_head_rough_assembly.jpg) in order to join the head to the handle. Handle Now since this prop is over five feet long and will clock in at several pounds (depending on infill settings), the connector that allows for the head to be removed will need to be robust. Given that there is a natural break in the features right at the base of the head of the axe, I chose to split the prop here and at the pommel so that it would break down into three discreet pieces. In order to reattach the head to the handle use 1/2" coupler nuts and epoxy weld them into a 1" square aluminum tube extrusion. Additional Hardware Needed Square tube http://www.homedepot.com/p/Eve... Coupler Nut http://www.homedepot.com/p/Eve... 1/2" Threaded Rod http://www.homedepot.com/p/Eve... In order to keep the epoxy from locking the threaded rod into the coupler nuts, coat the threads with a liberal dose of WD-40 to ensure everything turns smoothly. Next, add the handle detailing bits ("Handle_face 1,2,3.etc). The facing surfaces are .125" in height so if you have access to a laser cutter, these shapes can be simply zapped out of a standard sized sheet of acrylic to save some time. The same processing methods are applied to these parts - sand, acetone smooth/weld, ... , rinse and repeat. The Pommel The pommel section was designed to be printed in three pieces in order to reduce the amount of undercuts and support material required during the print. Post-process and assembly are similar to the handle and head. As for the attachment between the pommel and handle, I found that the handle sockets into this piece snugly enough to not require any adhesive. Well it's a beast of a project but with a little elbow grease and a lot of patience you can wield one of the legendary weapons from Final Fantasy XIV. Happy Printing!
With this file you will be able to print Final Fantasy XIV: Bravura Axe with your 3D printer. Click on the button and save the file on your computer to work, edit or customize your design. You can also find more 3D designs for printers on Final Fantasy XIV: Bravura Axe.