First Layer Calibration Creality Ender 3 / Pro
prusaprinters
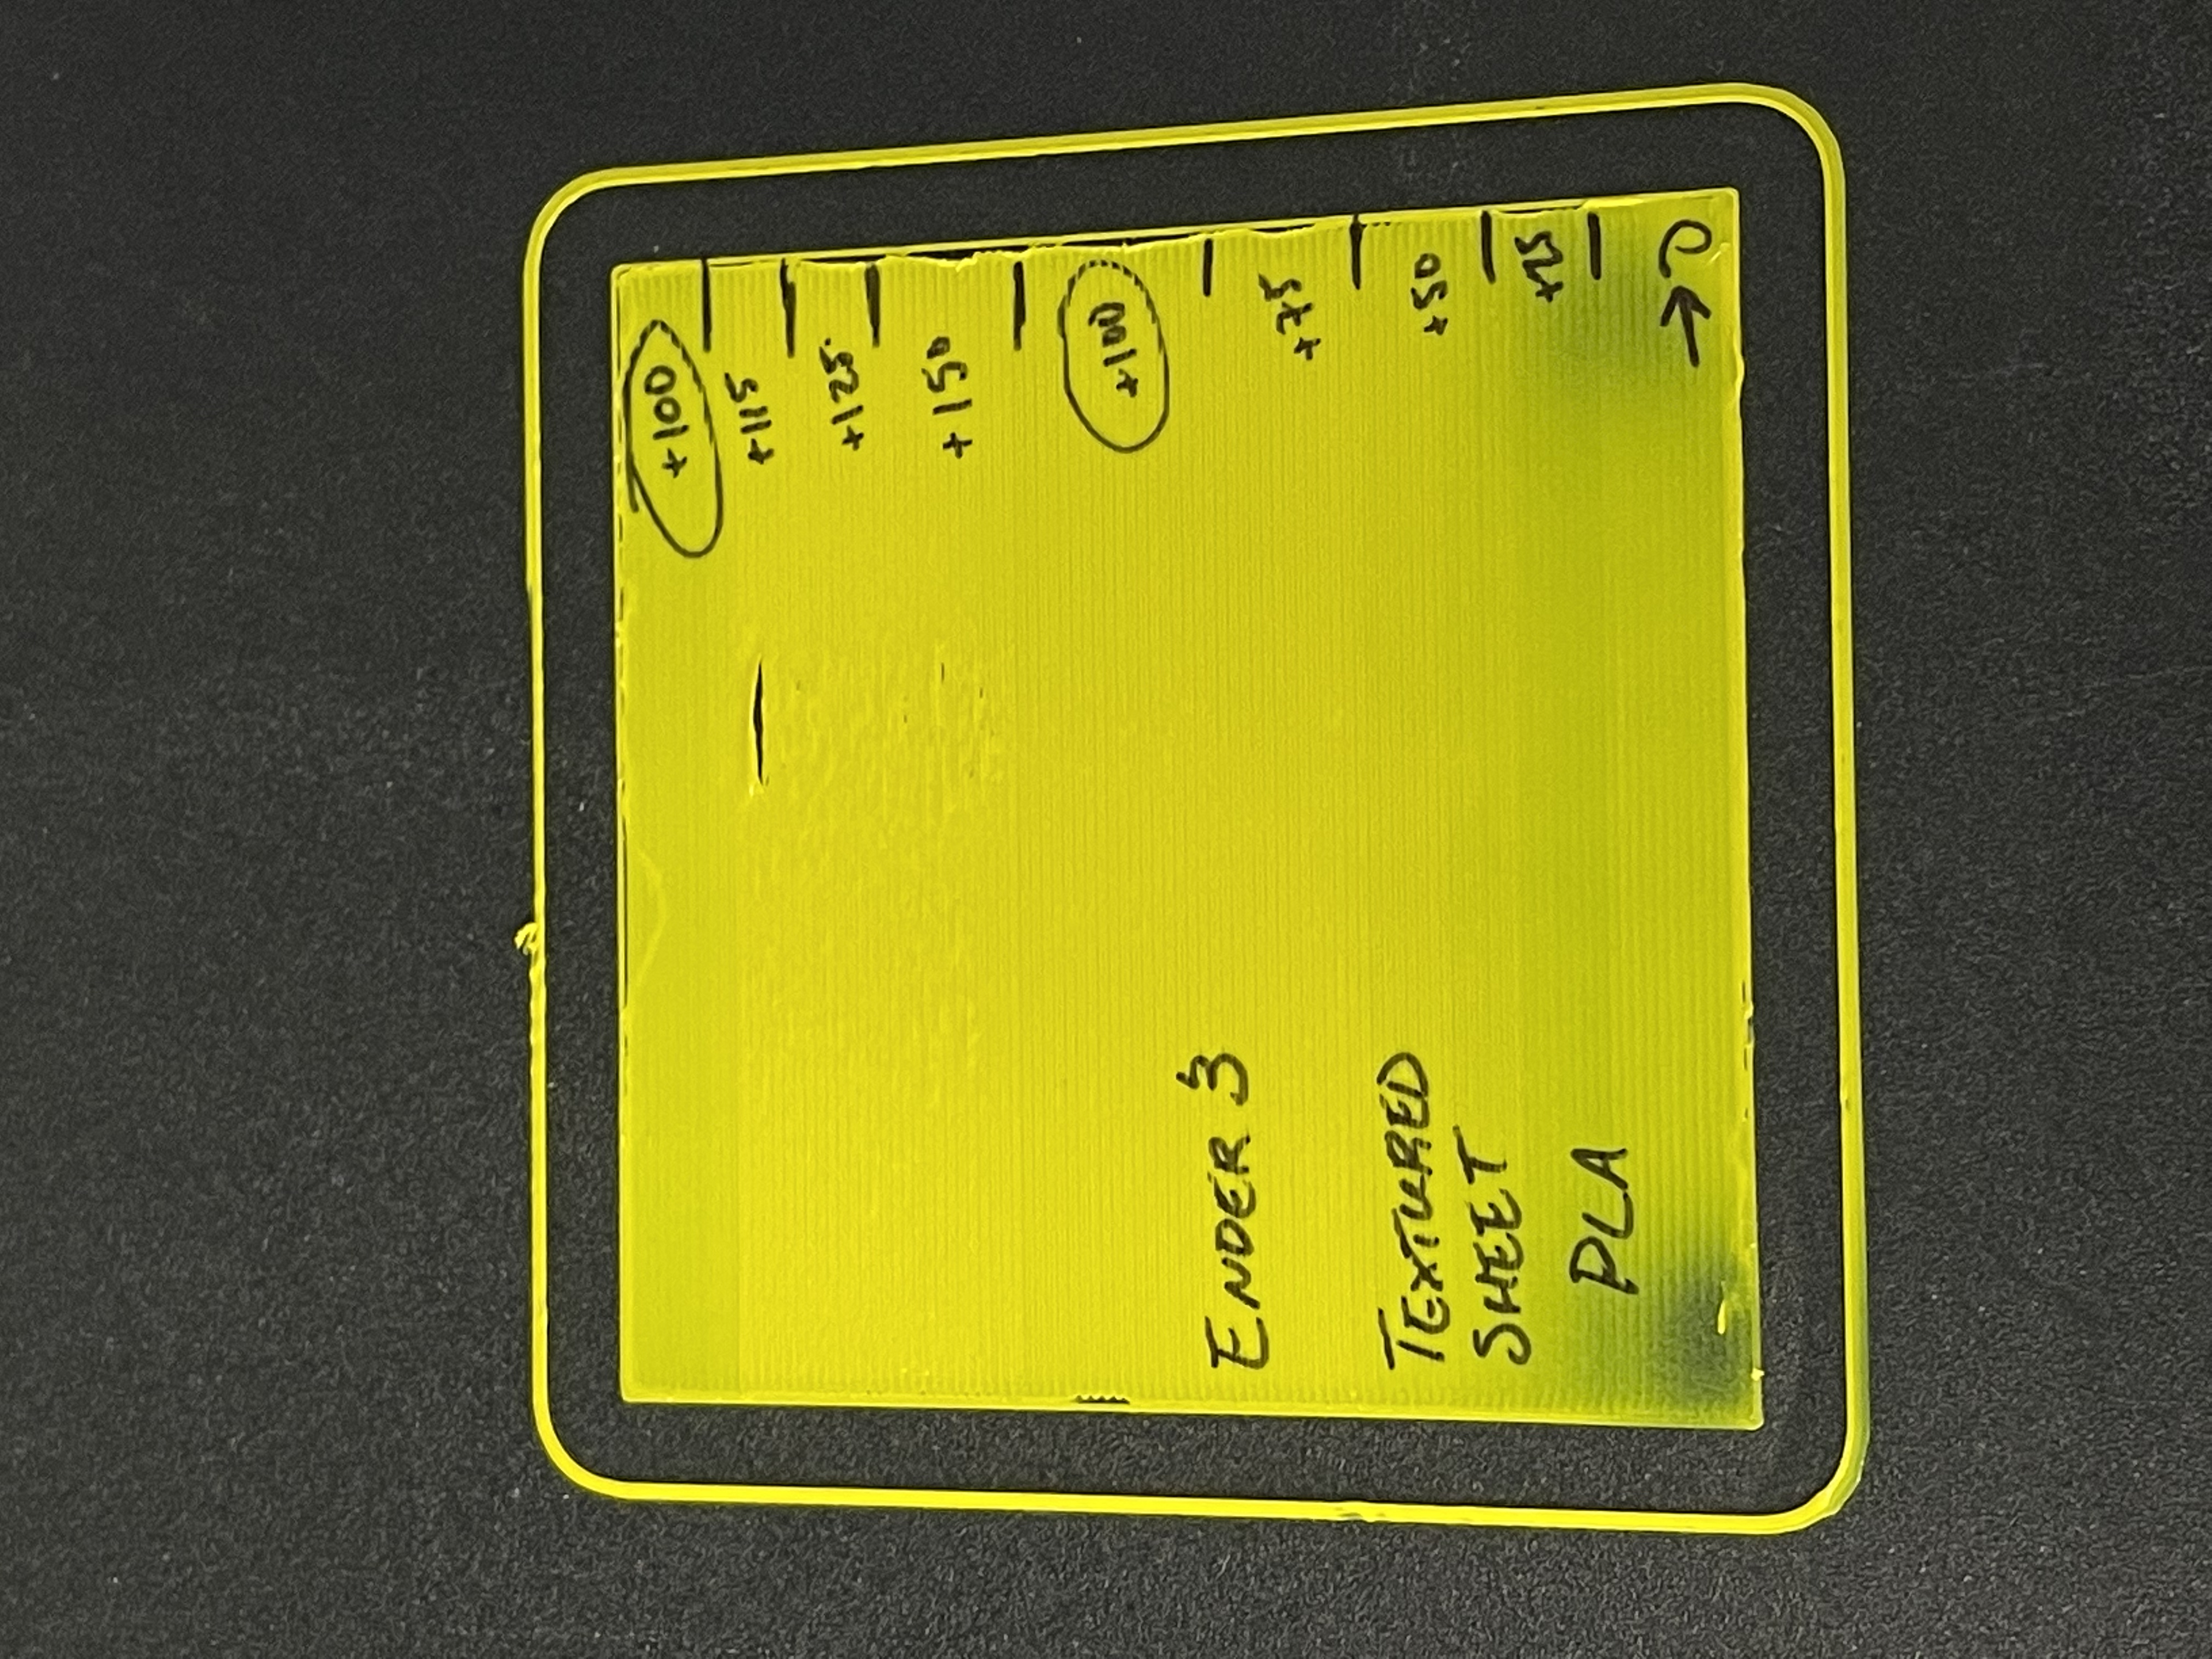
<p>Thank you to GKMAKEIT for the original. I found this so helpful at getting the perfect first layer setup that I found myself using for all different types of materials - I have now remixed it for use on my Ender 3.</p><p>In Summary, you adjust your babystep Z during the print until you get a good looking first layer.</p><p>This version is tested with an Ender 3 and Ender 3 pro, without an auto bed leveler.</p><p>Step by step guide:</p><ol><li>Level your bed with some decent accuracy</li><li><strong>Clean your build surface thoroughly</strong></li><li>Run your Gcode file and be ready to babystep Z ( Menu → Tune → BabystepZ )</li><li>Raise the babystep Z significantly, so that you aren't gouging the nozzle into the build surface</li><li>As the printer is running the purge line and the skirt, adjust the Z so that your print is sticking decently onto the surface. If any extruded material comes lose, remove it before the perimeters of the print start.</li><li>Once the inner lines start, Give it about 10 passes on each Z-offset setting, then adjust down or up accordingly. I typically use 0.050mm or 0.025mm adjustments</li><li>I Suggest writing the babystep Z adjustments you make for each section on the side with a sharpie so you can refer to your previous adjustments during the print</li><li><strong> Once the print is over, navigate to the configuration menu and SAVE YOUR SETTINGS - Otherwise the babystep Z that you did will NOT be saved.</strong></li></ol><p> </p>
With this file you will be able to print First Layer Calibration Creality Ender 3 / Pro with your 3D printer. Click on the button and save the file on your computer to work, edit or customize your design. You can also find more 3D designs for printers on First Layer Calibration Creality Ender 3 / Pro.