Flair Vent 8x14 Trim
thingiverse
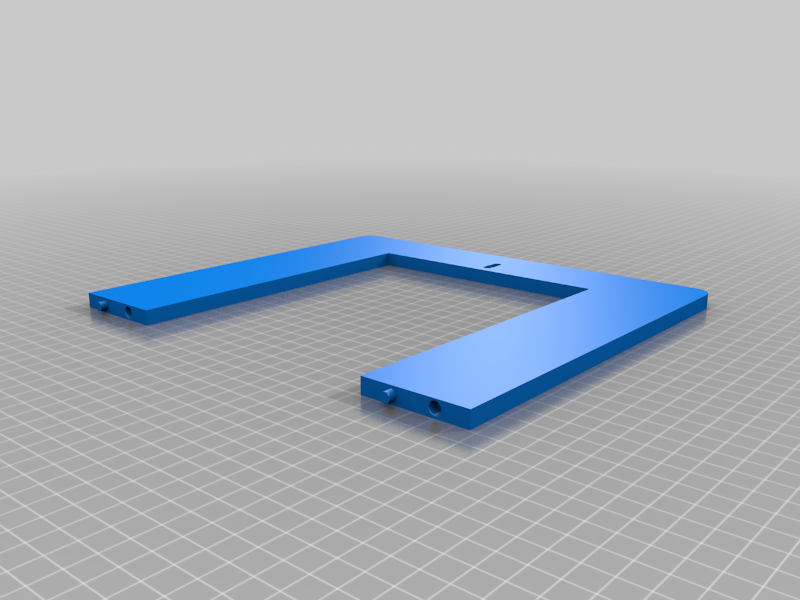
Hi guys, the company Flair does NOT offer any vents in the size of 8x14. They do offer 6x14 but not 8x14. Due to this, I took an existing trim (credits to https://www.thingiverse.com/thing:5278498) and modified the heck out of it. Some VERY important items you have to be aware of and consider before you use this 3D printed trim, which doesn't apply to the original thing ID. Your house has a certain BTU and CFM based on your house/room sizes and your HVAC system has been sized for that square footage. By reducing your vent from 8x14 to now 6x14, you are increasing the pressure in your home. I am not an HVAC expert, nor can I give you advice on this. I suggest you consult with your HVAC expert on the impact of using such a trim within your home. I do not take any responsibility if your HVAC system shuts down or you hear a whistling sound throughout your house. Use this at your own risk!!! With that out of the way... This trim reduces your 8x14 to 6x14 covering the HVAC shoe. Another very important aspect is to use the proper filament for this print. You can NOT use PLA and even if people tell you, that this should be ok, this does not apply here. The reason is you are exposing 1 inch on each side of the vent hole to the direct heat coming from the HVAC. I tried it and it simply melted the PLA, which I printed at 230 degrees Celsius. First it bends and then it starts melting, so do NOT use PLA! You can use Carbon Fiber (only comes in black), PC or PC-FR. PETG might work, but I didn't bother testing that. The reason is you can play it safe by using PC-FR, which stands for Polycarbonate Flame Retardant. I used the Polymaker brand, which prints at 250-270 degrees and is ideal for such a use case getting exposed to heat. Printing with PC-FR has certain prerequisites like heated chamber, bed at 100 degrees, fan off, certain nozzle types, etc. However, the results are worth it having peace of mind and not worrying about melting 3D prints on your vents. If you have a cheap 3D printer, which e.g. can only do PLA and no heating chamber and no heated bed, I would strongly suggest to find a friend or pay somebody to print this for you. This trim installs between your wall and the black frame of the Flair vent. It does NOT go between the black frame and the grill from Flair! It raises the vent by 6mm of your wall and it allows you to still see the LED indicator light of the Flair vent and it installs in your existing vent screw holes. I am attaching the STL file for your print, I am also attaching the 3mf file, which is specifically made for the Bambulab Carbon X1 printer and I am also attaching the Fusion 360 file in case you don't like the design and you want to make modifications to the model. I am also including a screenshot of the settings for the Bambulab X1 printer especially around the BRIM setting, because the STL or 3mf will not allow you to print this on the Bambulab X1 Carbon printer for being too large with the default BRIM setting. You do need "support" and "brim" enabled and the brim is crucial for printing with PC-FR. Your print will FAIL, if you print without brim as PC-FR will start bending and warping during your print. I also recommend using Magigoo adhesive, which was designed specifically to print PC and PC-FR. It does make a difference. I hope this background and advice helps other people to deploy Flair vents in their home who were not able to use those vents before due to the size issue. Good luck and enjoy!
With this file you will be able to print Flair Vent 8x14 Trim with your 3D printer. Click on the button and save the file on your computer to work, edit or customize your design. You can also find more 3D designs for printers on Flair Vent 8x14 Trim.