Flash Forge Finder 3 Enclosure
thingiverse
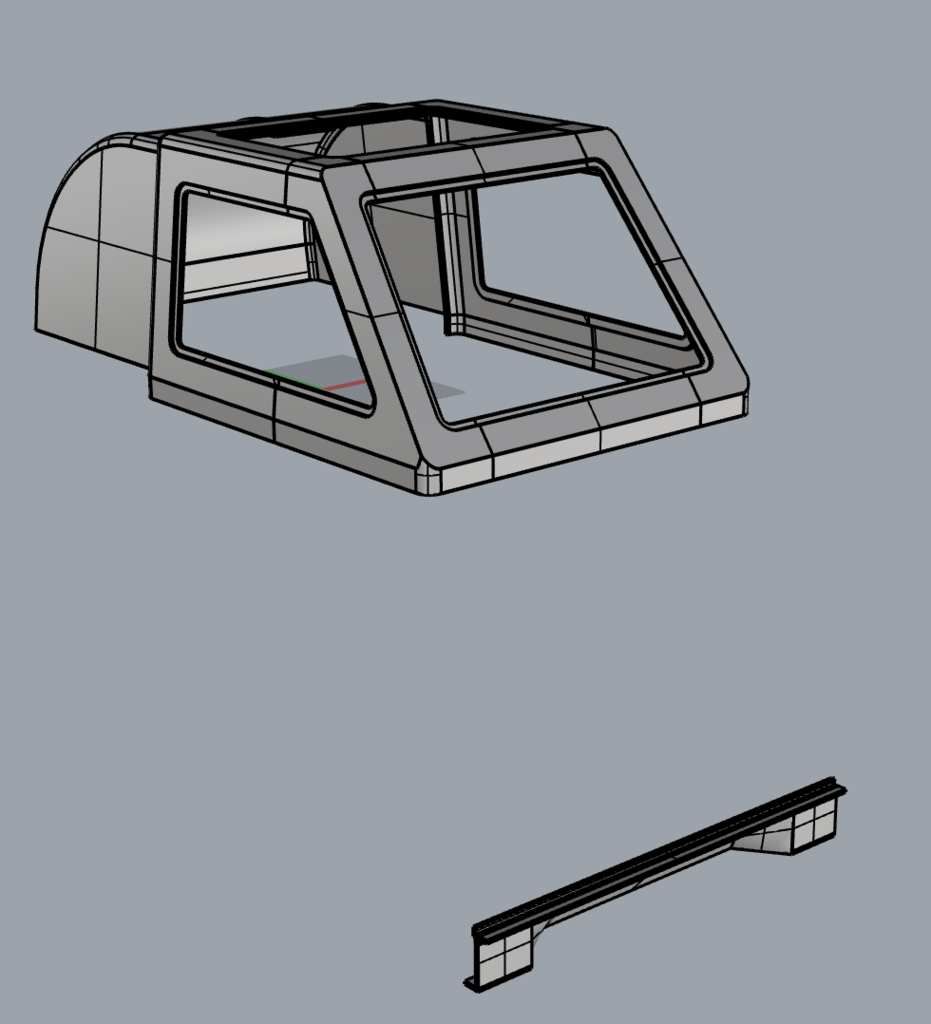
Created these parts to attach to my finder 3 and am posting due to interest on the Flashforge face book group I printed them with PLA pro but would recomend using someone with a little more heat resistance. It Has not sagged or caused an issue as yet but the hood does really capture the heat. if I was to do it again I would redesign so all parts to join with a lap joint . in this instance they're just but joints. I super glued the parts in place using the joining straps and once the frame was assembled I went around the seams with a 3d print pen, welding the joins shut . this works but does require some skill. anyway I've designed the top frame to be assembled with 2mm plexiglass windows .which had to be cut to size and bonded in . I did intend to extend the back over hang down to cover the filament roll but the chamber gets hot enough to print large ABS and ASA models with out. the front sill, coupled with long/ short stop and top grove, I mounted to the machine with double sided 3m tape and it seems to hold fine. I believe the tape is 5mm wide and when I purchased it , it was for bonding Mac laptop screens in place so its quite good for the job. then the door and the enclosure sides become quite easy , again cut from 2 plexiglass glass and the stuck on the machine with double sided tape . the finder 3 actually has perfect landing ledges for the side panels so again ....easy. sorry this is a bit unfinished, I got as far as I need to to make my machine do what I needed it to do. I would encourage a remix and if you do let me know I might even be tempted to replace my V1 with your V2.
With this file you will be able to print Flash Forge Finder 3 Enclosure with your 3D printer. Click on the button and save the file on your computer to work, edit or customize your design. You can also find more 3D designs for printers on Flash Forge Finder 3 Enclosure.