Flashforge Adventurer-3 Indicator Adaptor
thingiverse
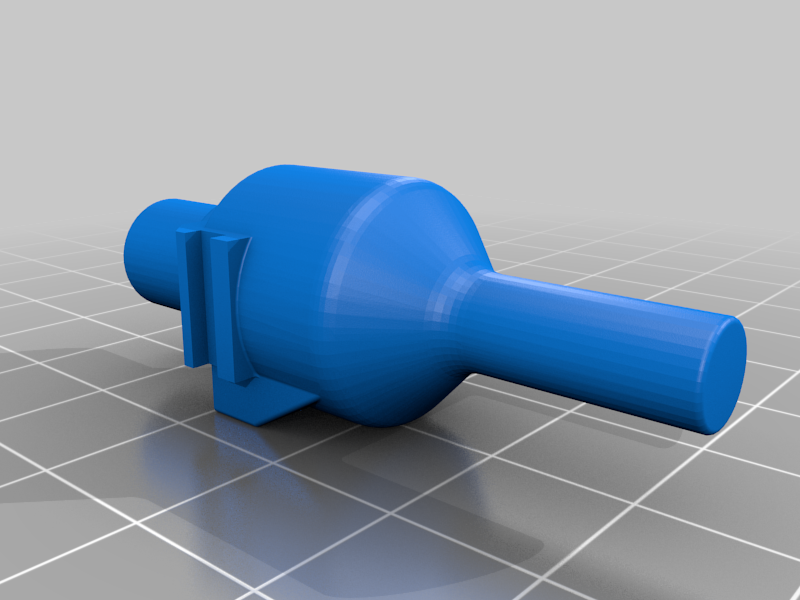
I've been struggling with printing larger objects on my Flashforge Adventurer 3, experiencing uneven adherence in certain areas. To resolve this issue, I designed an adapter that fits seamlessly into the print head, mirroring the hot end's design. By removing the filament and hot end using the clips at the front of the print head, you can easily swap it out for this printed adapter. The adapter features a .250 diameter post, which is standard for most indicators, but I've also included the SolidWorks part file in case you need a different size. Upon inspecting my print bed, I discovered a pronounced crown in the center and uneven drops of .254mm (.010in) at the back left and .20mm (.008in) at the front right. To achieve accurate Z-axis positioning, I found that setting the head centered on the plate resulted in it being too high in the corners, while adjusting it closer led to the bottom fill bulging up in the middle sections. With this adapter in place, I'm now better equipped to diagnose and potentially compensate for these imperfections. Although I've already employed tape on the edges to flatten the Y-axis, addressing the crown remains a challenge I'll need to tackle next. I hope this design proves useful to fellow 3D printing enthusiasts.
With this file you will be able to print Flashforge Adventurer-3 Indicator Adaptor with your 3D printer. Click on the button and save the file on your computer to work, edit or customize your design. You can also find more 3D designs for printers on Flashforge Adventurer-3 Indicator Adaptor.