Flex-Tester for temperature calibration
thingiverse
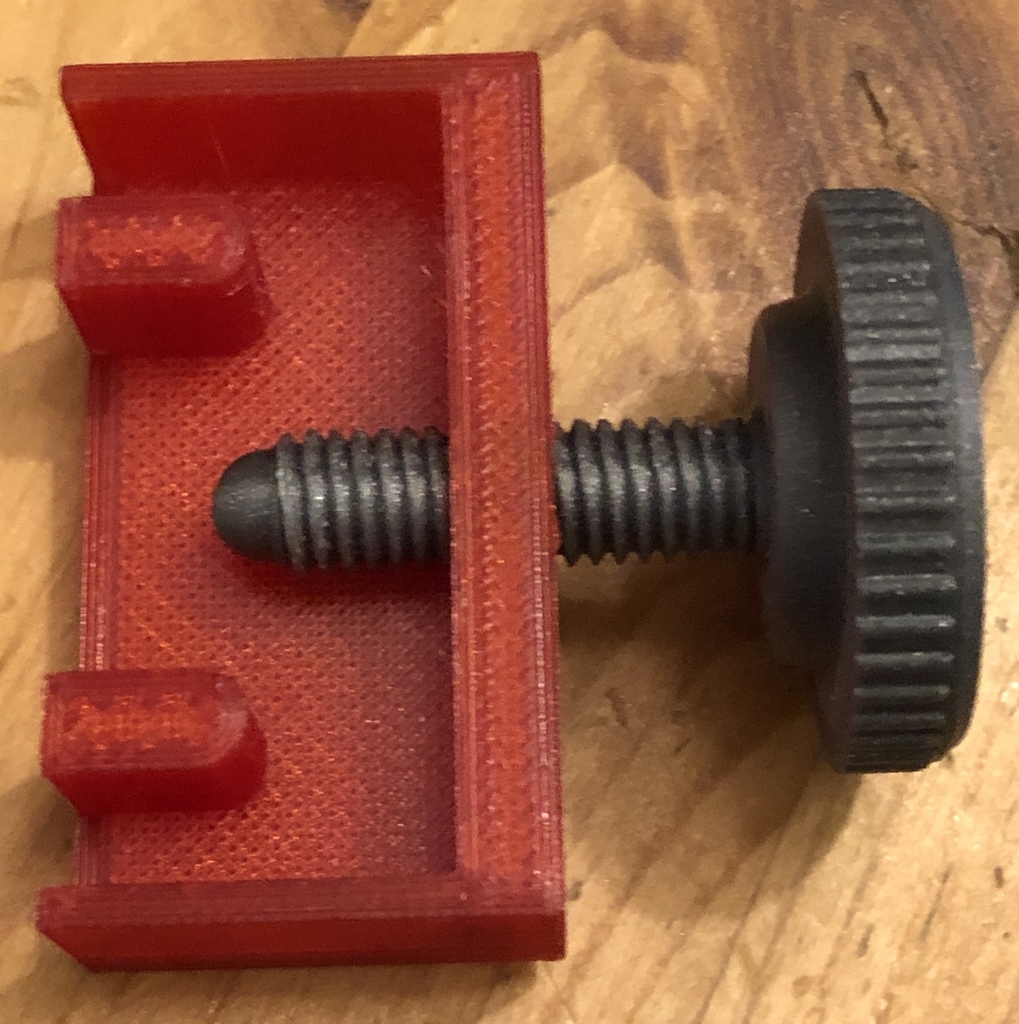
This is V2 of a compact test rig I designed specifically to evaluate filaments for their usability in printing enclosures. The more resistant a print is to breaking along its layers, the closer it is to achieving optimal temperature and cooling settings for the filament. So this is essentially a temperature calibration test. Print the bar vertically with 100% infill, not just perimeters, but also include at least one line of diagonal infill for increased rigidity. Use a brim consisting of about 10 lines. The entire print should take around 10 minutes to complete. Next, insert it into the rig as shown in the photo and secure it slightly with the screw. Measure the distance from the screw head to the frame using a caliper; this should be approximately 25 mm. Slowly tighten the screw until the bar breaks, then measure again. The result is simply the difference between these measurements. The higher the number, the stronger the layer adhesion. Optimize temperature and cooling settings by varying them as needed. My best results so far with non-flexible filaments have been achieved with PETG at a nozzle temperature of 240°C. In this case, the bar remained intact, but showed signs of cracking instead of breaking completely - see second photo (older version of this rig). Conversely, if temperatures and cooling settings are not set correctly, the print can break as early as 3 mm in. PS: Special thanks to Uwe for providing a screw and nut that fit much better than those on the first version.
With this file you will be able to print Flex-Tester for temperature calibration with your 3D printer. Click on the button and save the file on your computer to work, edit or customize your design. You can also find more 3D designs for printers on Flex-Tester for temperature calibration.