Flight Simulator Throttle Quadrant
thingiverse
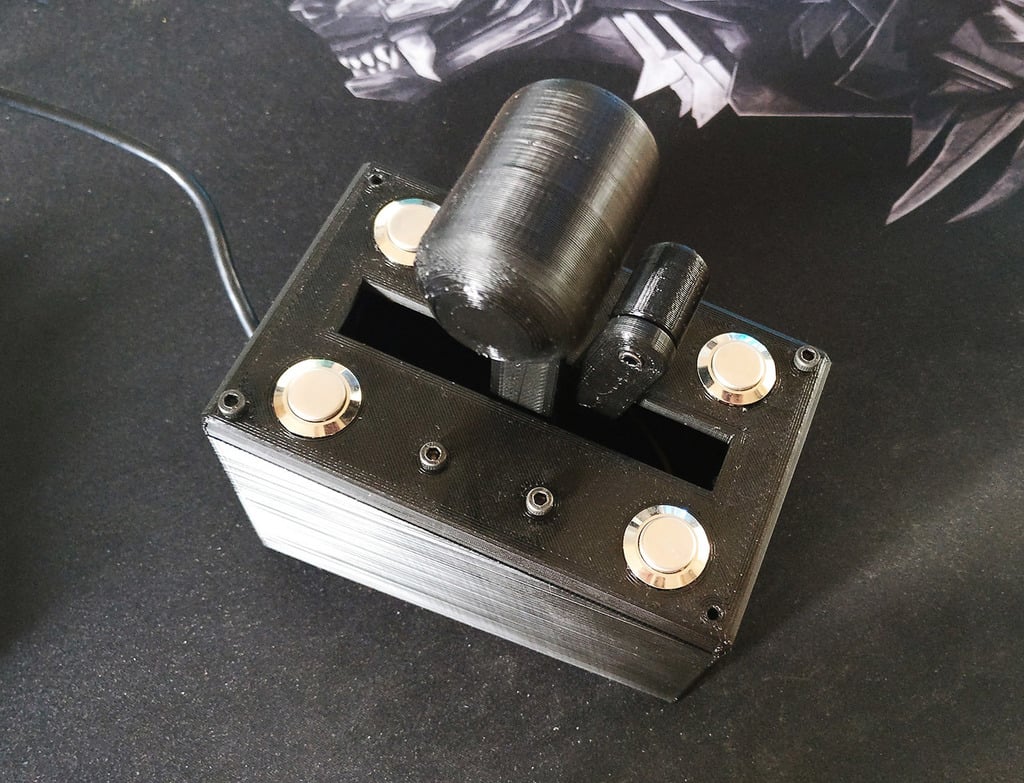
# Intro Hi guys. First, thanks to [FlightSimMaker](https://www.thingiverse.com/flightsimmaker/designs) for the original concept. I've done this remix to fit my style and to upgrade it if needed. I wanted to add some buttons as we have the space for that ! ----------------------- # Part list **What you will need:** * 2 x **Potentiometer** (i used 10K, it should work between 1K to 30K. [eBay](https://www.ebay.fr/itm/2Pcs-Panel-Pot-B10K-Linear-Taper-Rotary-Potentiometer-10K-Ohm-New-Ic-fa/132615239261)) * 4 x **Push Button** ([eBay](https://www.ebay.fr/itm/5Pcs-16mm-3A-250V-Metal-Waterproof-Push-Button-Momentary-Horn-Switch-Self-Reset/192593620647)) * **Wires** (i advise you to use some silicon wires as they are more easy to use and less fragile. [eBay](https://www.ebay.fr/sch/i.html?_from=R40&_trksid=p2334524.m570.l1313&_nkw=silicon+wire+black+22awg&_sacat=0&LH_TitleDesc=0&LH_PrefLoc=2&_sop=15&_osacat=0&_odkw=silicon+wire+black+22awg+5m&LH_BIN=1)) * **Printed Parts (see below)** * **M3 screws (10 x M3 10mm, 1 or 2 x M3 12-16mm)** ----------------------- # Printed Parts **You have to print those parts:** * **Base.stl x 1** * **Bolt.stl x 1** * **Gear.stl x 2** * **Leg.stl x 2 (supports needed)** * **Nut.stl x 2** * **Plate.stl x 1** * **Spacer.stl x 1** * **Wire Cap.stl x 1** Then you have **2 options**. You can choose the version with 2 different levers (1 tall 1 smaller), or the version with the same levers (2 tall levers). **Option 1, print those parts:** * **Lever 1.stl x 1 (supports needed)** * **Lever 1 Knob.stl x 1** * **Lever 2.stl x 1 (supports needed)** * **Lever 2 Knob.stl x 1** **Option 2, print those parts:** * **Lever BIS.stl x 2 (supports needed)** * **Lever BIS Knob.stl x 2** ---------------------- # Assembly For the assembly, you can do as in the video of FlightSimMaker [here](https://www.youtube.com/watch?v=ETZZYA-l5lQ) **There is some differences however:** * You don't need glue in my version, you screw the legs to the plate with M3 x 10mm. * You have to insert the pushbuttons into the plate. * You don't really need grease, but if you feel some hard point, you can simply use a small spay of WD40 for the bolt once assembled. * I designed a wire cap to let the micro usb cable go into the box, then hold the cable * The box is made with an angle, more convenient on my mind. ---------------------- # Wiring **Here is an image showing you how to wire all together:** [Wiring Diagram](https://mega.nz/file/5hYEnaKT#Do_0LLvn8MpcwfsK564IMBSMZMiB1nlqBuKjJ7Wu6z0) ---------------------- # Code **This is the code you have to upload with the Arduino IDE on your Arduino Pro Micro 32U4.** [Throttle Quadrant Code](https://pastebin.com/sA26rfCC) ---------------------- # Outro Hope those explanations are clear for eveyone ! This project seems complicated but really, it's not. If you experience some problems, feel free to ask me !
With this file you will be able to print Flight Simulator Throttle Quadrant with your 3D printer. Click on the button and save the file on your computer to work, edit or customize your design. You can also find more 3D designs for printers on Flight Simulator Throttle Quadrant.