Floating arm trebuchet (dimes and pennies)
thingiverse
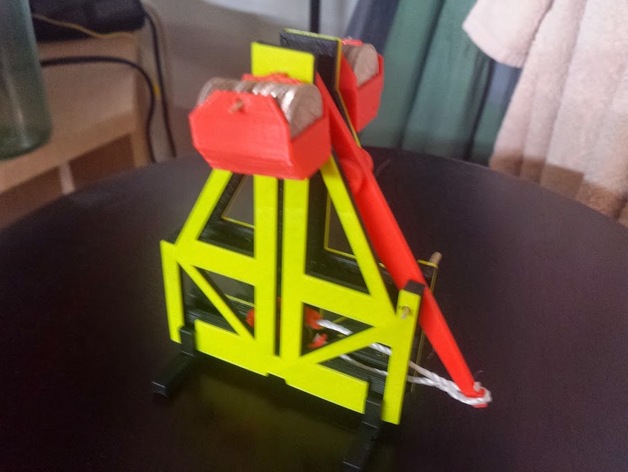
This trebuchet uses a floating arm rather than a fixed arm. That means that the weights can fall completely vertical resulting in a more efficient and powerful throw compared to standard trebuchet designs. See a test firing shot here: http://i.imgur.com/9QZHuB0.gif It requires 2 toothpicks, some string, and 32 dimes to fill the weights. Instructions Assembly should be fairly straight forward. You will need 2 toothpicks and 2 and 10-15cm of string along with the 3d printed parts. You need to print two of the weight, the stand, and the wheel. Everything else just print 1. You will need to orient each shape properly as I did not build them on the plane they were to be printed at. I printed the parts at 0.025mm height with 0.05mm width. Some parts are small and are exactly 1mm in width so these settings ensure that they match up exactly with no small gaps. side1 and side2 should pushed together until they are flush. This might be a bit hard, but this is to ensure that they stay in place and will not come apart. I used a small vice to push pins together that I couldn't get with my hands. The stands just snap on to the assembled frame. The sling should just snap together. Once the 2 halves are together make sure they swing freely. If they do not you may need to make some small edits to the file to get the piece configured correctly for your printer. These are small pieces so some variation may occur. The current size of the hole and pin worked great for me. The hinge stays together and swings loosely so the coin can fly out with no resistance. For the arm take one of your toothpicks and cut it in half. One half will be your firing pin so save that for later. With the other half but it down to 9mm in length. This goes through the hole that is second from the top of the arm (top being the thickest end of the arm). Next push the two wheels, one to each end of the toothpick. The other toothpick secures the weights and the arm to the frame. It goes through one vertical slit, then through the top most hole of the arm, the through the far slit. Once this is done you can slide the weights onto each side and fill the weights with dimes. You could increase the size of the weight holders if you want to use pennies or some other denomination. For the string...one piece goes through the bottom most hole of the arm and then through one of the string holes on the sling. Another piece of string must be made into a loop on one end and the attached to the other string hole on the sling. When loaded, the sling should be about in the center of the frame with the strings taut. Too long and it will not have enough power to swing the strings, too short and it will throw your coins into the ground every time. Experiment a bit to find that sweet spot. If you have any trouble just look up how trebuchets work and you should be able to sort it out.
With this file you will be able to print Floating arm trebuchet (dimes and pennies) with your 3D printer. Click on the button and save the file on your computer to work, edit or customize your design. You can also find more 3D designs for printers on Floating arm trebuchet (dimes and pennies).