Floating Desk Utensilo
myminifactory
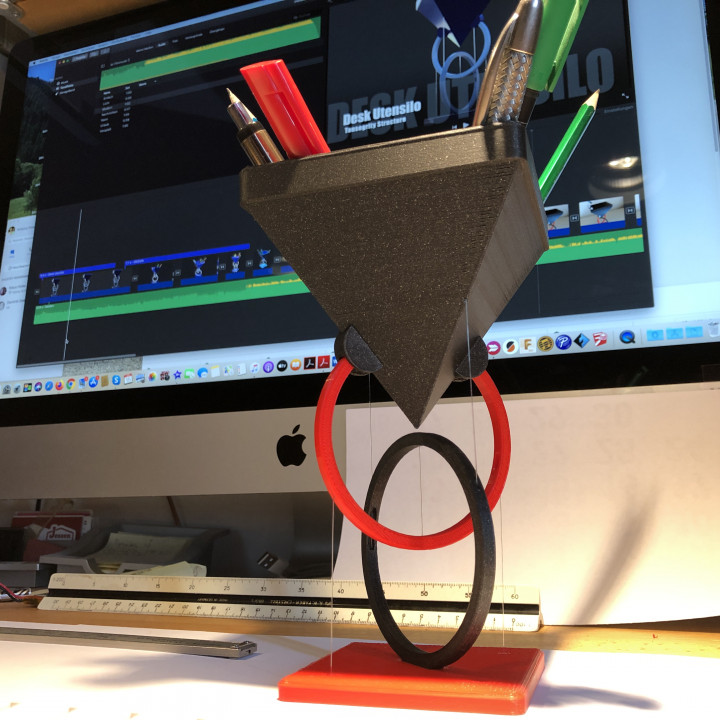
Here comes another contribution to the topic "Tensegrity". The thread in the middle of the two rings - besides the four threads connecting the utensilo box and the base - builds the tension in this object. It's a bit magical how the physical conditions create a tension that makes this object a unit - a perfect unit. At first sight a bit confusing ... you have to look twice to understand the principle. To get printing color ideas, have a look at the video:https://youtu.be/piDnsAO79gQ Dimensions: Box 112x112mm, H approx. 185mm Normally no glue is necessary for the assembly! The creation of the "tensegrity "and the final fixing of the threads is exclusively done in the base! At the other end of the threads only a multiple knot is required.The assembly should ideally be done with a nylon thread Ø 0.35mm, as the widths of the fixing slits in the base are designed for this. In addition, a nylon thread is easier to guide through the inside of the „basering“. If the assembly is done with yarn or dental floss, you may need to use a thin wire to which the thread can be attached and then pulled through. It is best to start by making the connection between the two rings. The distance between the rings should be about 25-30mm. This is not very easy and needs some patience to set the second knot so that this distance is created. Several attempts may be necessary. Then cut 4 threads of about 25 cm. Start with the two threads that go through the box from above and guide them through the "basering" so that they come out at the bottom. Now you can insert the other two threads into the „topring“ and then insert the ring into the openings provided on the box. To ensure a good fit, the fitting accuracy is very tight. It may be necessary to correct the fit with a cutter knife or sandpaper! This also is the same for inserting the "basering" into the base. Now insert the "basering" into the socket. Pay attention to the threads! Place the model with the bottom side facing up. Then feed the two threads from the „topring“ through the two holes in the socket. At first just clamp the strings. Than you can start with the adjustment. So when the strings are slightly tightened, socket and box are aligned horizontally, then you can secure the strings. Hurray! That's it! … the desk utensilo is floating! Maybe the attached pics can help you with the assembly. I hope that I did not forget anything in my description. If you have any questions please contact me!
With this file you will be able to print Floating Desk Utensilo with your 3D printer. Click on the button and save the file on your computer to work, edit or customize your design. You can also find more 3D designs for printers on Floating Desk Utensilo.