Floating Table
prusaprinters
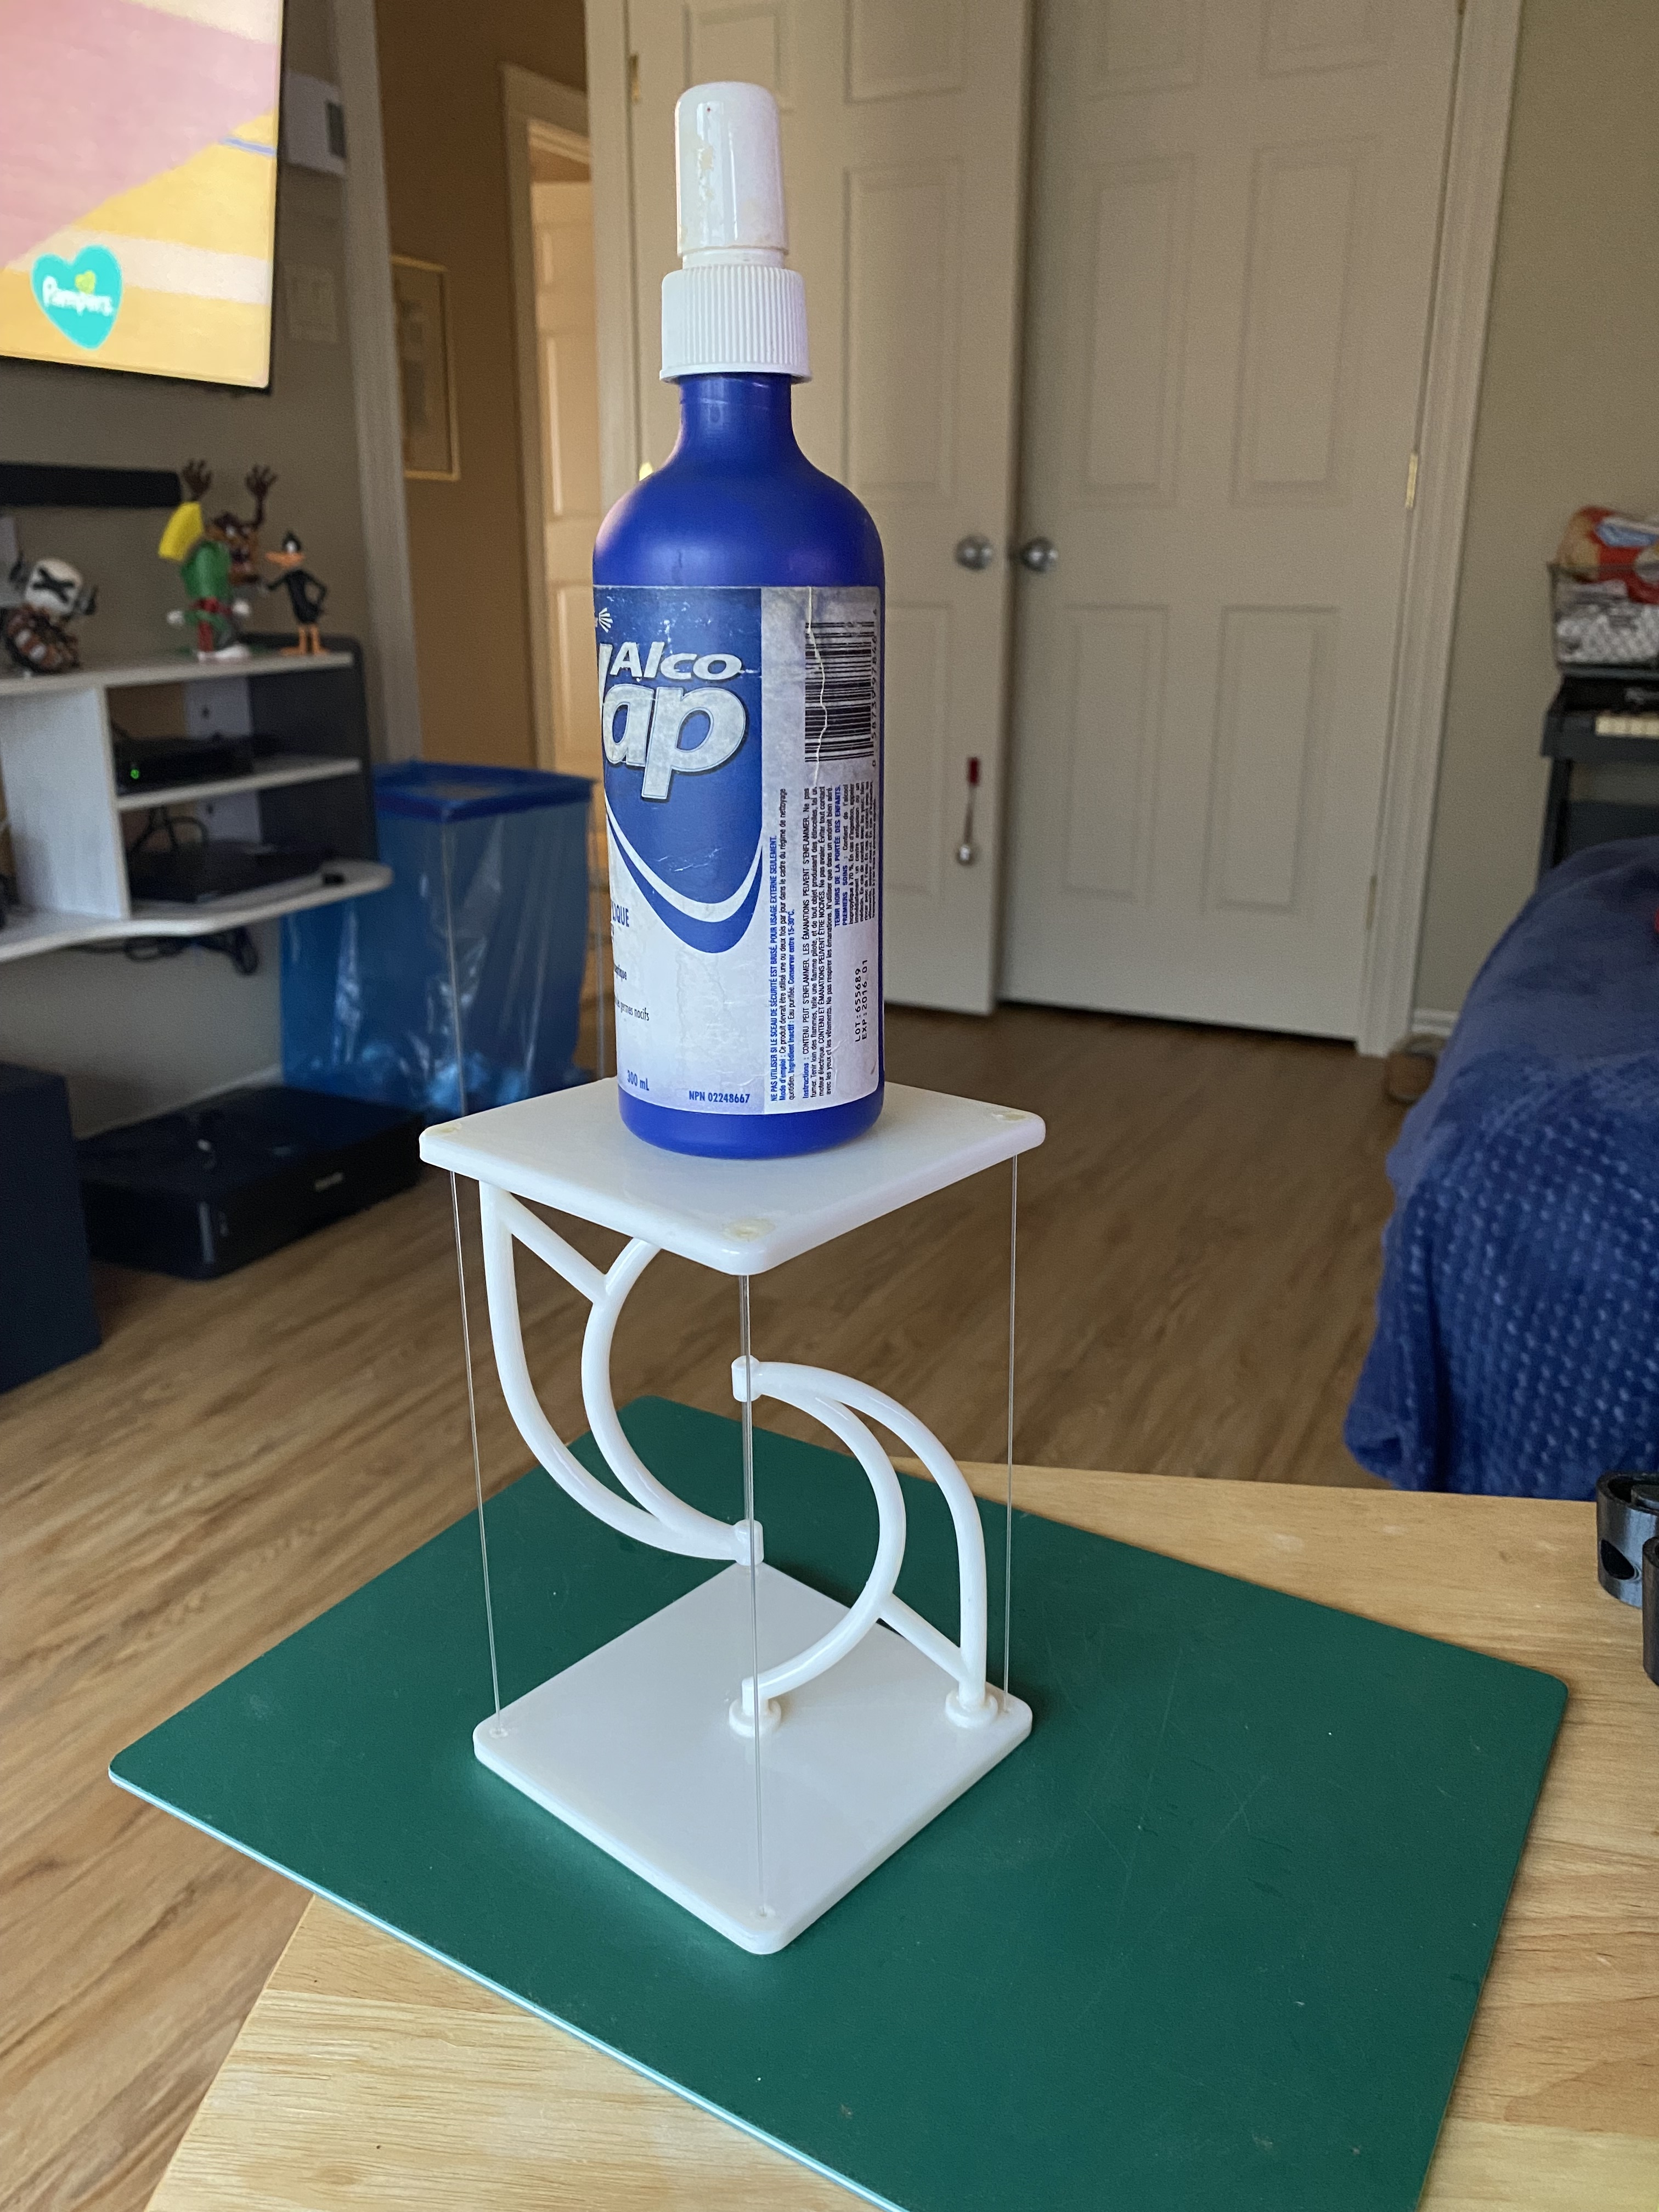
<p>I've seen a bunch of these models all over so the concept is not new, but I wanted to design one that would best complete the illusion. The curves allow for viewing the separation at a wider range.</p><p>Printing: Print 2 of each model at .2 mm or lower layer height. 2 mm walls, bottom and top layers. No supports required but make sure your bed is very level when printing the legs or use rafts to prevent warping.</p><p>Assembly: Glue the legs to the tables with the leg curved inward using 2 part epoxy or ABS slurry if printing in ABS. After the glue has completely cured (24 hrs for ABS slurry), use 50 lb test fishing line to wire it up. The holes are big enough to allow the line to pass through but will not allow it through with a knot. First, wire the tips so they are positioned in the center of each other's arcs. Then wire each table corner to the corner of the opposite table in a straight orientation. When wiring the table corners, you need to put tension into the lines while the table is level. It may take a few tries before getting the hang of where to tie the knot. Once the knots are tied and tension is correctly set to keep the table level, snip off the excess but leave 1 mm so it doesn't unravel. To ensure it doesn't unravel, you can fill the alcove the knot fits in with some hot glue. Obviously be very careful with hot glue around PLA. Apply very sparingly and cool between,</p>
With this file you will be able to print Floating Table with your 3D printer. Click on the button and save the file on your computer to work, edit or customize your design. You can also find more 3D designs for printers on Floating Table.