Floating Tensegrity Helix
thingiverse
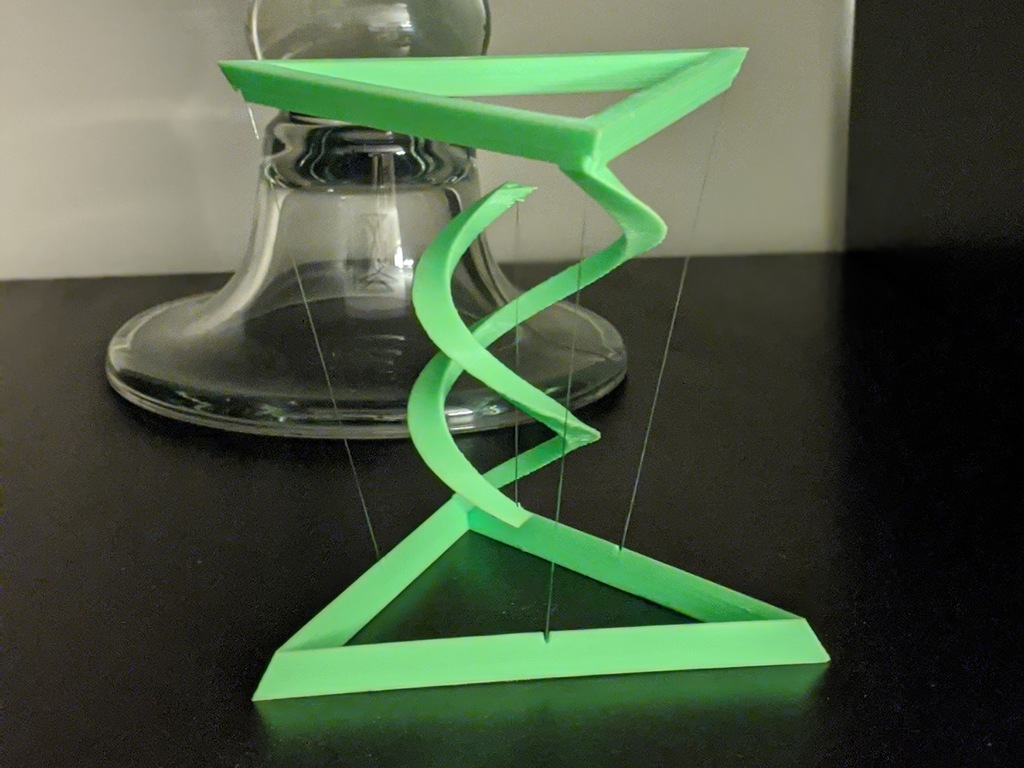
This is a [tensegrity](https://en.wikipedia.org/wiki/Tensegrity) sculpture made of two intertwining helices. These "float" above one another without touching. There are four tensile members supporting the upper structure. The base and the top of each helix form a regular tetrahedron. I recently saw [this tensegrity structure](https://www.reddit.com/r/3Dprinting/comments/eke8np/does_anyone_have_the_stl_file_for_this_this_seems/) made out of wooden blocks on reddit, and I was inspired to make this. However, I wanted to make it unique with the following requirements: * Use only triangular shapes * Use a single line / string, mainly for simplicity * Hide the string in the structure so that it is not visible until someone looks closely Even when someone does look closer at the sculpture to see how it is suspended, it still may be puzzling. The entire weight of the upper tetrahedron is suspended by the line in the center. The 3 lines on the corners simply keep the upper tetrahedron from tipping over by applying tension against any rotation. Printing Notes =========== Will print without supports, but will likely turn out better when supports are on. I set "Support Overhang Angle" to 60^, And placed blocks in a couple of locations so that there was only a single support. See this photo:  I would recommend to ensure you have "Minimum Layer Time" set to at least 10s as well so that the helix does not print too quickly. Assembly ======= To assemble, perform the following steps: 1. Print one "top" and one "bottom". 2. You will need ~90cm of transparent monofilament fishing line. Cut more than this, as the ends can be trimmed later. 3. Tie a large knot in one end of the line. I used an "[improved clinch knot](https://www.netknots.com/fishing_knots/improved-clinch-knot)", which is a standard fishing knot for tying on a hook (but no hook here). 4. Starting from the "top" piece, run other end of the line through the vertical holes in the center of both pieces. See this picture:  5. Continue running the line down the channel in the center of the "bottom" piece's helix, until it comes out of the other end. 6. Push the line through one of the closest holes in the bottom piece (at the midpoints of the base). It does not matter which of the two holes is used. 7. Align the top and bottom pieces as pictured / desired:  8. Push the line from one corner of the "top" to another through the hidden channel. It does not matter which direction is taken. 9. Continue running the line down and up between the pieces through different holes until it is fully connected.  10. The line must turn a corner on the bottom piece, so ensure that it is placed completely in the channel (there is a notch in the corners to ensure it cannot fall out). 11. Note that for final connection between the bottom and the top, the line should have exited a hole near one of the previous connections. 12. Tension the line, and arrange the model to the appropriate height. It does not need to be perfectly level at this point, but the height does need to be correct. 13. Tie off the tag end of the line to the upright line near it using a simple overhand knot. You do not need to keep the sculpture upright while doing this. 14. Slowly pull the top and bottom pieces apart to tension all of the lines and tighten the knots. If the top and bottom are not level with one another, simply rotate the pieces and the lines will follow. 15. Cut off the excess line on both ends. 16. Optionally glue the line to the bottom piece in the center of the sculpture. You will be unable to place any weight on the sculpture unless you do this.
With this file you will be able to print Floating Tensegrity Helix with your 3D printer. Click on the button and save the file on your computer to work, edit or customize your design. You can also find more 3D designs for printers on Floating Tensegrity Helix.