Flower pot with bottom watering & Self-Watering
thingiverse
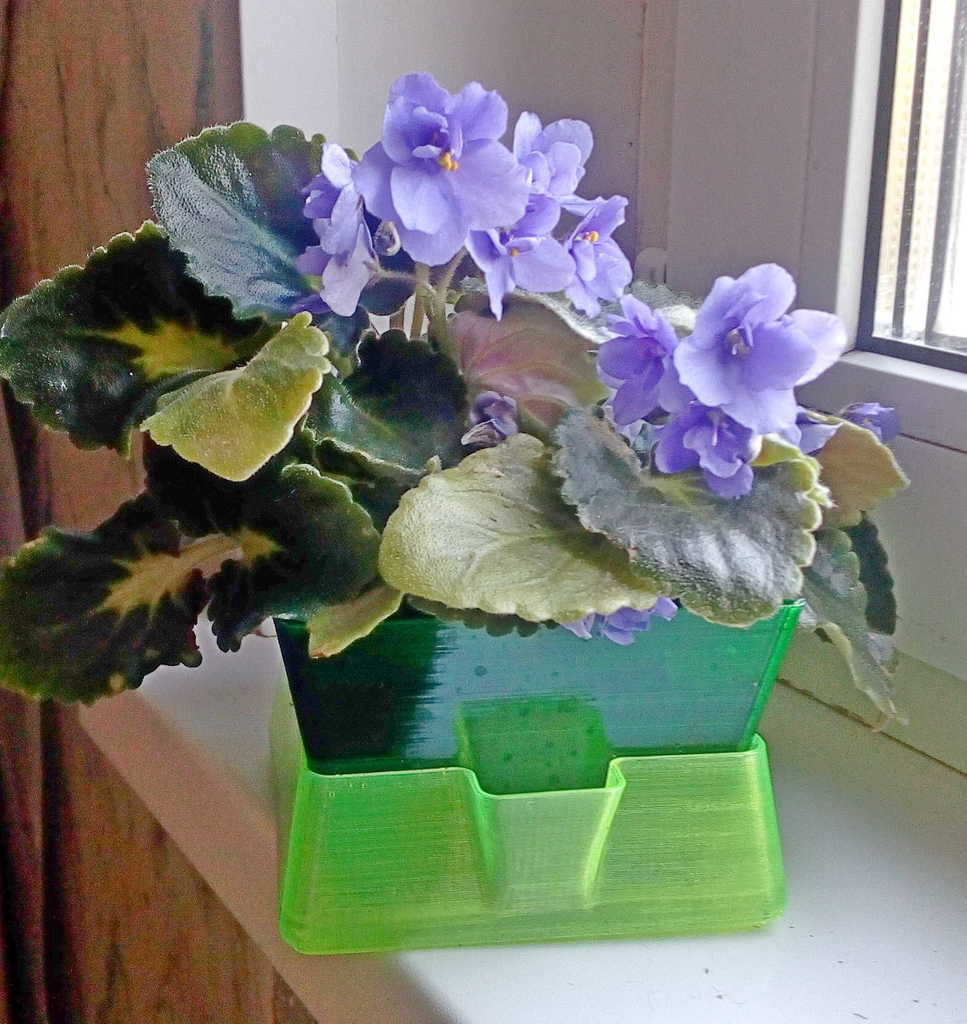
В продолжении темы https://www.thingiverse.com/thing:5388456 . Изменил форму поддона для уменьшения испарения воды из него. В поддоне есть столбик для контроля уровня воды. Верхняя часть столбика соответствует дну варианта с авто поливом и высоте выступов на дне универсального горшка. Переработал форму горшка. Сделал два варианта: универсальный и с авто поливом. Универсальный- содержит 9 углублений с отверстиями. В исходном виде используется как обычный горшок с возможностью нижнего полива или для удаления излишков воды при верхнем. Если заклеить термоклеем все отверстия в выступах дна кроме одного двух (выступа), то его можно использовать как горшок с авто поливом, но запас воды не очень большой. С авто поливом. Состоит из двух частей, которые впоследствии склеиваются. Это сделано для возможности печати без поддержек. Все детали оптимизированы для печати соплом 0,4 мм толщиной слоя 0,2 мм и соплом 0,8 при толщине слоя 0,4. При таких оптимизациях столкнулся с проблемой - при печати пластиками с большим коэффициентом усадки (ABS, SBS) при остывании происходит разрыв слоев между элементами дна и стенок. Видимо это происходит из-за сравнительно больших линейных размеров при сравнительно тонких стенках толщиной в 4 (2) слоя. Нужно подбирать режимы охлаждения и использовать режим : Ooze Shield (печать с защитной стенкой). Changed the shape of the pan to reduce the evaporation of water from it. There is a column in the pan to control the water level. The top of the column corresponds to the bottom of the auto watering option and the height of the projections on the bottom of the universal pot. Reworked the shape of the pot. I made two options: universal and with automatic watering. Universal - contains 9 recesses with holes. In its original form, it is used as a regular pot with the possibility of bottom watering or to remove excess water at the top. If you glue all the holes in the protrusions of the bottom with hot glue except for one or two (protrusion), then it can be used as a pot with auto watering, but the water supply is not very large. With auto irrigation. It consists of two parts, which are subsequently glued together. This is done to enable printing without supports. All parts are optimized for printing with a 0.4 mm nozzle at a layer thickness of 0.2 mm and a 0.8 nozzle at a layer thickness of 0.4. With such optimizations, I ran into a problem - when printing with plastics with a high shrinkage coefficient (ABS, SBS), when cooling, the layers break between the bottom and wall elements. Apparently this is due to the relatively large linear dimensions with relatively thin walls with a thickness of 4 (2) layers. It is necessary to select cooling modes and use the mode: Ooze Shield (printing with a protective wall).
With this file you will be able to print Flower pot with bottom watering & Self-Watering with your 3D printer. Click on the button and save the file on your computer to work, edit or customize your design. You can also find more 3D designs for printers on Flower pot with bottom watering & Self-Watering.