Flower - Push Puppet
thingiverse
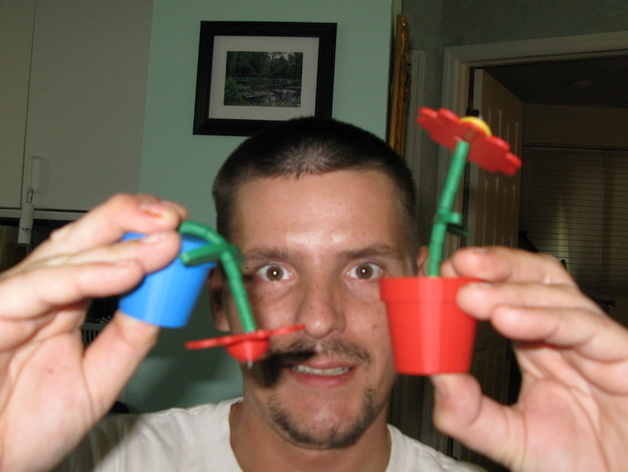
Create a Collapsible Flower or push puppet with this design. Simply print Flower_Red.stl for the pot and action button, Flower_Green.stl for stems and leaves, and Flower_Petals.stl for the flower itself in different colors. An optional full tray is available for printing all pieces at once. The assembly process has changed slightly; instead of threading one piece of string through the entire flower, use a single piece of fishing line with the button in the center and bring up both ends through the flower. Ensure you have a spring with an inside diameter of 14mm and height of 20mm for the button. Start with around a meter of fishing line, but adjust as needed. String the button through the spring, followed by stem segments and leaves. Thread one end of the fishing line through one hole in the flower and the other end through the other hole. Tie both ends together in a square knot, pulling tight while pressing the button. Additional knots can be added for extra security. Finally, cut off excess fishing line to complete your Collapsible Flower push puppet.
With this file you will be able to print Flower - Push Puppet with your 3D printer. Click on the button and save the file on your computer to work, edit or customize your design. You can also find more 3D designs for printers on Flower - Push Puppet.