Foam Terrain Stamp - Ice - 1" grids
thingiverse
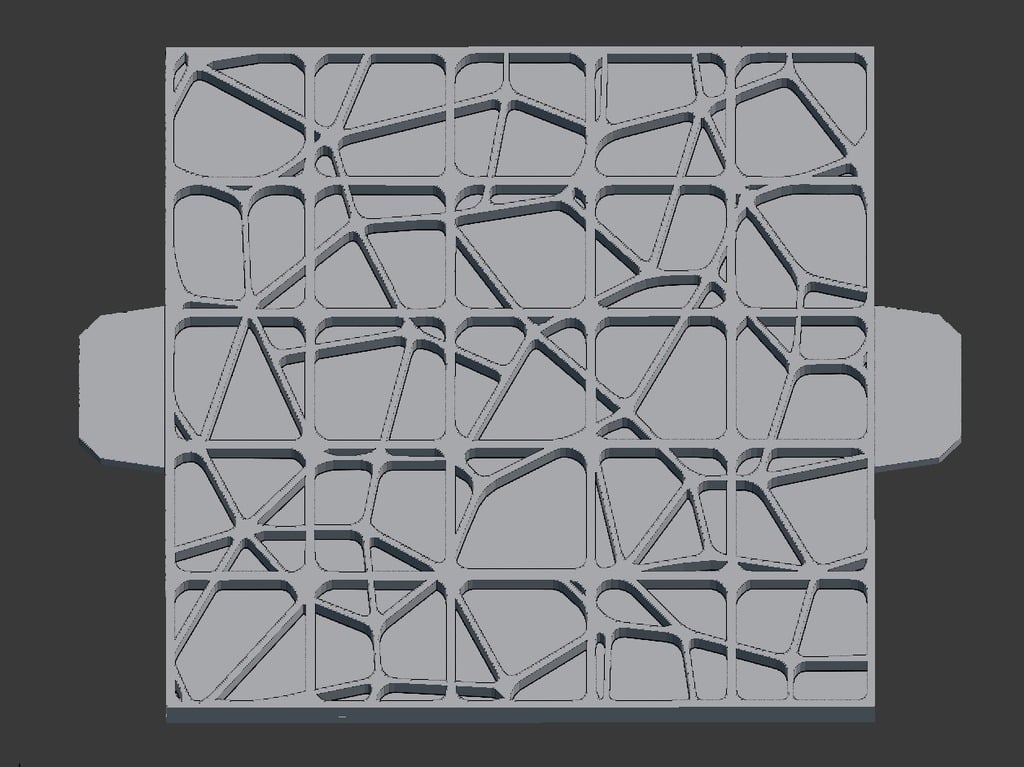
[](https://go.ec3d.design/the-ignis-quadrant-ks) -------------------- I created a lot of foamcore terrain for large outdoor landscapes - I previously used balls of tin foil for texture and carved the grids by hand, with mixed results. This stamp allows you to make consistent grids without measuring/drawing/hand sculpting. Here's how I make mine: 1. Peel 1 backing sheet off dollar store foam board 2. Lay on flat floor surface, place stamp in one corner, place board or book over stamp, and step on stamp - applying consistent pressure. 3. Move stamp and repeat until board is covered. You can feel the impressions line up with the edges for consistent grids. 4. (optional) Roll up tin foil into ball and press around sheet for more texture. 5. Cut cardboard to size and hot glue to back of foam board for rigidity. 6. (optional) for extra strength, hot glue around the edges, smeared with tip of glue gun 7. Mod podge (mix acrylic color with mod podge for base cover and slather it on there). 8. (optional) Wash with a paint/water mixture to add contrast and depth (black or dark brown for dirt, light blue for snow) DONE! Make sure to use a good amount of infill for strength (I used 50% I believe). Will upload a finished ice sheet later today or tomorrow!
With this file you will be able to print Foam Terrain Stamp - Ice - 1" grids with your 3D printer. Click on the button and save the file on your computer to work, edit or customize your design. You can also find more 3D designs for printers on Foam Terrain Stamp - Ice - 1" grids.