Folding Leg IKEA LACK Table
prusaprinters
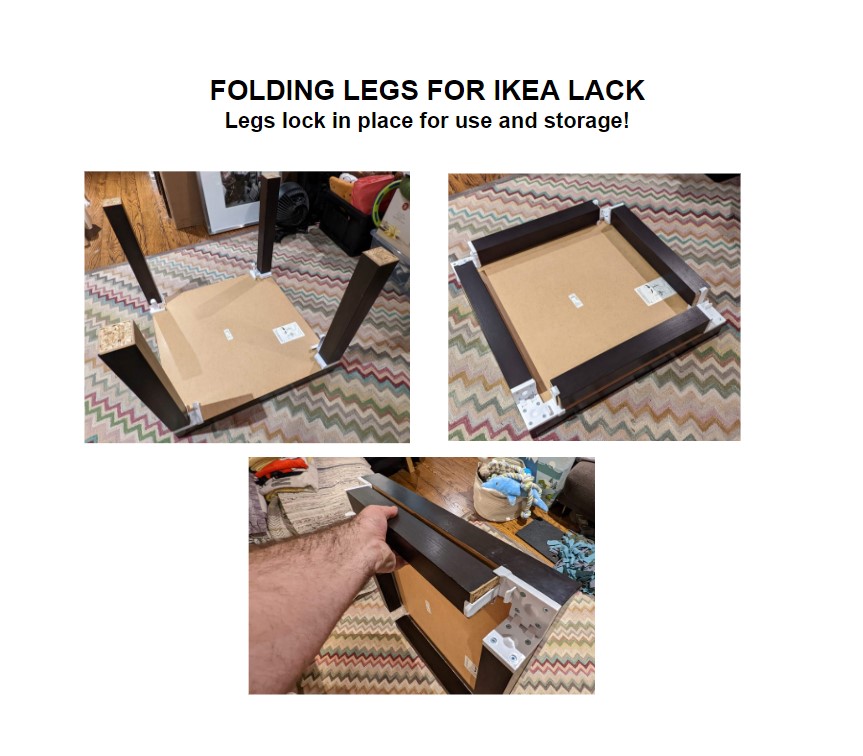
<figure class="media"><oembed url="https://youtu.be/ZHcMqRNrtBQ"></oembed></figure><figure class="media"><oembed url="https://youtu.be/d07rPZ_EOzw"></oembed></figure><p>This model should be printed out from PETG to allow flexibility of the locking tabs.</p><p>NOTE the locking tabs slide into or through the table hinge for two reasons. </p><ol><li>Being separate pieces allows for maximum strength in bending as they can be printed flat.</li><li>If they break, permanently deform due to over bending etc. they can be replaced without having to reprint an entire bracket. </li></ol><p>To assemble:</p><ol><li>The leg hinge lock tab needs to be inserted from the bottom side (side that mounts to the table. This will hold the tab in place. Refer to the photos for the orientation (it should only fit in one direction. You may need to sand the tab slightly to remove any printing artefacts as it is a tight fit.</li><li>Position the IKEA leg to the outer corner of the leg hinge and mark the hole locations. PRO TIP: drilling pilot holes and counter sinking those pilot holes will prevent cracking of the IKEA leg and prevent a mound of wood being pushed up when the screw goes in. There is a countersink on the mounting surface of the leg hinge to account for some push up of material when screwing the hinge in place.</li><li>Use two M3 x 20mm socket head cap screws as the pivots to affix the table hinge to the leg hinge. </li><li>With the legs in the folded position, align all 4 legs to the table top and each leg captured in their leg lock tab and pocket. This ensures proper alignment of the legs and will prevent the legs from interfering with the leg lock tab during folding.</li><li>Again mark the position of the screw holes and as in #2, drill and countersink the holes. The IKEA table material WILL pucker upwards when screwing.</li></ol><p>To use:</p><p>Care must be taken when folding and unfolding the legs to avoid excessive stress on the hinge. It is printed plastic after all and, although the pivot was made as beefy as space allowed, the leg acts like a pretty massive lever arm and can break the hinge if excessive force is applied.</p><p>When folding, fold one leg at a time by gently flexing the leg locking tab away from the locking nub and then guiding the leg into the pocket and ensure the locking tab captures the end of the leg.</p><p>When unfolding, push back on the leg lock tab until the leg is released and guide it up so that the locking nub is secured in the locking tab. Press the tab towards the leg to ensure that it is fully seated and has locked the leg in place.</p>
With this file you will be able to print Folding Leg IKEA LACK Table with your 3D printer. Click on the button and save the file on your computer to work, edit or customize your design. You can also find more 3D designs for printers on Folding Leg IKEA LACK Table.