Forward 3D Printing Christmas Ornament
thingiverse
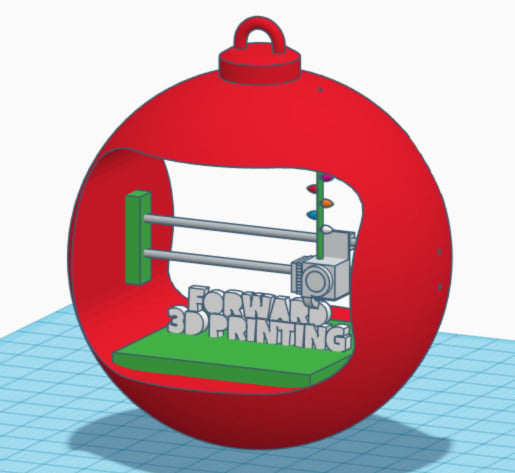
I belong to the Facebook group - Forward 3D Printing. If you've never heard of it, come check us out. It's a lighthearted group of enthusiasts, printer builders, troubleshooters and designers. All with a great sense of humour. So I decided we need a Christmas ornament this year. So I made this to look like a 3D printer is almost done printing the group name:) So for printing I've included the full uncut ornament as well as the individual components. The Body of the ornament have holes through it so it is easy to slide the rods and lights through. Horizontal Rods - I've made up the horizontal rods, but feel free to use dowels or coat hanger metal for those. I've holed the back of the print head to accept these. Just push the rods through the side of the ornament and while holding the print head in place, slide through there next, and into the holes on the opposite side of the ball. The rods are shorter than the diameter of the ball, so won't stiick out. Filament Lights - Print off 7 of the Christmas Light stl. The ball has another hole through the top that you can push the filament rod through, and it ends in the top of the print head. As before it is shorter than the ball diameter so it won't stick out. Then epoxy on the uindividual lights you've printed into the holes you'll see in the filament stl. Paint each Bulb seperatley a different colour, or all the same, it's up to you old chaps, Merry Christmas Everyonje. Cheers!
With this file you will be able to print Forward 3D Printing Christmas Ornament with your 3D printer. Click on the button and save the file on your computer to work, edit or customize your design. You can also find more 3D designs for printers on Forward 3D Printing Christmas Ornament.