FPV 5.8 GHz RX5808 monitor
thingiverse
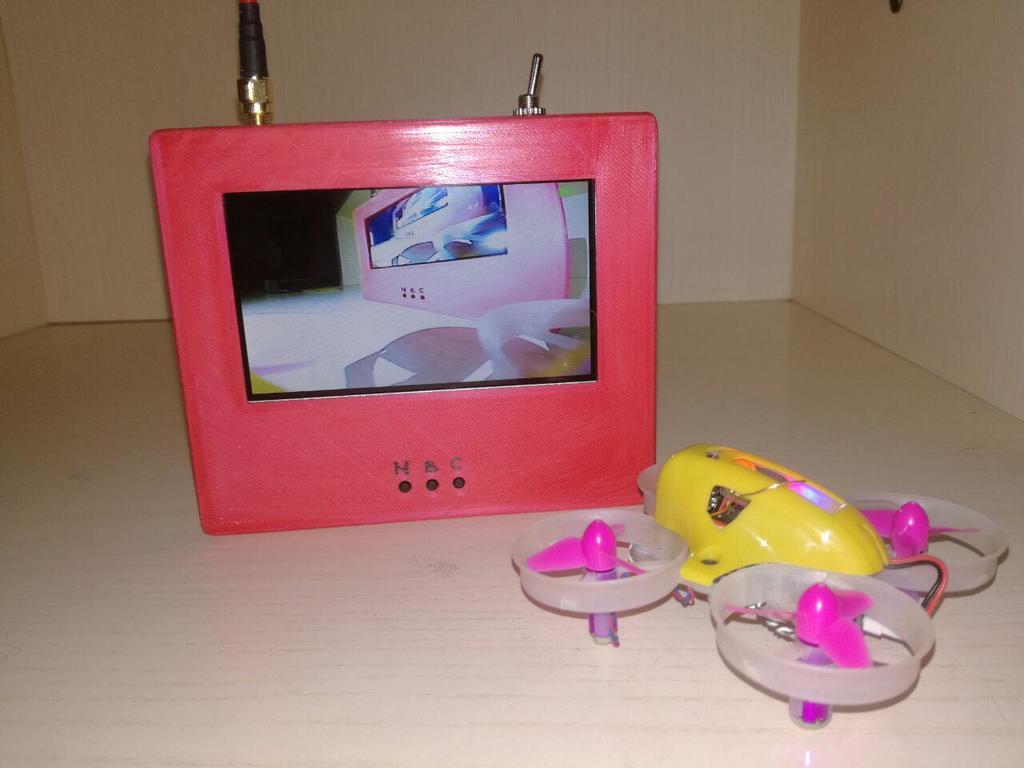
**What is it for?** This DIY project is designed to provide a spotter during an FPV session with a low-cost, high-quality monitoring experience. It's perfect for drone pilots who want their spotter to have a clear view of the flight without having to wear goggles themselves. This setup can also be used when flying indoors with small drones like Tiny Whoops, allowing kids and family members to enjoy the hobby alongside you. **What is it NOT for?** This DIY FPV monitor is not intended for use as primary FPV gear during outdoor flights. While it's reliable for short-range flights, it's best to avoid relying on this setup for long-range flying. **What do you need?** To build your own DIY FPV monitor, head over to Banggood and pick up the following components: * The **DIY FPV Monitor Kit**, available here. * An RP-SMA antenna - I recommend using a pagoda antenna, but compact options like RHCP UXII or LHCP UXII work just as well. * A toggle switch for easy on/off functionality. * A battery with its corresponding battery slot. * Optional: use N52 neodymium magnets to secure the box in place. **How to build everything** Follow these simple steps to assemble your DIY FPV monitor: 1. Give your enclosure a fresh coat of paint and add some personalized stickers for a unique look. 2. Pass the red and black wires from the battery slot through the holes, then glue them down securely. Next, screw in the switch (positioned on the right side) and solder the red wire to one side. Cut another wire and solder it to the middle pin - this ensures your ON/OFF switch is wired correctly. 3. Position the antenna connector and secure it with a printed nut that's self-tapping and self-locking. 4. Slide in the LCD display and hold it in place using hot glue on the corners. Let it dry for 10 minutes before proceeding. 5. Solder the red wire from the middle pin of the toggle switch to the board (marked as VCC), along with the black wire from the battery slot to the GND pin. 6. Connect the flat cable from the display to the board, then secure the board to the back of the display using dual-sided tape. 7. Finally, glue in place or attach a back cover using N52 neodymium magnets - and you're ready to enjoy your new FPV monitor!
With this file you will be able to print FPV 5.8 GHz RX5808 monitor with your 3D printer. Click on the button and save the file on your computer to work, edit or customize your design. You can also find more 3D designs for printers on FPV 5.8 GHz RX5808 monitor.