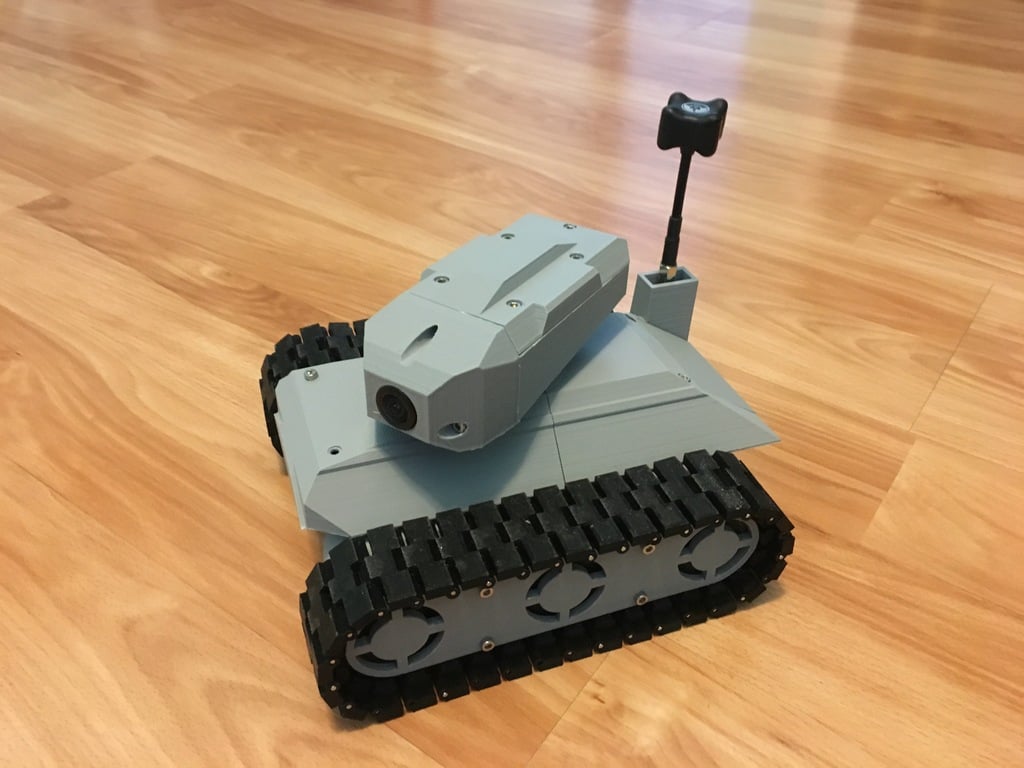
FPV Prototank with Turret
thingiverse
UPDATE 3/8/2019 - I've just published a lighting/illumination kit for this tank. It can be found at: https://www.thingiverse.com/thing:3479054 Also, a very common question that I get is "where are the files for the tank tracks and cogs?" You can find them here: https://www.thingiverse.com/thing:972769/files You need: ProtoTank_Cog.stl (qty 6) ProtoTank_trackinnerFrame.stl (qty 2) ProtoTank_TrackOuterFrame.stl (qty 2) You'll see a bunch of different track segment files, labeled Track_X_Y.stl. The X_Y represent the radius of the pin hole. So Track_1_5.stl has a 1.5mm radius pin hole. This is important because 3D printers print with varying levels of accuracy. You'll want to experiment to determine which size works best for your printer so the tracks fit together smoothly. ------------------------------------------------ PARTS PARTS PARTS!!!! - These are all from Amazon (US), and I've copy/pasted the exact item descriptions so you can easily search for them. ------------------------------------------------ -Black PLA: HATCHBOX PLA 3D Printer Filament, Dimensional Accuracy +/- 0.03 mm, 1 kg Spool, 1.75 mm, Black -Gray PLA: HATCHBOX PLA 3D Printer Filament, Dimensional Accuracy +/- 0.03 mm, 1 kg Spool, 1.75 mm, Gray -Qty 4 Motors: Doradus 5Pcs DC 3V-6V Dual Axis Gear Reducer Motor For Arduino Smart Car (source: Amazon) -Qty 2 ESCs: Hobbypower RC 20A ESC Brushed Motor Speed Controller for RC Car Boat W/O Brake. Each side of the tank gets one ESC. Wire the motors to the ESC in parallel. Recommend you test your wiring before assembling the tank, itself to ensure you got the motor polarity correct so the the motors turn in the correction direction. -Qty 2 Servos: ElectroBot 2X Pcs Sg90 Micro Servo Motor 9G Rc Robot Helicopter Airplane Boat Controls -Qty 3 Bag Pins to Hold Tracks Together: uxcell Replacement Stainless Steel Round Rod 35mmx2mm 30Pcs for RC Car Mode -Misc. M3 Hardware 1: iexcell 125 Pcs M3 x 20mm/25mm/30mm/35mm Internal Hex Drives Socket Cap Head Hex Socket Screws and Nuts Kit, Stainless Steel 304 -Misc. M3 Hardware 2: M3 Stainless Steel Hex Socket Head Cap Screws Nuts Assortment Kit, Allen Wrench Drive, Precise Metric Bolts and Nuts Set with Beautiful Assortment Tool Box for 3D printed project, 310 Pcs (Silver) -1 Bag M3 Washers: M3x6mmx0.5mm Stainless Steel Round Flat Washer for Bolt Screw 100Pcs -Camera: I used a Runcam Owl Plus that was salvaged from a ZMR250 build. It's an older camera, but you should be able to find it or similar cameras elsewhere online. I believe many of the Runcam FPV cams (and similar off brands) have the same case/mounting interface. -Qty 1 VTX: AKK X1 5.8G 25mW/200mW/600mW Switchable FPV Transmitter with Push Button and Digital Display -Qty1 2.4 Gz Rx: Pick whatever is compatible with your transmitter, of course. I'm a FrSky Taranis user, so I just used a FrSky D4R-ii that I pulled off of a quadcopter. -Power Distribution - Eh, you can wire up a harness (pain in the butt), or just go grab a small, simple quadcopter PDB. It doesn't need anything fancy. -You'll also need wire, solder, tweezers, soldering iron... you know... all of the basics for working with hobby electronics.
With this file you will be able to print FPV Prototank with Turret with your 3D printer. Click on the button and save the file on your computer to work, edit or customize your design. You can also find more 3D designs for printers on FPV Prototank with Turret.