Franke Soap Pump Shell
thingiverse
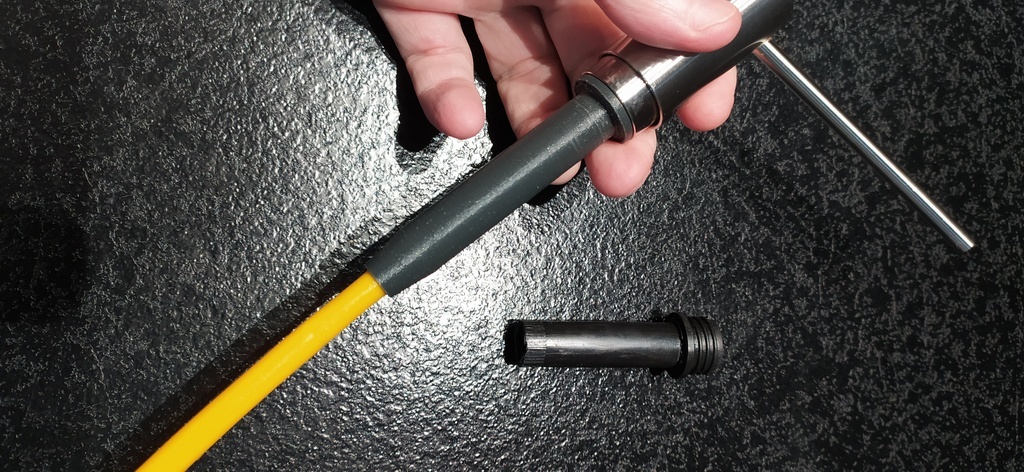
The original Franke soap pump has a design issue making it too fragile to support repetitive spring compressions. After 3 successful repairs with glue, I have not been able to repair it anymore. As the spare part by Franke costs the price of an Anycubic 3D printer. I decided to go the 3D printer route and I am really glad I took this option since I can use the printer for many other cool projects as well... Here is how you should print and assemble the part. 1. Make sure you did not apply some axis calibration by measuring a printed part. This is a complete non-sense. Your stepper motors and pulleys gives an exact value to compute from tech sheets. (Usually in the metric world it is round and exact numbers like 400 and never ever 387.8. Eg for AnyCubic Mega S: M92 X80.00 Y80.00 Z400.00 E400.00) 2. Scaling of 3D printed part should be based on thermal coefficient of your printed material and delta temperature (eg: printing PLA, around X and Y axis requires +1.224% model upscale for a delta of 180 degrees delta between printing and usage temperature. Just compute your value given material and printed temperature, starting again from tech sheet). No scaling needed on Z axis (since the part cools down in this direction) 2. Scale FrankeSoapShellControl part according to value you found above. Print it and control inner diameter once at usage temperature is exactly 11.7mm, outer 14.4mm. 3. If dimensions are a bit off, adjust X and Y scaling (same value) until inner diameter is exactly 11.7mm (priority shall be given for inner diameter) 4. Using the scaling found above print the FrankSoapShell part with thread pointing at sky. Make sure to use a brim about 12mm, no support, the part already includes it. 5. Remove the support below thread shoulder. Sand slightly if needed to insure it can be inserted in kitchen sink without excessive force. Removing from kitchen sink should require some force as with original part. 6. Inside tube will likely requires some sanding as well. If printed in PLA make sure to add water so that it does not heat up to much. To ease this process, make the part spin in a drill/lathe and use a small round file. Make sure to process only the cylindrical inner part, not the conical part. Control the pump slides nicely with some moderate force. Compare with original part. 7. Print the insert tool (scaling not needed here) with a brim. You can use 0.25mm layer height for this part faster print 8. Print the 2 parts ball cage using the same scale as used in step 4. No brim needed here. Resolution 0.1. Ensure perfect seat of the ball in the bottom part. For that, scrub gently with drill bits, then using the extract tool, hold the ball against a 600 or more sand paper and roll it for a while. Blowing down through the cage should be impossible. Continue scrubing until it is perfect. 9. Place ball in cage, place cage conical part toward bottom of the sheel and press in place using a vice and the tool printed at step 8. Stop once too is aligned with thread start of the shell. 10. Reassemble pump as in the original part and give it a try.
With this file you will be able to print Franke Soap Pump Shell with your 3D printer. Click on the button and save the file on your computer to work, edit or customize your design. You can also find more 3D designs for printers on Franke Soap Pump Shell.