Frankenstein Head sculpt
thingiverse
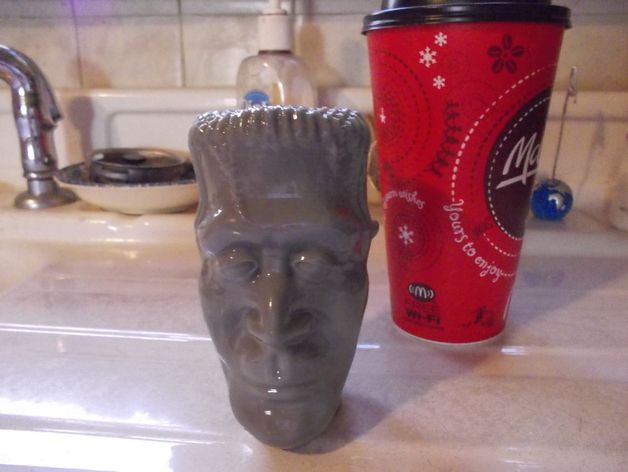
I did a frankenstein a while ago and was never really happy with the work (it was one of my first sculptris efforts) This is more keeping with my current puppet head sculpts. Intended for a larger print, 0% infill 2 shells with an expectation of some post printing cleanup. The current workflow I have been using is to expect the prints to be close to where they need to be, but need some work. The trade off being less plastic and time used to print and as the post printing processes give a very shiny surface, the layer of slice can be somewhat coarse. in short, if you use my print settings it will not pop off the FDM build plate looking like a factory manufactured item. you can use infill etc but my objective is a prototype, so it is more an issue of getting close to what i need to where I can finish it and at the same time save time and LOTS of material. Tailor print setting to your own workflow and what you are looking to achieve. update this printed really nice without any holes or major rough spots at the settings 0% infill, 2 shells .27 slice 80 mm/sec speed. color me surprised! Acetone Vapor polished ABS Instructions 0% infill 2 shells were my settings Acetone Vapor polished ABS
With this file you will be able to print Frankenstein Head sculpt with your 3D printer. Click on the button and save the file on your computer to work, edit or customize your design. You can also find more 3D designs for printers on Frankenstein Head sculpt.