Franx DIY Car Radio with MultiModule TX
thingiverse
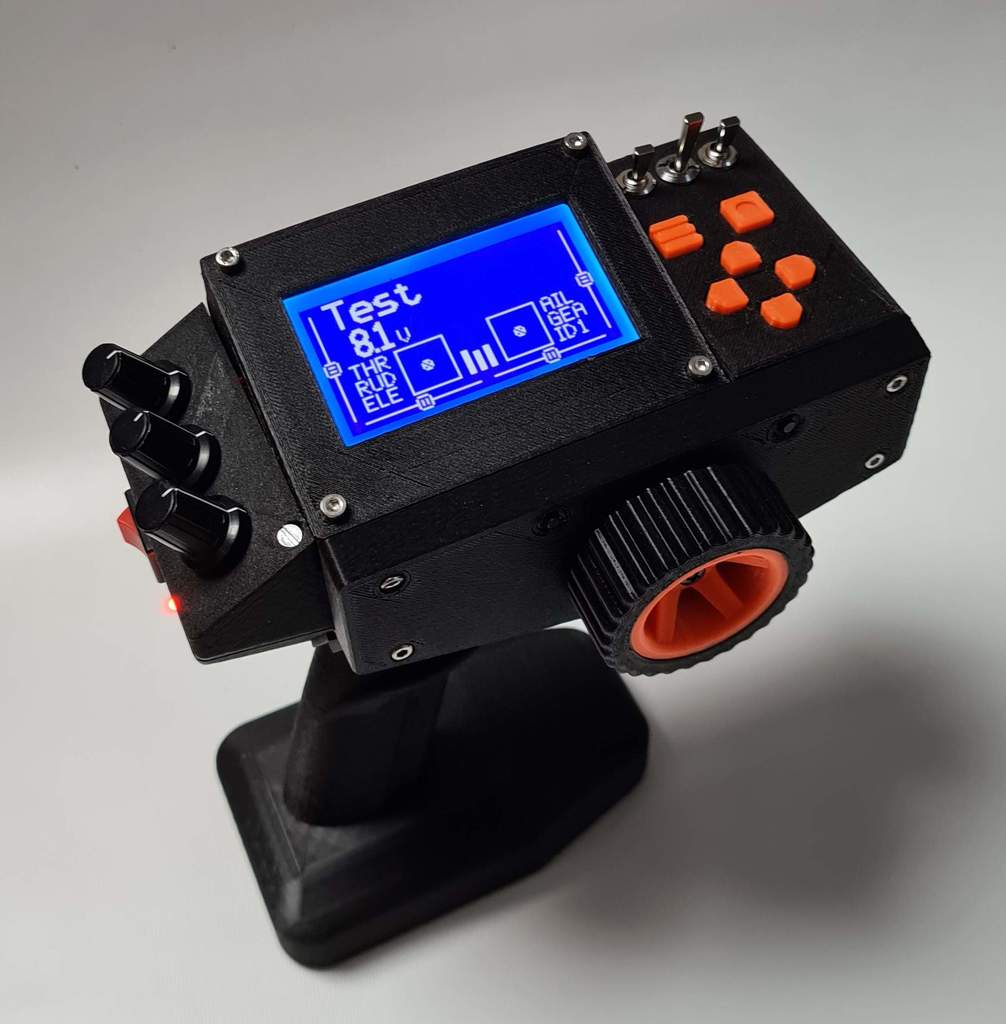
This is my Car Radio TX with MultliModule ( https://github.com/pascallanger/DIY-Multiprotocol-TX-Module ) and OpenTX (https://www.open-tx.org) on small sized Arduino Mega 2560 PRO. I designed this radio because I didn't find any Pistol Radio with Multimodule support. Unfortunately OpenTX supported ArduinoMega only up to Version 2.1 although the schematic can be found in version 2.2. A special feature compared to other Pistol Radios is the 2-Axis Trigger Gimbal. In normal direction the throttle is controlled as usual. But sideways you can add features like mixing force between rear and front traction if you have two separate motor drivers. This can be helpful for Crawler Cars. But you can also install common 1 Axis Gimbal instead. I used an "Rj1616t-45j-h 16mm 3d Joystick Potentiometer" from an older Radio. Maybe this is hard to get as it seems to be discontinued but there are similar Gimbals that should fit. The Design is kept modular for two reasons: - Smaller parts are much easier to print. - For design changes only small parts need to be replaced. The main groups are "Top" containing LCD, Wheel, Potis and most Buttons and switches and "Bottom" with Trigger Gimbal, Power Switch and some Buttons for Thumb. The Bottom is connected to Grip and Battery Base. It consists of two subgroups Left and Right. The Top Group is divided into 4 subgroups for Wheel, LCD+Electronic, Potis and Switches. See explode pictures for details. The Tire of the wheel was printed with the softer TPU but you can also use PLA instead. Tire and Rim are glued together with CA glue. The Spring for the Wheel self centering is made out of a 0.5mm spring steel wire. Maybe it is too soft and 0.8mm would give a better feeling. For most screws I used thread inserts because threads are not easy to cut into PLA, especially small ones like M2. I used this Assortment Kit: https://www.banggood.com/Suleve-MXBN11-420Pcs-M2-M3-M4-M5-Metric-Female-Thread-Brass-Knurled-Nut-Threaded-Insert-Embedment-Nuts-Assortment-Kit-p-1980184.html To melt the inserts in the corresponding holes I used a long screw as holder and heated the insert with a soldering iron. A little amount of tin improves the heat contact to the inserts. You can also tryout a hot air gun. Don't heat up too much, the insert must not get too hot, just enough to melt into the PLA holes. Some improments came up which are not implemented so far: - The Trim Buttons for Wheel should be placed on the top side of the Wheel Case instead of the front - A USB Connection to the Adruino is missing. This could be placed on the backside - A Hole to the USB Connector of the MultiModule is missing - Thread Inserts are missing on the Top Left Case Part. Currently you must cut an M3 Thread into PLA. Finally the Electronic is described on https://www.instructables.com/DIY-Car-Radio-TX-With-MultiProtocol-Module/
With this file you will be able to print Franx DIY Car Radio with MultiModule TX with your 3D printer. Click on the button and save the file on your computer to work, edit or customize your design. You can also find more 3D designs for printers on Franx DIY Car Radio with MultiModule TX.