Fridge Magnet Design Challenge
thingiverse
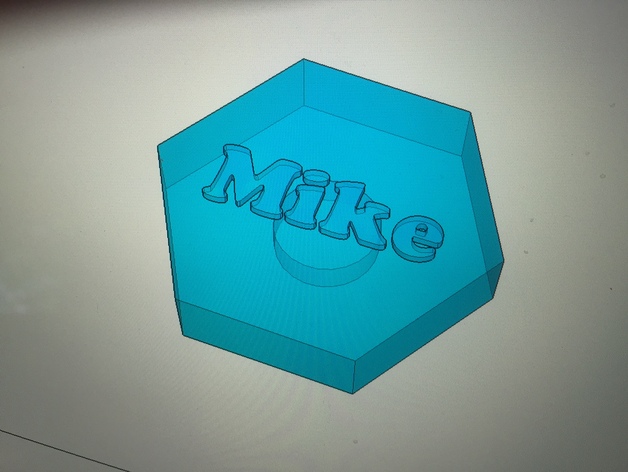
This project is meant for middle school students (7th and 8th grade). I call it the "Fridge Magnet Design Challenge." The solid modeling portion of the project is taught using Google Sketchup 2015. Students are tasked with using the Problem Solving Process to come up with an original design for a magnet for use on their fridge at home to display their school work. The Problem Solving Process steps are as follows: State the Problem Collect Information Develop Possible Solutions Select the Best Solution Implement the Solution Evaluate the Solution The parameters of the project we as follows: -The magnet had to fit within a 2"x 2"x 1/2" space (LxWxH) -The magnet has to incorporate a geometric shape- either chosen from the shapes that can be drawn in Sketchup via the shape tools, or custom drawn with the pencil tool -The magnet body must include a hole that is centered on the geometric shape, that has a radius of .3" and a depth of 3/16" so that once the print is finished, a magnet may be super glued inside the hole -Must include custom text or a custom shape/design that is relevant to the stident and meets school appropriate guidelines *This project is meant to teach problem solving skills, basic solid modeling skills/concepts, review standard measurement skills, and also to teach critical thinking & analysis. Print Settings Printer Brand: MakerBot Printer: MakerBot Replicator (5th Generation) Rafts: Yes Supports: No Resolution: .20mm Infill: 10% Notes: This may be printed with anywhere from 10% infill up to 20% infill. 10% is plenty strong for the 2" x 2" x 1/2" dimensions, but if you would like to use different maximum dimensions, for example, larger dimensions, you may want to increase the infill by a few percent. Post-Printing This is how your Hexagon magnet will look if you followed the steps in the instructions. If you turn it over there is a hole cut out under the raft to put a magnet in. This is a The magnet designs done by my middle school kids using Google Sketchup 2015. How I Designed This Instructions for Sketchup 2015 Magnet Design How to make the simple Hexagon Shaped Magnet: Polygon tool- inscribed radius of 1- (if you decide to use a different shape ignore this measurement and simply stay within the 2"x 2"x 1/2" space. Other shapes may include: circles, squares, rectangles, different types of polygons, or custom drawn shapes. ALL SHAPES WILL FOLLOW THESE STEPS from #2-on. For step #1 you may use your own custom measurements) Push/pull tool- .4 thickness Use line tool to locate a center point Use the circle tool to .3 radius Use eraser to delete all lines drawn inside the polygon Push/Pull tool- click inside the small circle and begin to drag down (DO NOT CLICK AGAIN YET) type in 3/16 and press enter (Or Click) Choose the select tool Lasso the entire object and right click (CTRL CLICK ON THE OBJECT for laptop) then click Make Group from the drop down menu Choose the rotate tool Click on the side face of the polygon when it says “On Face In Group” Click again and rotate 180 degrees, click to exit Choose the orbit tool and click until you can see the side surface Click the move tool and click on object, move the object up off the surface and click again when it says “On Blue Axis” Use the orbit tool to view the top of your object Click the “view” drop down menu from the top left corner of the screen, choose tool palette →Large tool set Click the 3D text tool which looks like a Block letter A ENTER YOUR DESIRED TEXT CHOOSE DESIRED FONT AND CLICK PLACE MAKE SURE THE TEXT IS PLACED “ON FACE IN GROUP” BEFORE CLICKING (AKA TOP OF OBJECT) THEN CLICK Zoom out Choose the scale tool Move your mouse to the corner of the text box and click when it says “Uniform scale about opposite point” click Scale your object down and click Click the move tool and move your object to the center of your magnet a. YOU WILL NEED TO REPEAT THE ROTATING, MOVING AND SCALING PROCESS MULTIPLE TIMES BEFORE MOVING ON TO THE NEXT STEP Select and lasso all components, right click, Make Group File menu- export STL, check both boxes, choose a name, and save it. NOTE: TO EXPORT THE .STL FILE YOU MUST HAVE THE SKETCHUP .STL plugin.
With this file you will be able to print Fridge Magnet Design Challenge with your 3D printer. Click on the button and save the file on your computer to work, edit or customize your design. You can also find more 3D designs for printers on Fridge Magnet Design Challenge.