Frsky RX4R Receiver Case
thingiverse
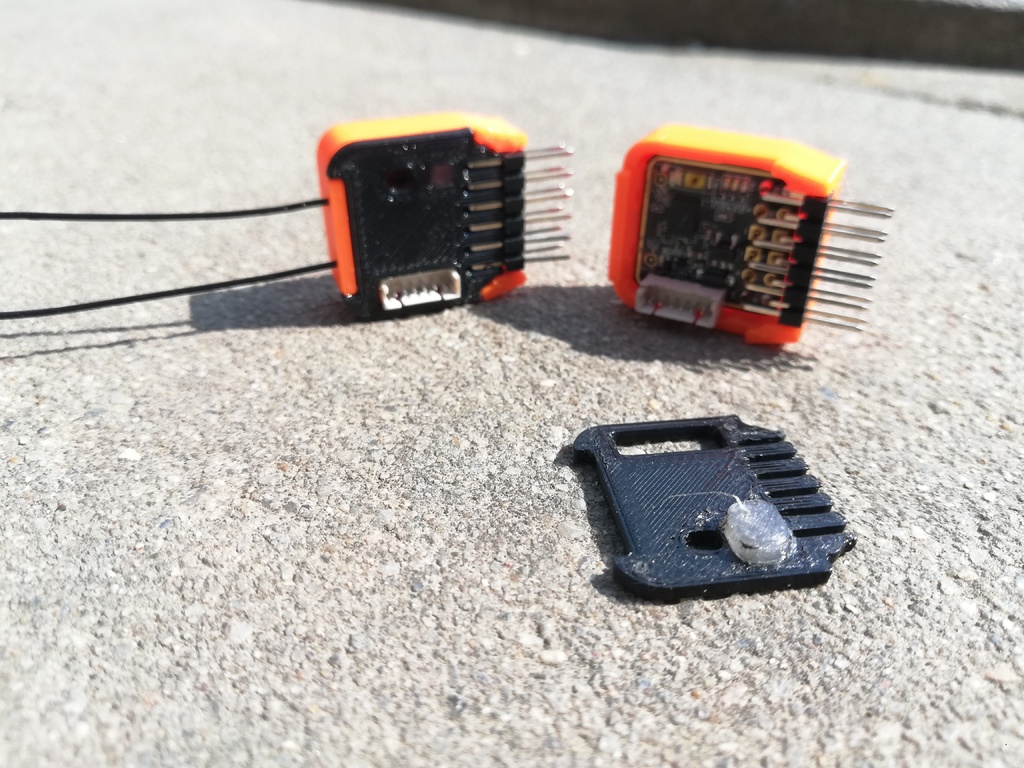
Hi guys I hope you're all doing well ! :) Today I share with you my desgin of a Frsky RX4R Receiver Case with in-place-printed ledlight guide. This Part will not only protect your receiver and its flimsy antenna connectors, it also replaces the cardboard wrapping. This design ist pretty much easy and fast to print and should't require any glue. It also includes an in place printed lightguide ( with transparent PLA ) to increase the visibility oft the leds in bright sunlight. HOW TO PRINT THE LED-LIGHT-GUIDE ? 1. Align the lightguide, with the chamfered side of the rectangular hole ( facing the hole for the bind button ) for the leds as shown in the picture above ( you may have to flip the lid- and lightguidemodel ) Make sure you're positioned the model in a way wich dosen't effect the home procedure especially when you`re using SAFE_HOMING. You will find out why, later ;) 2. Slice and print ONLY the lid and leave it on the build plate after the print has completed. 3. Update following print settings in your slicer for the lightguide. - disable AUTO_BED_LEVELING or delete G29 in your start gcode ( if you use it ) - set Z lift or Z hop to at least 2 mm - disable any brims, rafts, skirts and supports - load a clear or transparent filament matching your lid's material ( different materials will work too but they will not fuse together as well and may fall out ) 5. Slice ONLY the lightguide. 4. Cross your fingers and hit print :D Your 3D printer should now heat up, home all of its axis ( NO BED LEVELING ! ), rais it's nozzle by 2 mm, move to the chamfered rectangular hole, lower the Z axis and start printing the lightguide. Attention !!! You have to disable AUTO_BED_LEVELING and move the models to a safe place for homing, to ensure your printer will not crash into the part ! Everything should "snap" firmly together and be hold just by friction. If something ist to loose just use some small drops of superglue to secure it. If something doesn't want to fit at all, try to decrease temperature, layerheight and extrusion multiplier to make things more precise. To fit the antennas into the case you have to rotate the ipex connectors 90 degrease towards the middle and cross them through the holes. ( as shown in the picture above ) I also designed an RX6R Case. I wish you a successful printing and stay and also fly safe ! :) Kind regards Benno :) PS: I also would love to hear and see from your prints ! :)
With this file you will be able to print Frsky RX4R Receiver Case with your 3D printer. Click on the button and save the file on your computer to work, edit or customize your design. You can also find more 3D designs for printers on Frsky RX4R Receiver Case.