FSR Mounts - Rostock Max V2
thingiverse
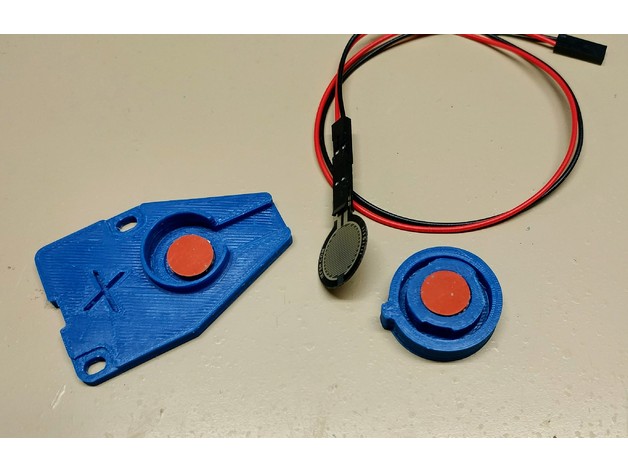
While trying to find the most effective way to auto-calibrate my printer, I came across EclecticAngler's blog and contributions to the SeeMeCNC forums for using the FSR kit from Ultibots. EclecticAngler graciously provided some mounts here on Thingiverse, but I decided that I wanted to design something a bit different to make it easier for me to mount. Design goals for this included not having to drill additional holes in the printer base plate and ease of adjustment. Update Added some modified mounts that will hopefully work for the new Tricklaser FSR plate. These have NOT been tested as I do not have the plate. A fellow Rostock V2 user requested the modification with a suggested offset so hopefully it is close enough to work. Please leave comments or send messages if anyone tries this. Print Settings Printer Brand: SeeMeCNC Printer: Rostock MAX v2 Rafts: No Supports: No Resolution: .2mm layer with .5 nozzle Infill: Doesn't matter Notes: Printed in Microcenter Inland ABS at 240 with the bed at 90 on glue stick. I use a Prometheus hot end in my Rostock Post-Printing As mentioned in EclecticAngler's FSR mounts, it will take a little bit of sanding and filing to ensure that the plugs move smoothly within the mounts. How I Designed This Using EclecticAngler's design as proof of concept and incorporating the desire to not have to drill holes in the base plate of my Rostock, I used the screws already in place on the base of the printer. The FSR mounts are thin enough to not require new screws. There is some built in adjustment in the mounting holes to help ensure smooth motion of the plugs within the mounts. Also the holes provided in the plugs are off center allowing for concentric adjustment when attaching to the bed plate. Installation is a matter of moving the bed to allow installing the mounts, attaching the plugs to the bed and then fine adjustments. I made the fine adjustments before installing the FSR sensors and silicone pads. Quick checks of the motion of the bed confirmed my setup. After that, I simply ran the wires down through the center hole and attached them to the JohnSL board on the mount provided in the original FSR mount design.
With this file you will be able to print FSR Mounts - Rostock Max V2 with your 3D printer. Click on the button and save the file on your computer to work, edit or customize your design. You can also find more 3D designs for printers on FSR Mounts - Rostock Max V2.