FT-817 DC-Devil
thingiverse
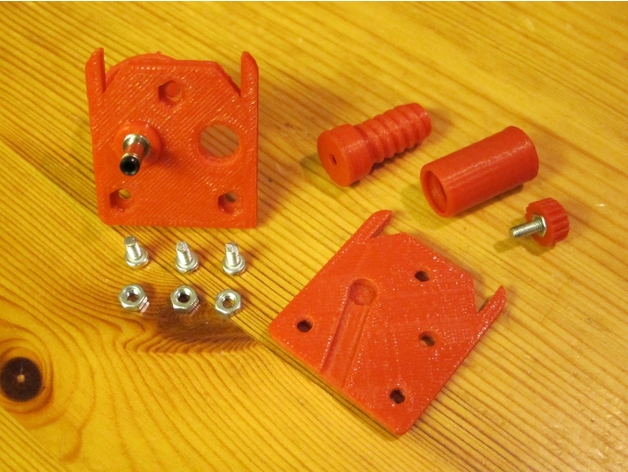
The following instruction applies only to individuals with exceptional electrical skills. No liability will be assumed for damages resulting from this. The angled plug is designed specifically for powering the Yaesu FT-817 and features a thumbscrew that secures it in place (remove the existing grounding screw first, located on the back of the device). A 2x0.75 mm² cable is used, but if thinner cable is necessary, it must be wrapped with insulating tape to ensure a secure connection. The required DC plug part has a straight design measuring 1.7 mm / 4.0 mm / 9.5 mm and can be obtained from the specified supplier. The connections are shortened to 3 mm before being screwed into place. The cable is stripped and soldered approximately 2mm per contact. Before tightening the cover, it's essential to verify that the contacts are not short-circuited and then secure them with a drop of adhesive. A total of four screws (an M3x10mm screw, three M3x6mm screws, and associated nuts) are required for assembly. To protect the radio from excessive current, insert a 2A fuse into the positive line. The universal fuse holder can accommodate both European (5x20mm) and US standard (6.3x32mm) fuses. The contacts to the fuse are connected using 5cm bare wire and secured with a node. Optional overvoltage protection and polarity reversal can be achieved by incorporating a suppressor diode into the circuit, as depicted in the diagram. Special thanks go out to Peter, VK3YE, for his inspiring YouTube video (Less Stress for Your FT817's External Power Connector). To remove excess PLA from the printed part, use a 5mm slotted screwdriver in the recessed areas on the outside. It is also recommended to remove any PLA residue in the screw threads with an iron file before assembly.
With this file you will be able to print FT-817 DC-Devil with your 3D printer. Click on the button and save the file on your computer to work, edit or customize your design. You can also find more 3D designs for printers on FT-817 DC-Devil.