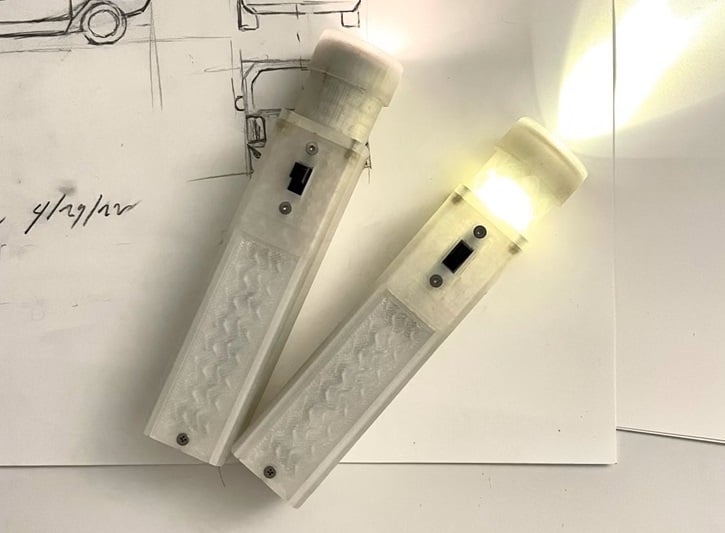
Fully 3D Printable Flashlight
thingiverse
Screw Kit: "Hilitchi 210-Piece Metric M2" Battery Holder Screws: Self tapping M2x5mm or x8mm Heat-set Inserts: "in-saiL 100pcs/lot M2x3.0mm Brass Insert" Switch: Nidec Copal Electronics MFS201N-Z Aluminum Reflector: "S5 20mm Aluminum Smooth Reflector Flashlight Reflective Cup Reflector Bow" Wire: 18 AWG silicone wiring Socket for E10: " E10 Copper Light Bulb Screw Base PCB Socket Lamp Holder Vintage Dia 1cm" Basically the minimal stamped brass sockets with solder tabs. Socket for Bi-pin bulb: Mill-Max 853-13-002-10-003000 Battery Holder: Keystone 2460 Lens: 23.7mm diameter polycarbonate circle 1.6mm thick. (Thickness is NOT critical) I oftentimes enjoy building a Joule Thief circuit or attaching an incandescent bulb to a battery. A battery attached to a bundle of wires and a light source isn't exactly practical, the need for an enclosure arises which allows the circuit to be used outside of a workshop environment. After pursuing the existing selection of fully 3D printable flashlights available I wasn't satisfied and decided to try my hand at it. The result is 3 fully 3D printable flashlights you can make at home! 1. E10 Base Incandescent 2. T1 Bi-pin Incandescent 3. 5MM LED All flashlights use the same body and operate off of a single 1.5V AA alkaline battery. 1.5V E10 base incandescent bulbs can readily be found on eBay as "112 Light Bulb" or "Norelco 112." They are somewhat dim but make for a good reading light. You must use the "Lamp Reflector Head Slide On" for this lamp as it is larger than the S5 reflector and is therefore incompatible. These disadvantages are offset by their nostalgic aura! You can paint the inside of the "Lamp Reflector Head" with reflective paint to help focus some of the peripheral light however the glass bead lens on these 112 bulbs seems to do most of the heavy lifting. The T1 Bi-pin flashlight uses bulbs similar to those used in the Maglite Solitaire, I also found some on eBay listed under "Miniature Bead Bulb 1.5V, T1 (3 mm) bi-pin, G1.27." They are brighter but use more power. Due to their smaller form factor you can use the S5 reflector which makes them a better choice for general illumination. Glue the reflector in with a drop or two of super glue. Also use some glue to set the Mill-Max socket in place. The LED version is the brightest and uses the least power. I used an Everlight 334-15/X2C1-1WYB as my LED because it is warm white and can handle 30mA. Glue the LED into the base tilted "Lamp_Mount_27mm_Slide_On_LED." The lifetime of the LED is very long so I decided not to make it removable. To boost the 1.5V battery to the voltage required for the LED simply use a QX5252 and 100uH inductor. Leave the SBAT pin floating and it will operate whenever power is applied. You can also use a simple Joule Thief circuit if you prefer. I do like the QX525 however because you can set the LED current with the inductor value. The LED works with and without the reflector. I have also included a 3D model of the bi-pin bulb if you find it useful (PN: 1231-DI.)
With this file you will be able to print Fully 3D Printable Flashlight with your 3D printer. Click on the button and save the file on your computer to work, edit or customize your design. You can also find more 3D designs for printers on Fully 3D Printable Flashlight.