Fully 3D Printed Small CNC Router/Plotter
thingiverse
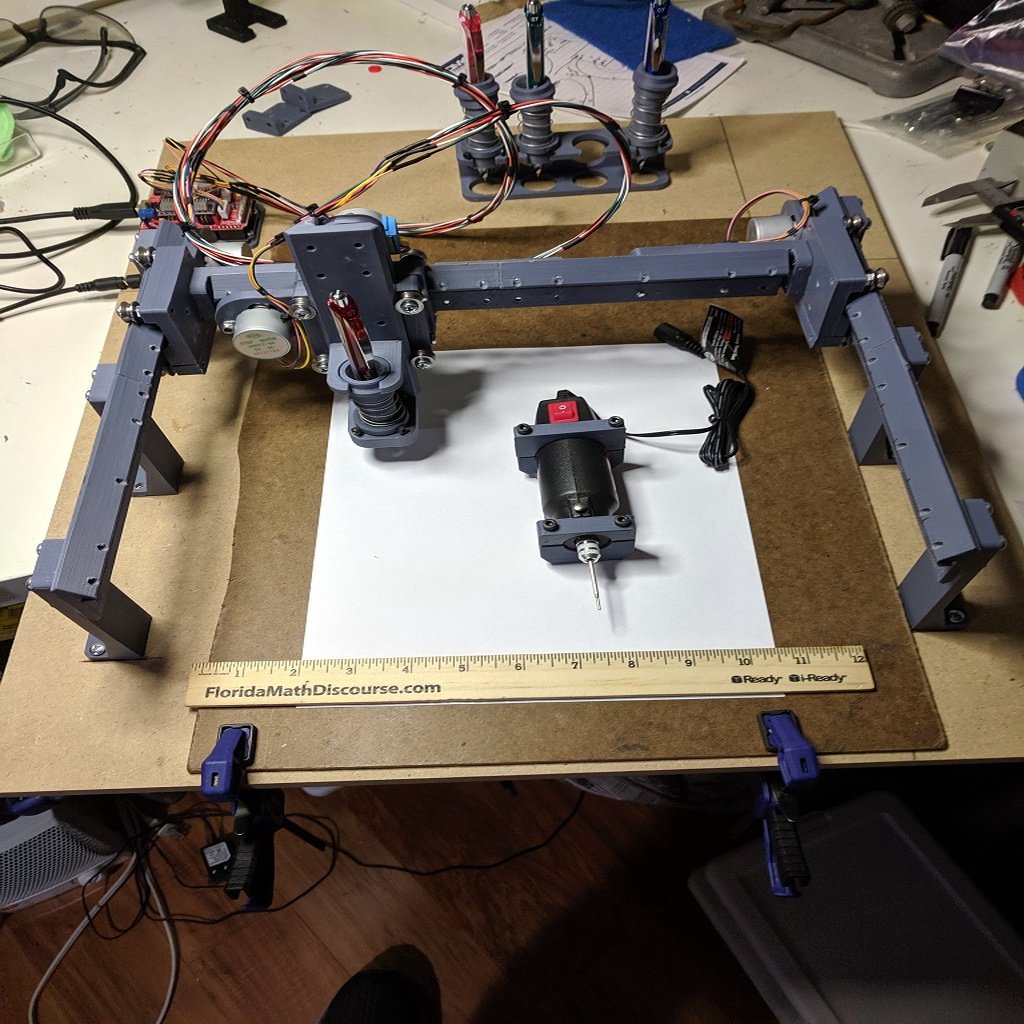
It appears that this text is a detailed documentation of someone's DIY CNC milling machine project, including design choices, printing settings, and various modifications they made during the build process. The author also shares their experiences with different materials, adhesives, and tools, as well as some issues they encountered along the way. Here are some key points that can be summarized from this text: 1. **Printing Settings**: The author used a 0.5mm nozzle, 4 top and bottom layers, and a layer height of 0.25mm for printing all parts in ABS. 2. **Material Choice**: They opted for ABS due to its ease of use but mention that stiffer materials like PLA or Nylon X might be better suited for this project. 3. **Design Changes**: Initially planning to replace the pen holder and spindle holder on the Z rail, they considered printing a new Z rail for each holder instead for easier swapping. 4. **Adhesives**: They used Dap Rapidfuse for gluing the GT-2 belt to the linear rails and Plastruct Bondene for attaching Zip Tie Mounts to the drive carriages or X-axis rail. 5. **Cable Management**: The author recommends using Zip Tie Mounts and Zip Tie Holder(s) for cable management, which are not shown in the drawings but can be attached with Rapidfuse. 6. **Spoil Board**: They used a piece of 1/8" masonite clamped on top of the MDF as a replaceable spoil board due to its smoother surface and better pen performance. 7. **Improvements**: The author invites feedback and suggestions for improvements, indicating that this is an ongoing project. Overall, this text provides detailed information about the design, printing, and assembly process of their DIY CNC milling machine, highlighting both successes and challenges they faced during the build.
With this file you will be able to print Fully 3D Printed Small CNC Router/Plotter with your 3D printer. Click on the button and save the file on your computer to work, edit or customize your design. You can also find more 3D designs for printers on Fully 3D Printed Small CNC Router/Plotter.