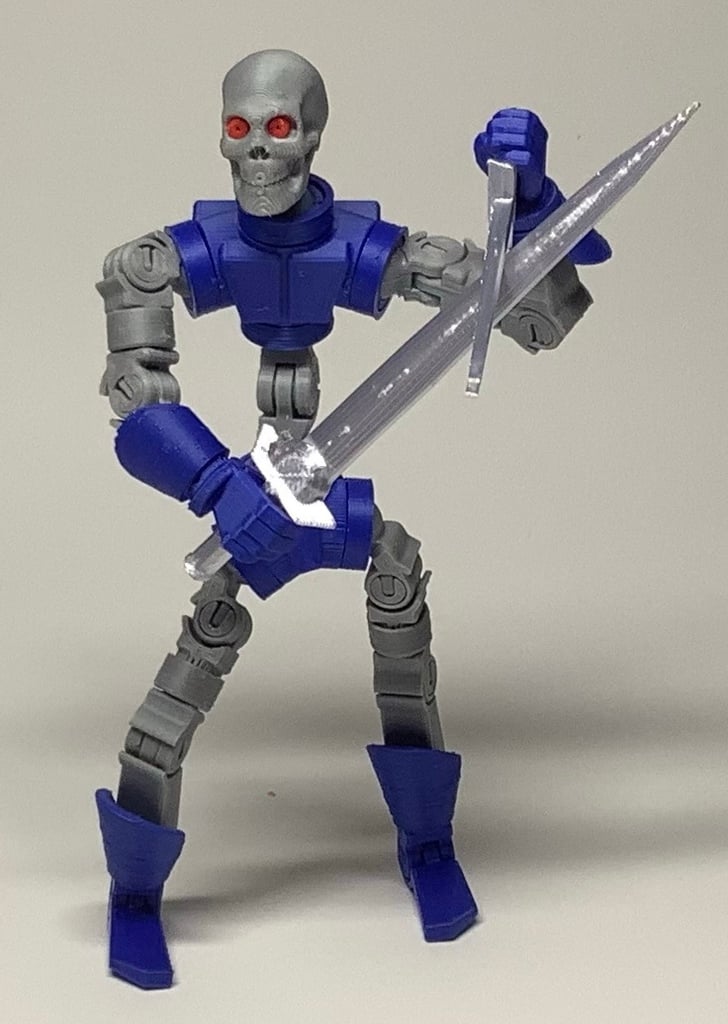
fully posable robot
thingiverse
#####If you print this robot, i would love to see your makes or hear about how the printing process went for you! That will help me to improve my designs. Thanks! #####CONTEXT I wanted to print a posable figure but the models I found either broke during assembly or were becoming too loose after a few days. This is my attempt to design PLA joints that are easy to assemble but not too loose. I designed 3 joints: a x axis joint, a z axis joint, and a ball joint. My solution is to split the joints in 2 parts: a cylinder in the xy plane, and a part that tight fits inside. This way the joint does not break during assembly, but can be tight afterwards. It tooks many many trial to find the good compromise (see last photo with all the scraps). And because why not, i made a posable robot (terminator T9 style) using these joints. It can be printed in 2 colors for more visual impact. #####PREPARATION The assembly is a tight fit. By luck (for you) my print head broke before I finished the project. I replaced the print head, but all my parts were now glued together! I found out i had to calibrate the flow to have reliable results. I strongly recommend that you calibrate your print head with the same process if you want the print to be ok. I use CURA 5.2.1 slicer with standard settings for PLA, 0.2mm layers, 0.4 mm nozzle. Changes: combing mode: all, supports : enabled, touching buildplate. #####FLOW CALIBRATION Slice the flow.stl file in vase mode: surface mode : both, + spiralize outer contours. It takes 12 min to print as an empty bucket. Measure the wall thicness with a caliper. It should be 0.44 mm. If bigger, reduce the flow, "extruder speed" on my artillery genius, down to 90%. Print, measure. Repeat until you find the good flow % for your print head. Then use this extruder speed for all your next prints. I made a video to show the process: https://youtu.be/NFlp3J8Tzzs #####TEST PRINT Just to be sure, slice and print the test.stl file. (not in vase mode!). It takes only 45 min and all the joints are present so you can check the flow is ok. If too tight, try again with -5% flow, if too loose try with +5%. I made a video to show what to expect: https://youtu.be/iSMvsvkrpvY #####PRINT Slice and print the gray parts (all_gray). Should take 2h 30min Slice and print the color parts (all_color). Should take 2h I used various wanhao PLAs. Slice and print the eyes. I used polymaker polymax red, because it is very luminous, its better for the eyes. Slice and print the weapons. I used JAYO silver PLA. Assemble the parts. The assembly should be tight but feasible by hand (except the pins). If you have to use some plyers for the rings, then the rings will break at some point, so dont. Instead try to print with -5% flow. The parts are designed to be very robust so they should not break. I made a video to show what to expect: https://youtu.be/oJZm3YygsSs I remixed the skull from Taran3D (thank you): https://www.thingiverse.com/thing:2303986 . #####[EDIT 24 02 2023]: on the request of my first maker, NicoleV72, i have added a stormtrrooper head, a remix from https://www.thingiverse.com/thing:4613855 ; I printed it in white and the black eyes and lines are just drawn with a permanent maker. Note that with this head the neck ring is not easy to to put in place. So I didnt, and it's ok, the head is sufficiently grabbed by the ball joint and doesnt move.
With this file you will be able to print fully posable robot with your 3D printer. Click on the button and save the file on your computer to work, edit or customize your design. You can also find more 3D designs for printers on fully posable robot .
