Fully printed Desk Vice with flexible jaws and pin jaws
prusaprinters
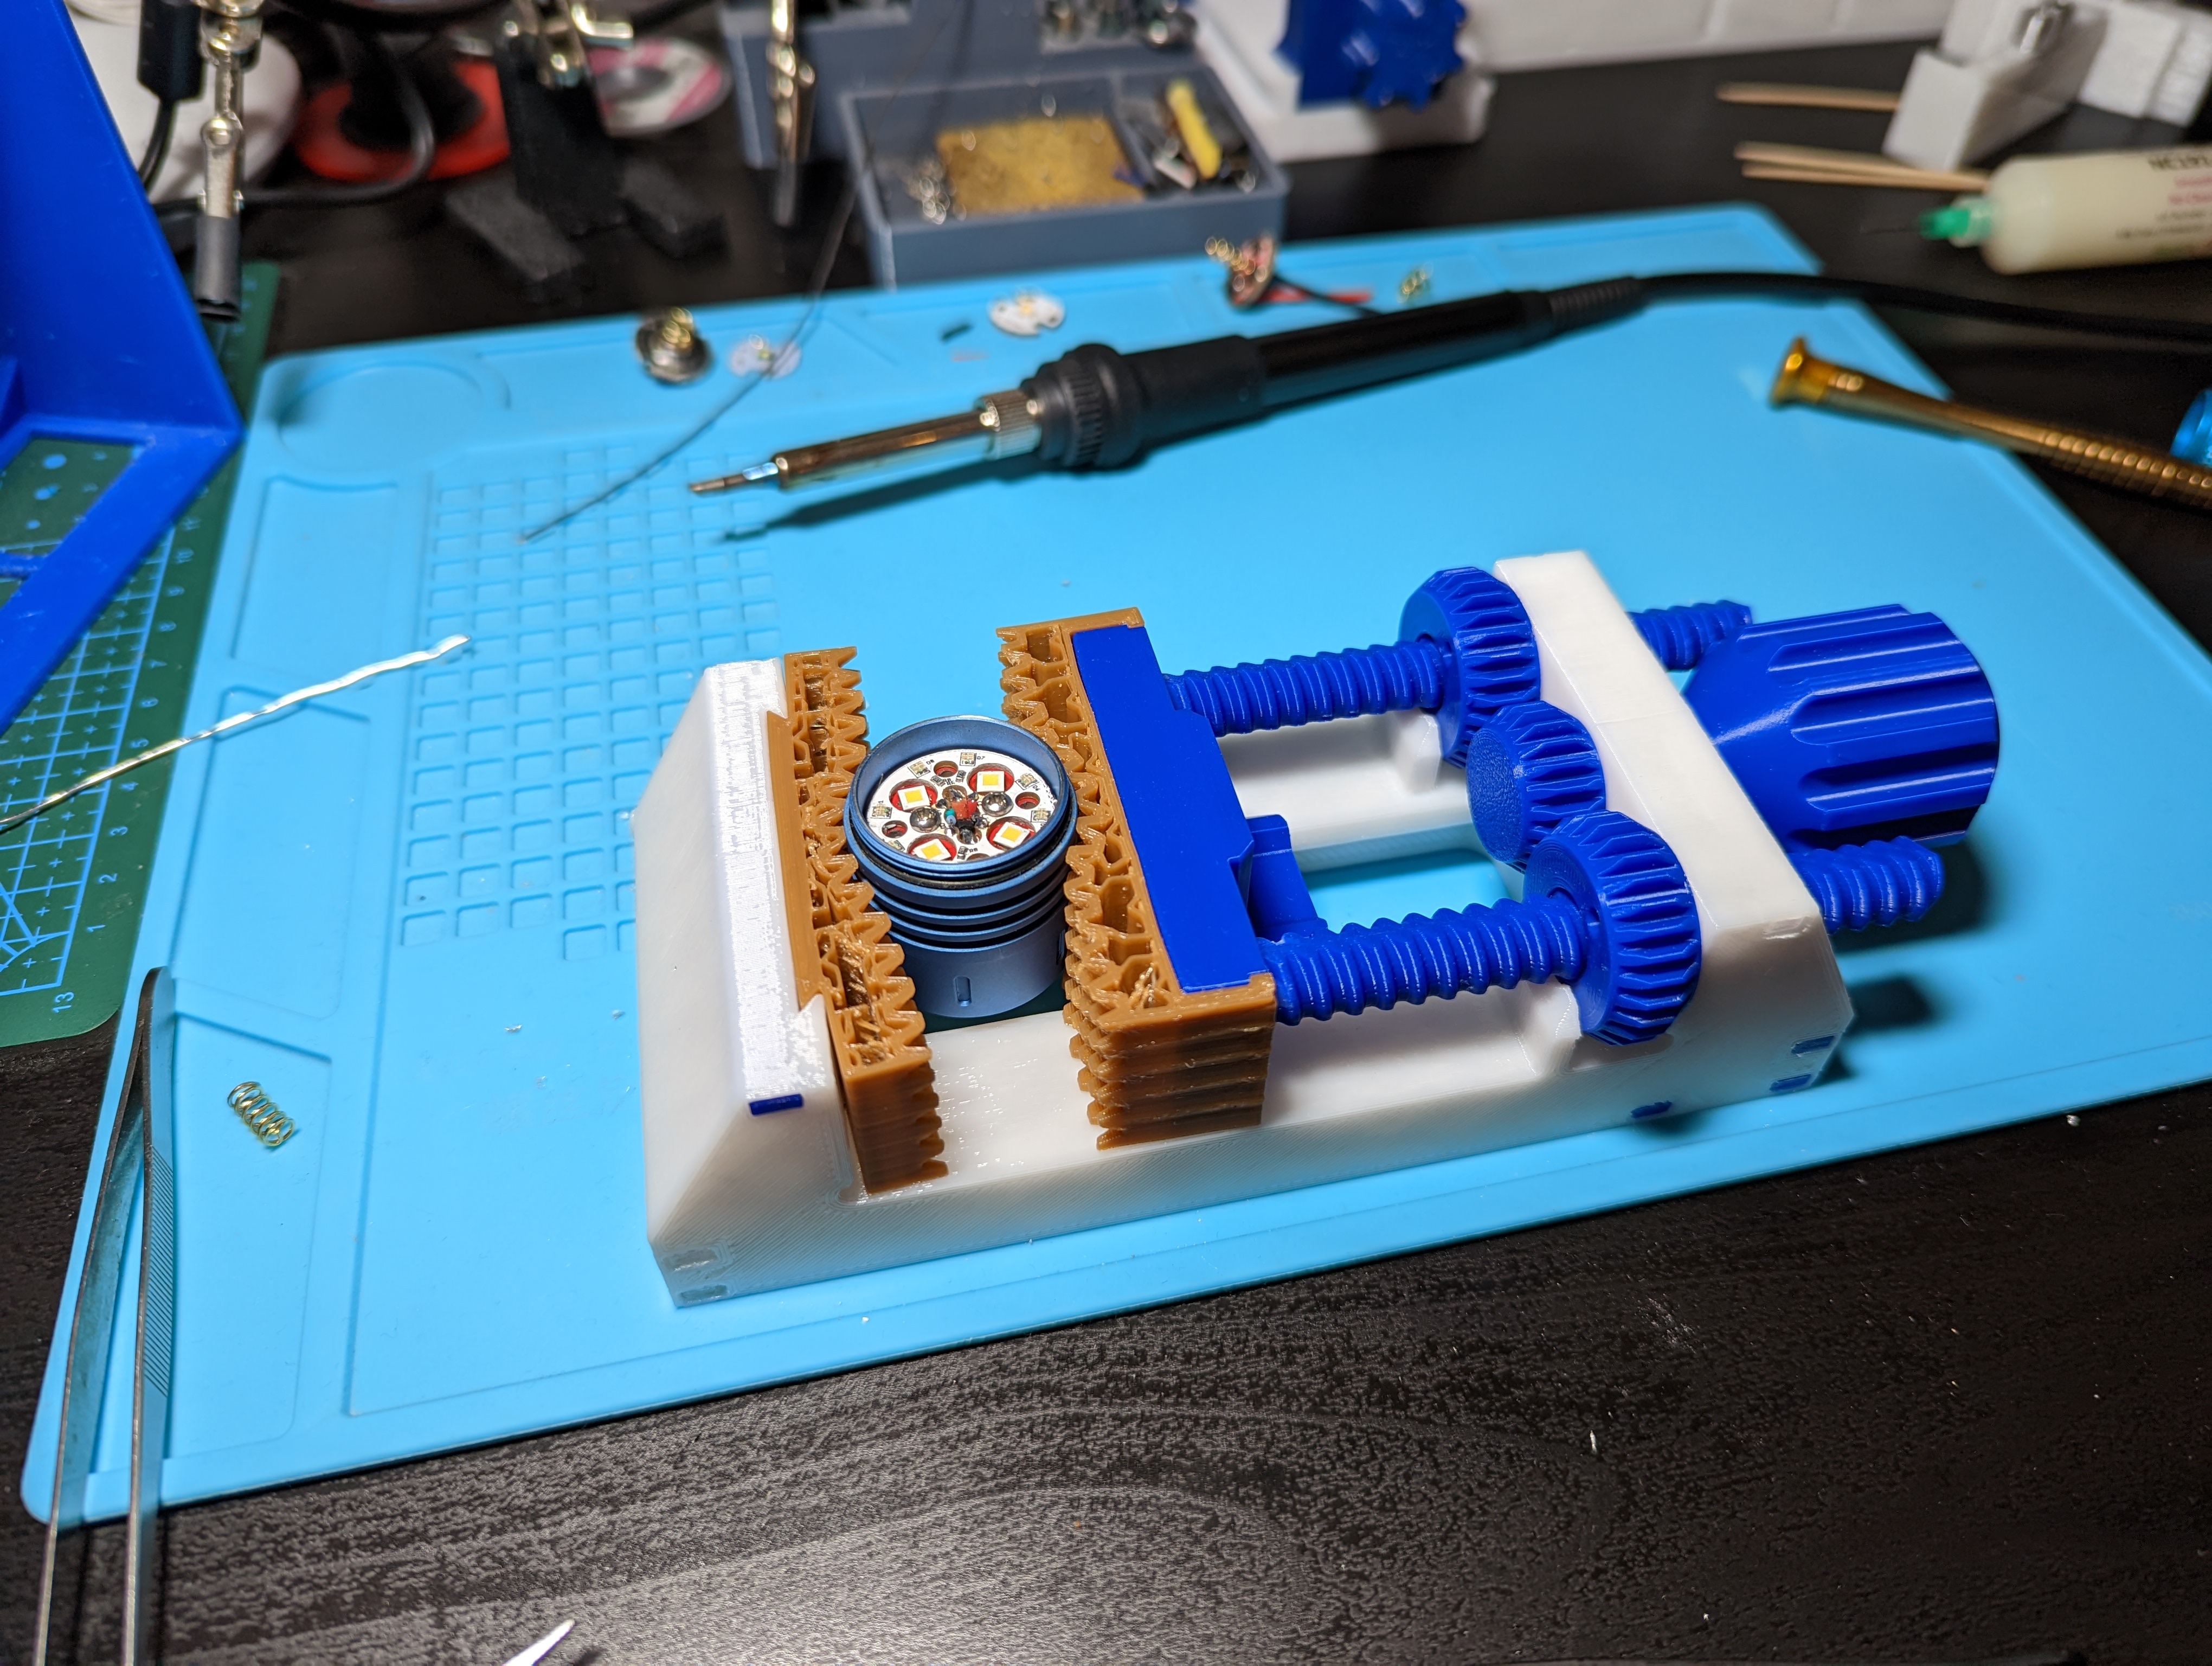
<h3>Vice:</h3><p> Full disclosure, I did not design the vice. It was an existing design by TheGoofy on Thingiverse. He has a whole bunch of awesome designs and I highly recommend you check them out. That being said I used it to base my jaw designs around because it is the best printed vice I have come across, so I am including it in this post for completeness.</p><h4> <i>Parts I printed in PETg:</i></h4><ul><li><strong>Vice_Base_A</strong></li><li><strong>Vice_Base_B</strong></li></ul><h4> <i>Parts I recommend be printed in PLA:</i></h4><p><i> I recommend using PLA for these parts because they are interfacing parts and PLA works smoother than PETg.</i></p><ul><li><strong>Vice base Clip</strong> ( I had to scale down to 95% on the Z and X axis, in other words, all axis except the axis that affects length, this will be different depending on how you orient the parts on your print bed. You want to make it skinnier, without altering the length. This made it possible to slide the clips through the PETg bases ).</li><li><strong>Vice_Handle.</strong></li><li><strong>Vise_Main_Gear_M12x4.</strong></li><li><strong>Vise_Sliding_Jaw_Block.</strong></li><li><strong>remix_Vise_Sliding_Jaw_Rod_M12x4_A.</strong></li></ul><p>You will need to screw the rods into the jaw block. I highly recommend that you also glue them for added security, it will probably save you a headache later on. I dropped in some BSI Insta-Flex after screwing in the rods and so far it has worked fine. I would probably recommend using some Maxi-Cure or IC-2000 instead, but any glue that sticks to plastic should work. As a side note, I printed the Base halves with a 0.6mm nozzle and 1.2mm perimeter walls and that worked well.</p><p> </p><p>Please reference this video by TheGoofy for guidance on assembling the vice. Do note though that the model he shows being assembled in this video is slightly different than mine, so just keep that in mind. Make sure to pay extra attention to the part where he describes how to use the dots on the gears to get them set with the proper timing, this is very important for smooth operation.</p><p>Video: <a href="https://www.youtube.com/watch?v=mziT7KV-fRI">https://www.youtube.com/watch?v=mziT7KV-fRI</a></p><p>Original Vice post on Thingiverse: <a href="https://www.thingiverse.com/thing:2064269">https://www.thingiverse.com/thing:2064269</a></p><p> </p><h3>Flexible Jaws:</h3><p><i><strong> </strong></i>I Printed these in Sainsmart 95A TPU. I printed them with a 0.4mm nozzle / extrusion width. I Sliced them in cura 4.13.1 and used the “Per model settings” so that I didn't have to adjust my profile back and forth. I modeled the jaws as solid models in Fusion 360, then adjusted the settings shown below to obtain the hollow / springy affect once printed.</p><p>Here's some settings you'll need to set specifically for these jaws:</p><ul><li>Walls: 2.</li><li>Infill pattern: Cross.</li><li>Infill percentage: 13%.</li><li>Top / bottom layers: NONE.</li><li>I added a modifier mesh and used it to set the dovetail (where it interfaces with the vice) to 2.0mm perimeter walls. This made it solid so that it will be stiffer and stay secured to the vice better.</li></ul><p>Please see attached screenshot of Cura to get an idea of how it should look once sliced.</p><p> </p><h3>Pin Jaws:</h3><p> I printed these in PETg with a 0.6mm nozzle and extrusion width which worked fine. They have modeled threads for M4 screws which is one reason I recommend printing them in PETg if you can, it will be a little more resilient.</p><p>The first time you try fitting the stationary jaw to your vice take your time and check how tight the tolerance is. Mine was tighter than I was comfortable with, due to printing them both in PETg (I've found that PETg on PETg does not slide very well, they almost want to stick together). If it feels like it is too tight and will be hard to get back out, take a small file to inside surfaces of the dovetail a little at a time until it slides in and out with minimal resistance. I only had to take it down a very small amount.</p><h5>M4 Vice Pin Cover:</h5><p> I printed these with a 0.4mm nozzle and 0.6mm extrusion width in PETg. Their purpose is to protect your workpiece from being damaged by the M4 screws.</p><h5>Jaw Clip Side A and B:</h5><p> These slide onto the sides of the moving jaw in order to secure it to the sliding jaw block. I landed on this solution after trying a few different ways of clipping the jaw to the block, I found this one is the simplest and most affective. It allows you to apply pressure in either direction without worry of the jaw popping out. I have used it to hold the inside of a copper flashlight bezel while I applied ProtectaClear to the outside for example.</p>
With this file you will be able to print Fully printed Desk Vice with flexible jaws and pin jaws with your 3D printer. Click on the button and save the file on your computer to work, edit or customize your design. You can also find more 3D designs for printers on Fully printed Desk Vice with flexible jaws and pin jaws.