Fully Reworked/Custom 3D printer
prusaprinters
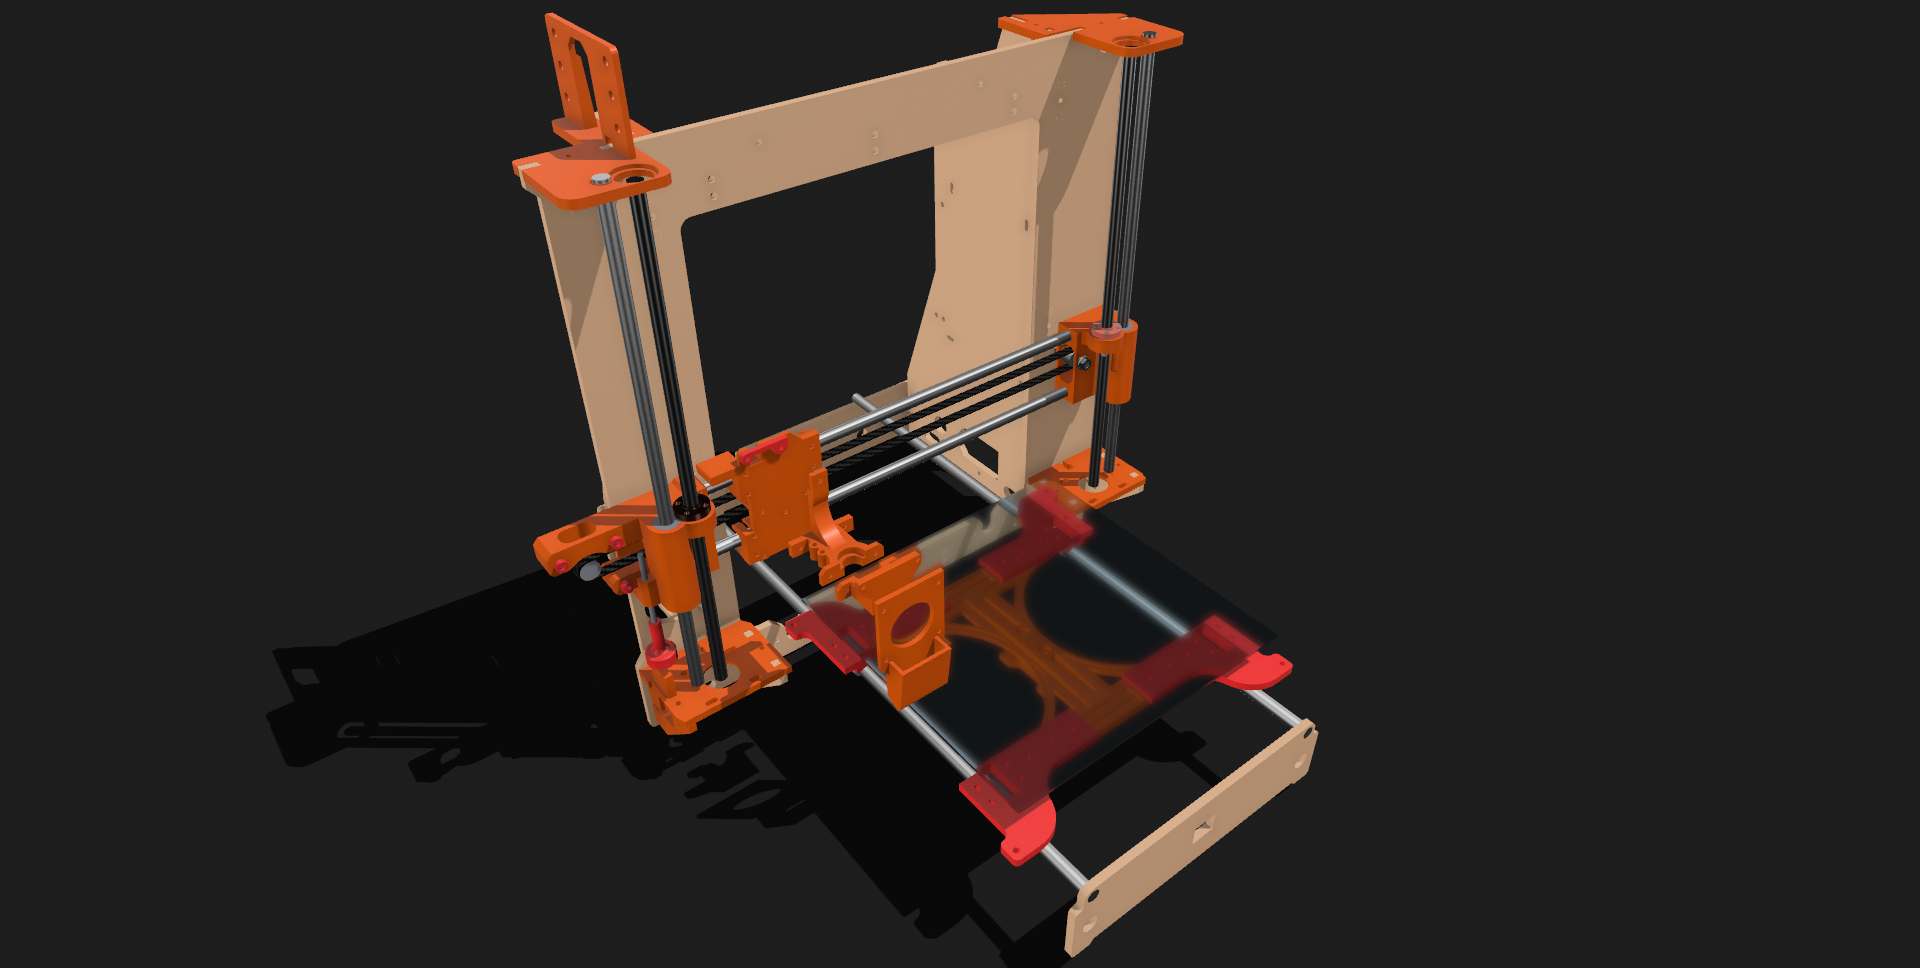
<p><strong>Short Story:</strong><br>I got this printer from a friend.. and I wanted to save it somehow because it did not work.<br>(Deformed original printed parts, deformed bed, bad extruder, semi-working hotend..etc)<br><i>And it seems to be a good hobby right? :)</i><br><br>So I ordered cheap parts like v6 hotend clone, a new extruder..etc. Then I recreated every part, mount, original parts..etc in a CAD app because my setup was totally custom so it was impossible to find 3d models for my project.<br>In short, now it works. <br><br>Is it good? To be honest, not really. It's far far far far… … far… away from my Prusa Mini. <br><i>But it's just a hobby project :) Maybe.. it will be a gift for a kid, but today it's not good enough. :)</i><br><br>So. I wanted to share this model because I think many of you are trying to do the same because it's really fun even if the results are… let's say not really good every time :)<br><br>In short, even if your printer is not the same, I hope this model<i> </i>can help<i> (or at least I can save your time somehow)</i> you guys because measuring every part over and over again and modeling took a little more time (and filament :( ) than I thought. <br><br><strong>Before you print these parts:</strong><br>Check every dimension on my models and on your “device”.<br>It's a totally custom printer and CTC documentation is not really good, they have different printers and variations.<br><br><strong>Attachment:</strong><br>Every reworked part in:<br>.3mf <br>.stl<br><br>Every reworked AND dummy/original parts in:<br><strong>Update: .STEP - 2022.09.04</strong><br>.XT - If you want to use a CAD app<br>.Shapr - <i>import is free in this CAD app, I created every model file in Shapr3D so you can check/change everything that you want.</i><br><br><strong>Known issues:</strong><br>- The original rods are not really straight.. so the bearings are too tight in place. <br><i>So if you have the same problem with the rods, try to cut into the related parts.</i><br><i>Related parts: "Z Right Part 1" and "Z Right Part 2". </i><br><i>Another idea, </i>the two rods are too close to each other now.<br><br>- X belt tensioning is not really perfect, it works but not perfectly, I didn't have a better idea for belt tensioning. <br><i>Related parts: "Belt_tight_1", "X hotend mount base"</i><br><br>- It's not an issue but unfinished: Auto bed leveling mount. I'm still waiting for the bed leveling device so that part is missing. <i>But on the v6 hotend mount there are 2 screw holes to connect this part in the future.</i><br><br><strong>Material:</strong><br>I used Prusament PETG everywhere. <i>Or use ABS if you can (In my opinion).</i><br><i>And do not forget the related temp. limit if you want to use heated bed too.</i><br><br><i><strong>Printer settings:</strong></i><br><i>Nothing special. I tried to avoid using support. Infill depends on your material. I used the default Prusament Petg / 0.2mm Speed settings in Prusa slicer. (20% if i'm not mistaken)</i><br><br>I Printed every part with a Prusa Mini, that's why the plate mount had to be assembled from 5-6 smaller pieces. I used M3 screws everywhere.<br><br><br><br>++Happy building!</p>
With this file you will be able to print Fully Reworked/Custom 3D printer with your 3D printer. Click on the button and save the file on your computer to work, edit or customize your design. You can also find more 3D designs for printers on Fully Reworked/Custom 3D printer.