Functional Beyblade Metal: Galaxy Pegasus - with compatible launcher.
thingiverse
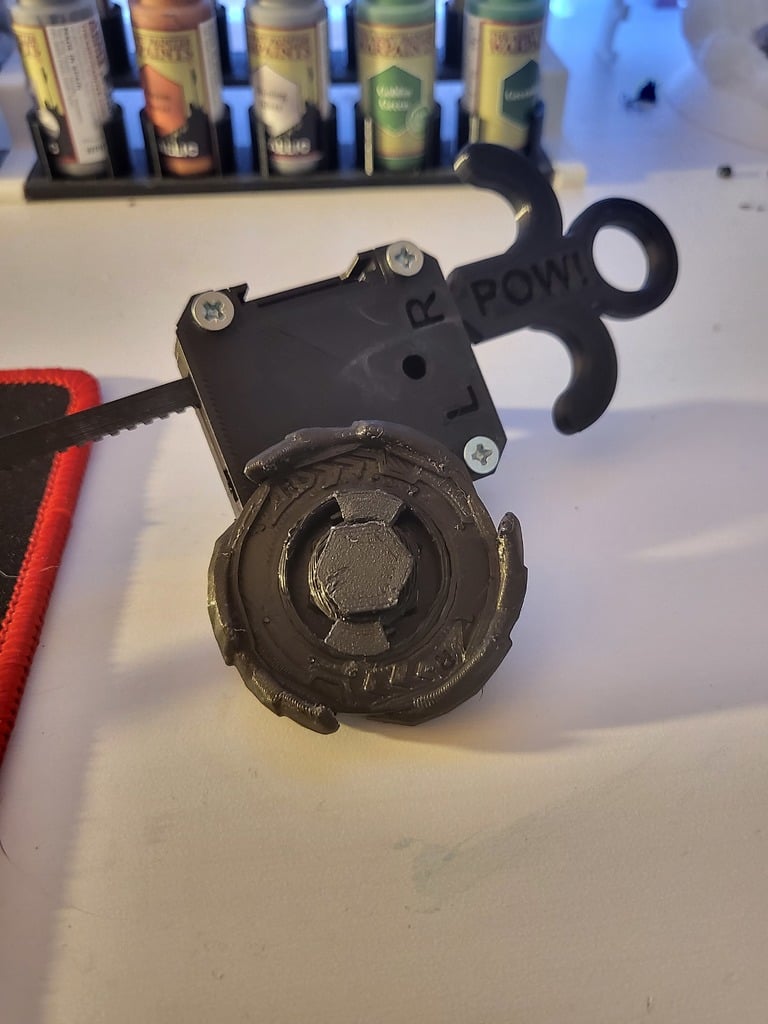
To put it simply, for the past two weeks, I wanted to recreate a Beyblade using 3D printing. However, there are no Metal Fusion Beyblades available as replicas of existing ones on various 3D printing websites. There are only a few dubious models. That's why I created a replica of Galaxy Pegasus myself. It's not perfect, but my limited modeling skills didn't allow me to do better. To create this top, I used the work of two other creators of thingiverse: krumerya23 and WuffyUnikitty I'm including the 3D files of the launcher here for you. Instruction for launcher: Orientation: Bot.stl - Print as is with supports touching build plate only. (ABS) Top.stl - Flip it so the flat part is touching the build plate. No supports. (ABS) Flapper.stl - Print as is with supports touching build plate only. (ABS) Gear.stl - Print as is. I used supports touching build plate but you may get away with none. (PLA) Spring V2.stl - IMPORTANT You need to rotate this 90 deg so the two spikes (pillars) are facing upward. (PLA) Bearing.stl - Print as is. No supports (PLA) Spinner type A.stl - Print as is with supports touching build plate only. Maybe infill 98% (PLA) Spinner type B.stl - Is for metal fusion and is not tested. print as is with supports touching build plate only. (PLA) Ripper.stl - Print as is no supports. (PLA) Handle: Bung.stl - You will need 4 of these. - Print as is with supports touching build plate only. (PLA) Handle Top.stl - Print as is with supports touching build plate only. (PLA) Handle Bot.stl - Print as is with supports touching build plate only. (PLA) Handle (insert) - Print vertically with the two round parts facing upward. No supports. (PLA) Here is a quick video showing the launcher in action. https://youtu.be/dh5kGrni3n0 Put it together: Start with the bottom part of the launcher. Push the Spinner shaft through the hole from the bottom. Place the bearing over the shaft. Place the gear on top (look at photos to check the orientation) Push the PLA spring into the two holes (look at photos to check the orientation) The Spring should bow upwards not downwards. Then Insert the flapper. The pointy bit should be facing down. (Smooth side up) (look at photos to check the orientation) The pointy bit needs to slide under the gear! Place the top part of the launcher on top making sure the flapper stays in place. The project is functional but still in the design phase to achieve perfection, so it may require some minor tweaking. To insert the screw, I had to modify its placement on the fusion wheel, and the energy ring doesn't fit perfectly.
With this file you will be able to print Functional Beyblade Metal: Galaxy Pegasus - with compatible launcher. with your 3D printer. Click on the button and save the file on your computer to work, edit or customize your design. You can also find more 3D designs for printers on Functional Beyblade Metal: Galaxy Pegasus - with compatible launcher..