Functional Desktop/Bedside Clock
thingiverse
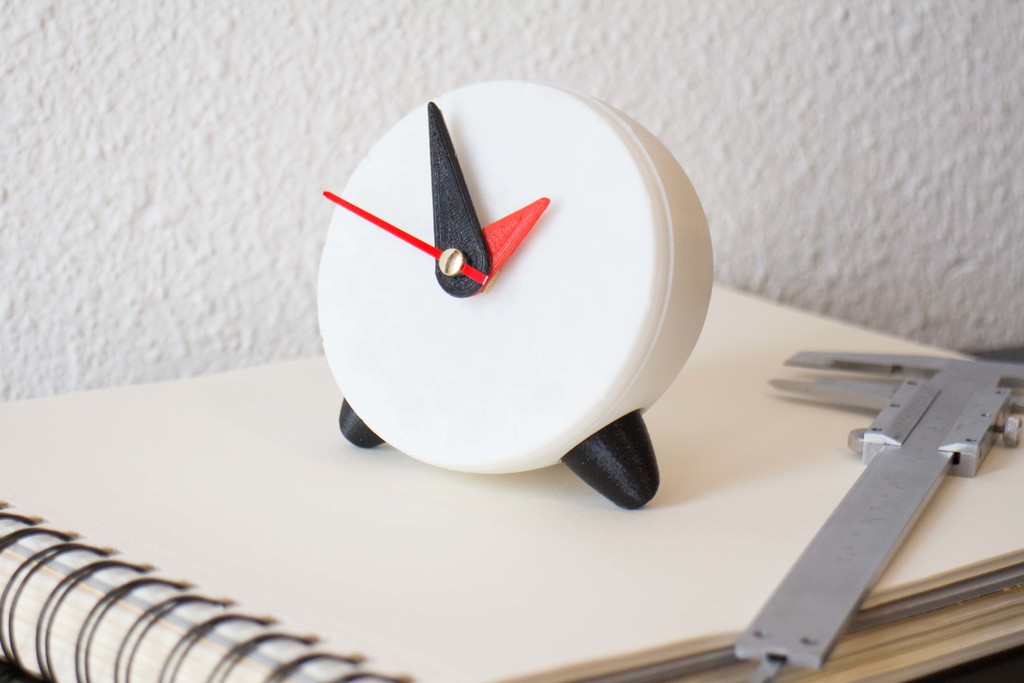
<iframe width="560" height="315" src="https://www.youtube.com/embed/heo4tI44vx8" frameborder="0" allowfullscreen></iframe> Designed from the ground up for 3D printing, BoBo Clock makes a great companion at your desk or bedside table. You can get the quartz movement for the clock here. <img src="https://www.tonythings.com/wp-content/uploads/2017/06/Thingiverse-featured.jpg" alt="Thingiverse BoBoClock" width="2300" height="1533" class="aligncenter size-full wp-image-2887" /> <img src="http://www.tonythings.com/wp-content/uploads/2017/08/3D-printable-clock-on-sketchbook.jpg" alt="3D printable clock on sketchbook" width="4524" height="3016" class="aligncenter size-full wp-image-2828" /> <h1>Assembly</h1> The assembly takes only 2 minutes without using any screws or glue. <h2>Step 1</h2> First, attach the legs to the back by inserting each leg and twisting it 90 degrees to lock it in place. <img src="http://www.tonythings.com/wp-content/uploads/2017/08/step-1-2.jpg" alt="Assembly step 1" width="2000" height="1413" class="aligncenter size-full wp-image-2836" /> <h2>Step 2</h2> Next, insert the shaft of the clock movement into the front and tighten it in place using the included nut. <img src="http://www.tonythings.com/wp-content/uploads/2017/08/stage-2.jpg" alt="Assembly Step 2" width="1475" height="1211" class="aligncenter size-full wp-image-2837" /> <h2>Step 3</h2> Attach the hour and minute hand onto the shaft. If the holes are too small, use a sandpaper or knife to enlarge them. Once the hands are attached, move them both to midnight and set the correct time using the dial on the back. <img src="http://www.tonythings.com/wp-content/uploads/2017/08/step-3.jpg" alt="Assembly step 3" width="1920" height="1175" class="aligncenter size-full wp-image-2838" /> If you want, add a minute hand to the clock by cutting down the red minute hand that comes with the clock movement. <h2>Step 4</h2> Insert the front part into the back of the clock, twisting the front legs to an angle that allows the prongs on the front to pass through. <img src="http://www.tonythings.com/wp-content/uploads/2017/08/step-4.jpg" alt="" width="1920" height="1505" class="aligncenter size-full wp-image-2839" /> <h2>Step 5</h2> Finally, fixate the front to the back by rotating the front legs approximately 15 degrees. Remember to avoid using force when twisting the legs, or else the prongs on the front might break. <img src="http://www.tonythings.com/wp-content/uploads/2017/08/step-5.jpg" alt="Assembly step 5" width="1920" height="1505" class="aligncenter size-full wp-image-2840" /> And you're done! If you make the clock, please upload pictures of your results. I'd love to see the clock in different colors and materials! <img src="https://www.tonythings.com/wp-content/uploads/2017/08/Bobo-clock-on-desktop.jpg" alt="3D printable clock on desk" width="2300" height="1533" class="aligncenter size-full wp-image-2833" /> <a class="post-more" href="http://www.tonythings.com/wp-content/uploads/2017/08/BoBo-Clock-v1.zip">Download Design</a>
With this file you will be able to print Functional Desktop/Bedside Clock with your 3D printer. Click on the button and save the file on your computer to work, edit or customize your design. You can also find more 3D designs for printers on Functional Desktop/Bedside Clock.