G Scale Buffer
thingiverse
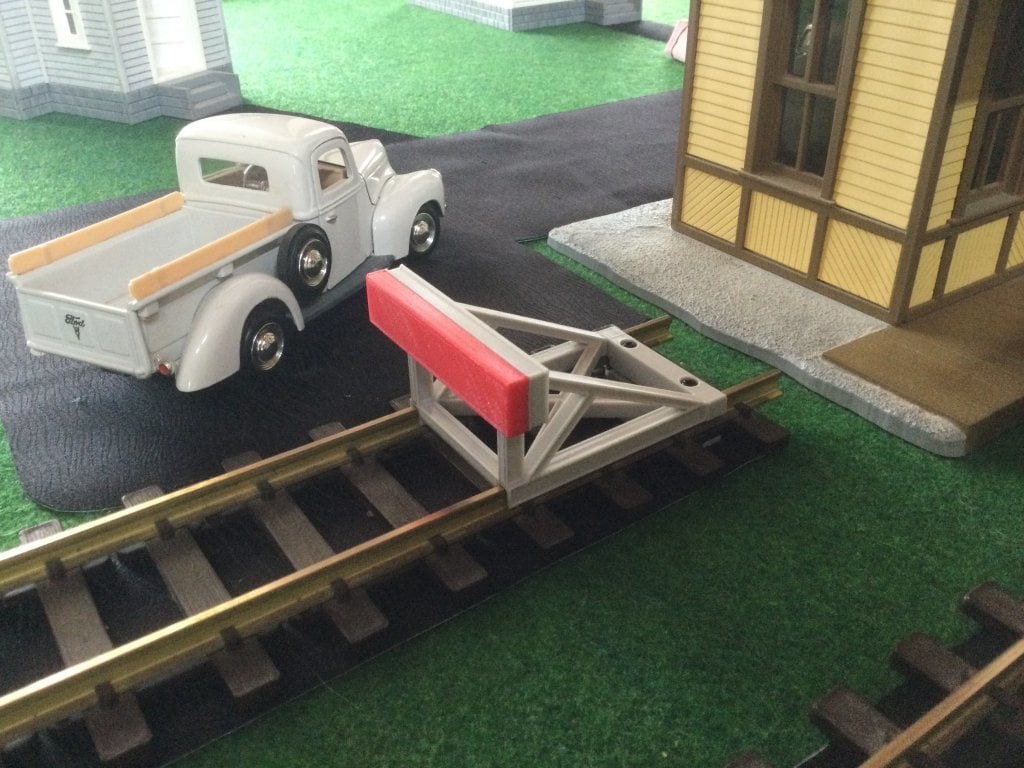
G Scale Buffer. I designed this for ease of printing. No supports required, but need to turn main buffer 90 deg, to put Buffer Beam down. For rail stop, also rotate top to make holes horizontal. Rail stop halves held together with 2 m3 x16mm self tappers. Buffer plank can be glued to main buffer. I managed to just have a press fit, no glue required. I have. Creality CR-6 SE, factory standard. 05 September. Upload Rail stop bottom. Originally not up loaded. 06 September Uploaded new Buffer10.stl to replace previous version. Small dimensional changes to make Buffer fit better on genuine LGB track. When slicing rail stop-bottom, use a higher than normal infill, perhaps 50-60% to increase the strength of the two conical pieces that screws thread into. 07 September. I have now fitted 9 of these buffers to my G scale layout. It has become obvious that there is a problem with the two conical screw supports in the rail stop bottom. They break easily. So Drill them out to about 2.7mm, and use screws that are long enough to go through to the bottom. If one of the supports does break, it can still be used with 16mm long screws. Printing:
With this file you will be able to print G Scale Buffer with your 3D printer. Click on the button and save the file on your computer to work, edit or customize your design. You can also find more 3D designs for printers on G Scale Buffer.