G4 Light Bulb Socket Holder
prusaprinters
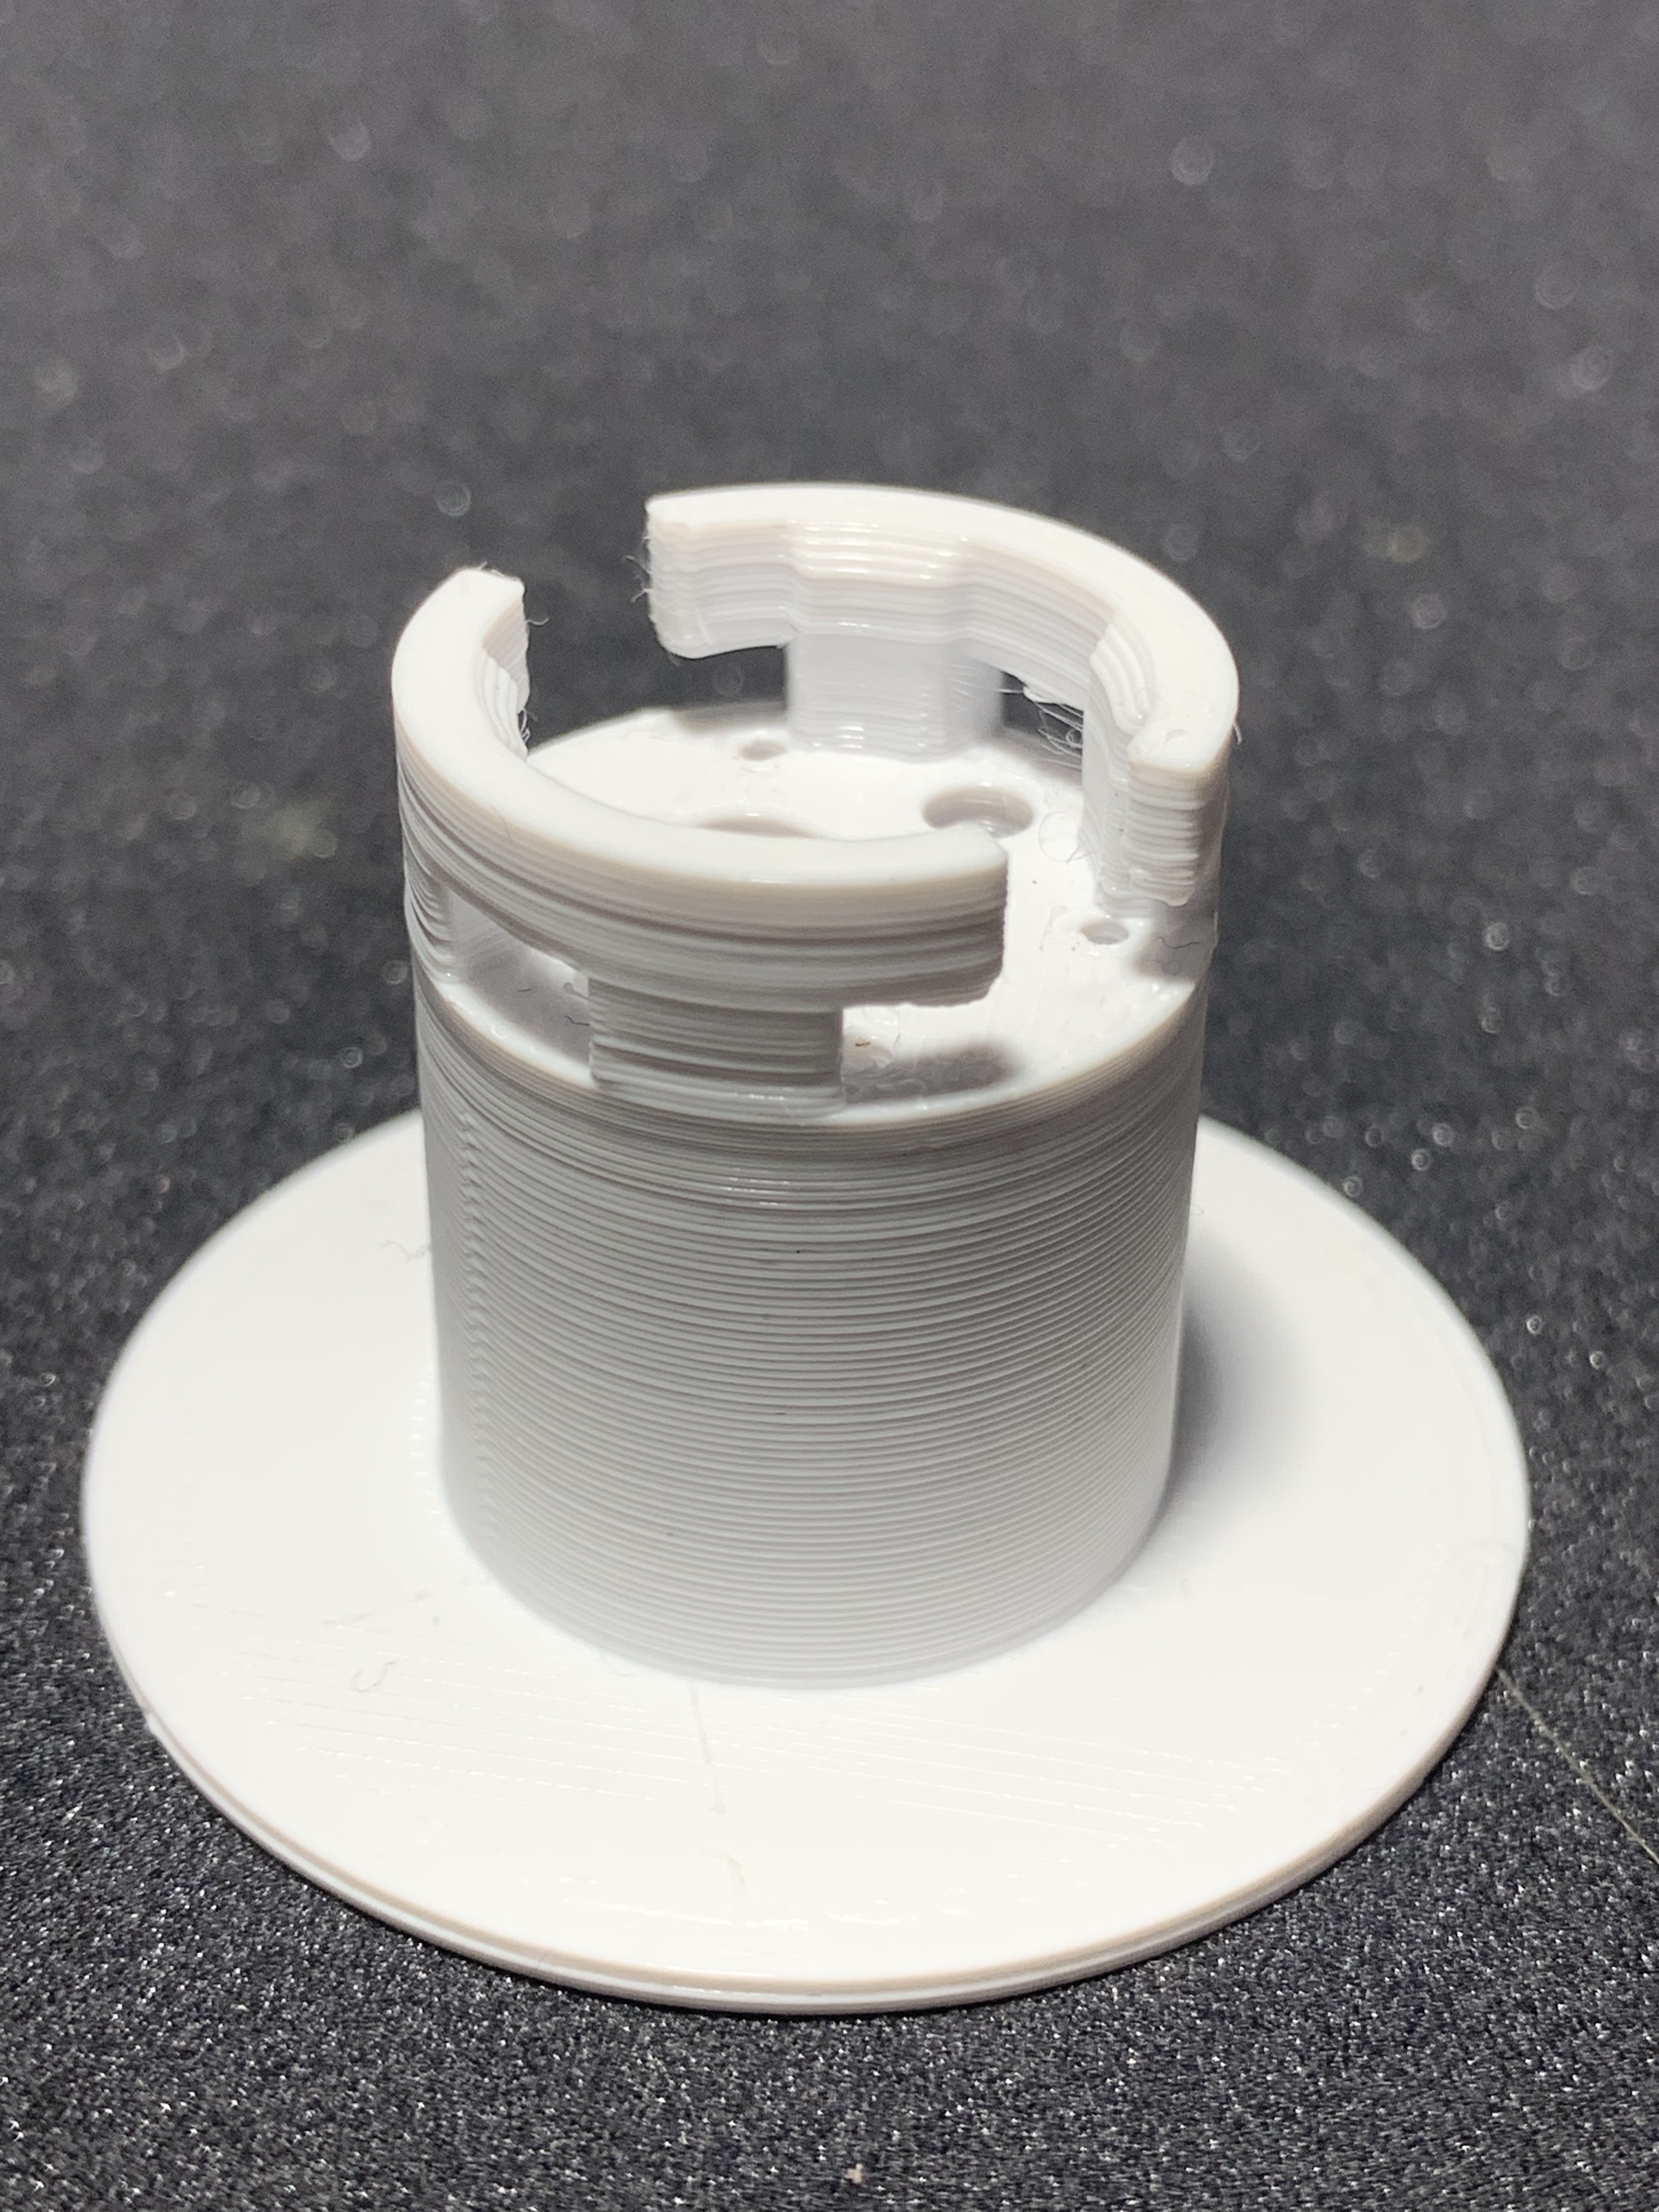
<h4>Description</h4><p>This is a holder for a G4 light bulb socket (e.g. <a href="https://smile.amazon.de/gp/product/B00TYCOXJO/ref=ppx_yo_dt_b_asin_title_o00_s00?ie=UTF8&psc=1).">https://smile.amazon.de/gp/product/B00TYCOXJO/ref=ppx_yo_dt_b_asin_title_o00_s00?ie=UTF8&psc=1).</a></p><p>It is designed to be recessed in a ceiling and held in place with springs (e.g. <a href="https://smile.amazon.de/-/en/SRunDe-pieces-retaining-downlights-recessed/dp/B08R64FSFJ/ref=pd_sbs_sccl_4_3/260-7782555-5890503).">https://smile.amazon.de/-/en/SRunDe-pieces-retaining-downlights-recessed/dp/B08R64FSFJ/ref=pd_sbs_sccl_4_3/260-7782555-5890503).</a></p><p>Those links are illustrative only - I'm not endorsing any particular vendor.</p><p> </p><p>It should take bulbs up to 17mm in diameter - this is larger than most holders I have seen. The coil of the springs should compress to about 12mm.</p><p> </p><h4>Printing</h4><p>I print these with the flange (the big disk) on the build plate. Supports are needed and I let PrusaSlicer place them automatically. If you don't like supports, and your printer has decent cooling, you can probably modify the file to have a very thin solid layer just under the base with the holes in and then drill it out after printing.</p><p>When selecting materials think carefully about heat and fire resistance and the amount of heat and kinds of voltages your bulbs produce and consume. PLA is probably OK with low wattage LED bulbs but if you have halogen bulbs you will need something with a higher melting point.</p><p> </p><h4>Usage</h4><p>Print the holder and remove any supports.</p><p>Insert the wires from a G4 bulb socket through the cylinder from the flange end and out the slit in the middle of the cover at the other end.</p><p>The two screw holes in the socket should line up with the holes in the holder. You can put an M3 x 12 hex head bolt through from then flange side and fasten it with a nut on the other side. I only use one bolt and leave the other hole empty.</p><p>Turn the holder around so the flange is on the bottom. You will need two spring retainers. They will go across the gaps between the pairs of protrusions on the top of the holder.</p><p>Take one spring retainer and put its small tang (the sticky out bit) in one of the very small holes next to a gap. There is a hole on both sides of the gap to accept differently wound springs but you will only use one of them. Stretch the spring (pliers might help) until you can hook it over the closest protrusion to the hole with the tang. Then compress the spring until you can slip it around the profusion on the other side of the gap. The spring should now span the gap. The wing of the retainer should naturally be held down by the spring and rest against the flange but you should be able to rotate it till it's pointing up with a little effort (though it won't stay there if you let go). Repeat this step on the other side.</p><p>Connect the end of the wires from your socket, through a whole in your ceiling, to the terminal block in your ceiling (or however you are wiring your lights). Then push the wires into the hole in the ceiling, and whilst holding the wings of the retainers vertical, the wings, followed by the holder. Once released the springs will pull the wings down and so the holder up and it should fit (almost) flush against your ceiling.</p>
With this file you will be able to print G4 Light Bulb Socket Holder with your 3D printer. Click on the button and save the file on your computer to work, edit or customize your design. You can also find more 3D designs for printers on G4 Light Bulb Socket Holder.