Gadgets3D LCD Enclosure
thingiverse
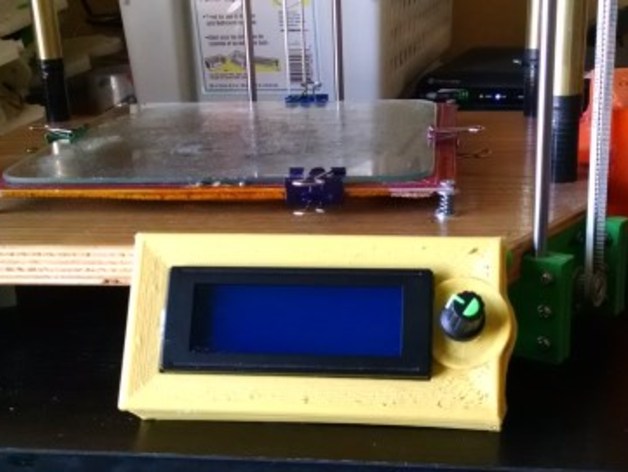
LCD enclosure designed for use with Gadgets3D's RAMPS 1.3/1.4 display: Get yours at gadgets3d.com/product-product.php?id=65 Assembly is straightforward, requiring just two print jobs - Enclosure and Panel. First, assemble the components within the housing by placing electronics and LCD inside. Pay attention to clearance to ensure the encoder's shaft protrudes adequately beyond the frame, allowing for effortless rotation of the knob. Adjust plastic trimming as needed to fit comfortably within the design space. Next, securely attach these parts using hot glue or alternative materials available on the market today. Frame assembly comes next by carefully aligning it over LCD surfaces and securing firmly in place with a suitable bonding agent. Following this process install encoder hardware and then find appropriate locations for attaching your device onto printers' existing mount points, holding it steady at an angle if required and ensuring full stability when in operation. Designs can also be modified further within SketchUp by opening up those files which include customizable 3D printable objects as desired to produce something truly unique or even commercially viable depending on target market demands!
With this file you will be able to print Gadgets3D LCD Enclosure with your 3D printer. Click on the button and save the file on your computer to work, edit or customize your design. You can also find more 3D designs for printers on Gadgets3D LCD Enclosure.