Gaggiuino - Arduino & Touchscreen Housing for Gaggia Classic & Classic Pro v2
thingiverse
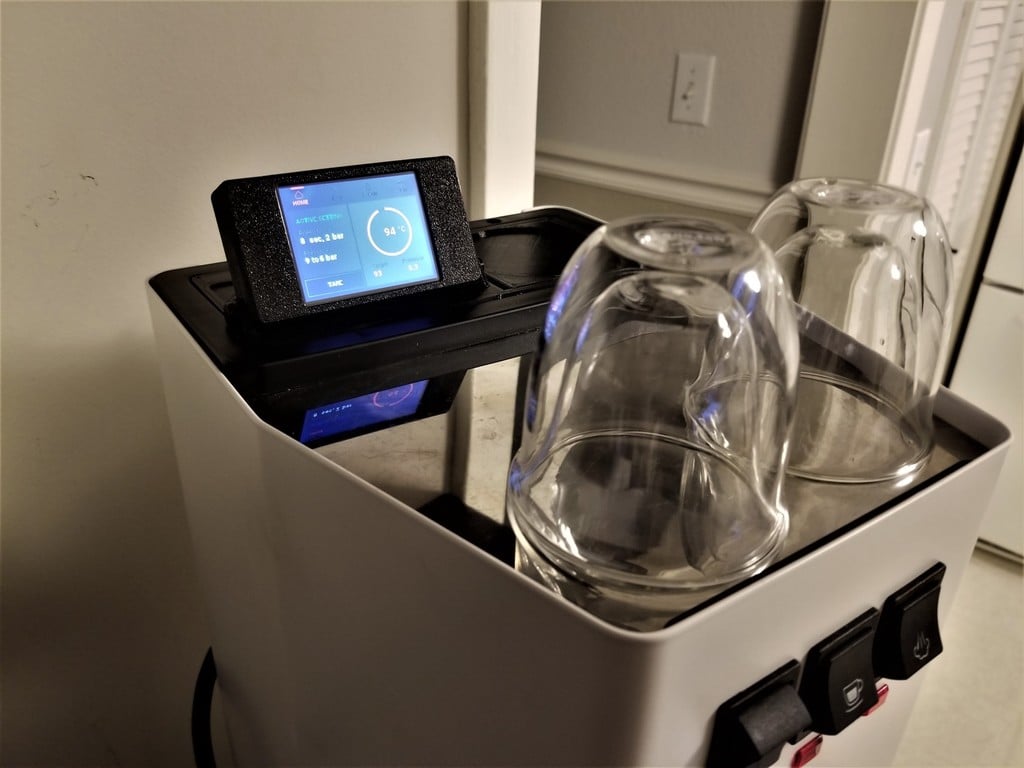
This is the updated Gaggiuino housing for a Gaggia Classic or Classic Pro espresso machine. It is designed for an Arduino Nano and a Nextion touchscreen display to control temperature, pressure, and display output weight. It allows for programmable preinfusion and pressure profiling. ADDITIONAL HARDWARE NEEDED: - piece of 1.75mm filament or stiff wire approximately 74mm long, for the water funnel door hinge - 2 m4x10 rounded head bolts - 2 m4 nylock nuts There is an external housing that is comprised of the following parts: - housingfront.stl - housingback.stl - plate.stl - lid.stl These can be printed in PLA or PETG. It does not matter which. None of these parts need supports, and are printed with the largest flat face down. There is a bezel that I included because I wanted to fill a hole that I had previously cut in the vent area of my machine to fit a db15 connector. I am no longer using those connectors. This bezel fills that hole and has a small hole in it to allow the wires to pass through to the screen. These wires can simply go through one of the vent slots if you haven't already cut that hole, and you will not need this part. There are three internal enclosures that are comprised of the following parts: - arduino-dimmer-max6675 enclosure bottom.stl - arduino-dimmer-max6675 enclosure top.stl - psu enclosure bottom.stl - psu enclosure top.stl - ACS712 enclosure bottom.stl - ACS712 enclosure top.stl These enclosures snap together. These need to be printed in ABS or PETG, or a filament with equivalent temperature resistance. None of these parts need supports, and are printed with the largest flat face down. The wiring and code has been created by Zer0-bit and uploaded to github, here: https://github.com/Zer0-bit/gaggiuino There is also a complete parts list there with everything you need to assemble this yourself. Print settings are basic settings. I used 4 perimeters and 15-20% infill. No supports are needed for any pieces. NOTE: THIS IS A CONSTANTLY EVOLVING PROJECT. THESE COMPONENTS ARE SUBJECT TO CHANGE TO ACCOMODATE ADDITIONAL FEATURES OR TO IMPROVE THE DESIGN. I have included the Fusion 360 file and you are welcome to adjust the design to fit your needs.
With this file you will be able to print Gaggiuino - Arduino & Touchscreen Housing for Gaggia Classic & Classic Pro v2 with your 3D printer. Click on the button and save the file on your computer to work, edit or customize your design. You can also find more 3D designs for printers on Gaggiuino - Arduino & Touchscreen Housing for Gaggia Classic & Classic Pro v2.