Galaxy Tab A 10.1 Sunshade Extension
prusaprinters
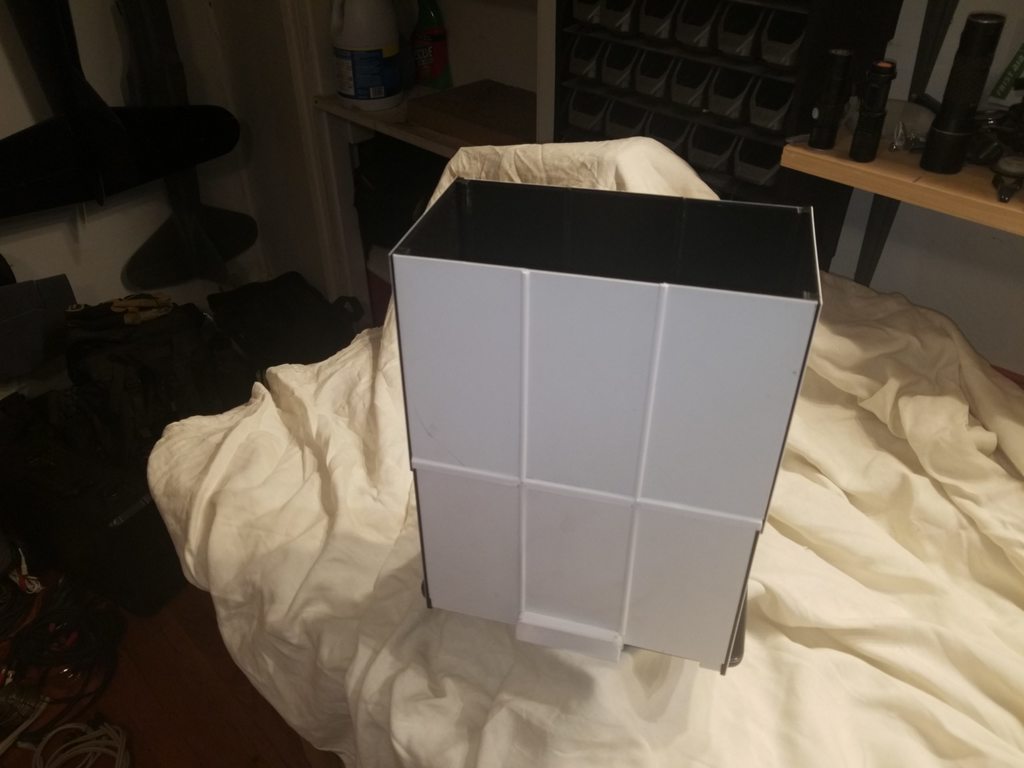
<p>This Sunshade Extension is designed to be used with my Galaxy Tab A 10. 1 Sunshade, found here: <a href="https://www.thingiverse.com/thing:4632715">https://www.thingiverse.com/thing:4632715</a></p> <p>The initial Sunshade I designed works, but as the tablet screen is glossy, it allows too much reflection back at you unless you have your face buried in it.</p> <p>The extension makes the view port deeper, helping to reduce the glare.</p> <p>It slips over the front edge of the Sunshade, then the sides and back fit to it, being retained by mild tension and flat neodymium bar magnets in the 4 pieces.</p> <p>2 different Side options exist: the L-R Sides are for use with the Back Panel, and the Left Side and Right Side do not use the Back Panel.)</p> <p>Be forewarned: it adds some weight, so be sure your tablet holder is strong enough.</p> <h3>Print Settings</h3> <p><strong>Printer:</strong></p> <p>My Mi3 and/or AluMaker</p> <p class="detail-setting rafts"><strong>Rafts: </strong> <div><p>No</p></div> <p><strong>Supports:</strong></p> <p>Yes</p> <p class="detail-setting resolution"><strong>Resolution: </strong> <div><p>Fine, .15 in Cura</p></div> <p><strong>Infill:</strong></p> <p>15%</p> <p><strong>Filament:</strong></p> eSun is what I used PLA+ is my preference <p>whatever you like</p> <p><br/> <p class="detail-setting notes"><strong>Notes: </strong></p> </p><div><p>Orient all panel parts with the outer face down on the plate.<br/> Orient the SE Trim strips with their flat side down on the plate. <p>Orient the Lock trim strips according to the build plate illustration: they will need Support..</p> <p>Print 1 ea SE Center Main, 1 ea SE Right Main, then mirror it to print 1 ea SE Left Main.</p> <p>Print 1 ea Center Main Lock Trim, 1 ea Right Main Lock Trim, then mirror it to print 1 ea Left Main Lock Trim.</p> <p>Print 2 ea SE Trim Strip</p> <p>Full Extension - 4-sided</p> <p>Print 2 ea SE L-R Sides</p> <p>Print 1 ea SE Back Center Main, 1 ea SE Back Right main, then mirror it to print 1 ea SE Back Left Main.</p> <p>Partial Extension - 3-Sided</p> <p>Print 1 ea SE Right Side, then mirror it to print 1 ea SE Left Side. (no back panel magnets)</p> <p>You will need some 20 x 5 x 2mm neodymium bar magnets.</p> <p>24 for the Full Extension</p> <p>12 for the Partial Extension</p> <h3>Post-Printing</h3> <p>Using CA and spray accelerator:</p> <p>Assemble the Center Main, Left and Right into the Front Panel assembly.</p> <p>Add the 3 Lock Trim Pieces to the bottom front edge. These trap the Front Panel onto the top front edge of the sunshade.</p> <p>Assemble the Back Center Main, Left and Right into the Rear Panel.</p> <p>The Trim Strips are for hiding the seams between the Front Panel Mains.</p> <p>Use care when gluing the magnets into the recesses of all the Front, Back and Sides, ensuring that the L-R Sides can be installed interchangeably.</p> <p>To Use: slip the Front assembly over the top front edge of the Sunshade and pivot it forward to lock it to the Sunshade.</p> <p>Slide the sides onto the Sunshade and push them forward to magnetically lock with the Front.</p> <p>Slide the Back into position, letting it rest on the Sunshade and magnetically lock with the Sides.</p> <p>My Sunshade and Extension have both been spray painted on their inside faces with flat black paint.</p> </p></div></p></p> Category: Tablet
With this file you will be able to print Galaxy Tab A 10.1 Sunshade Extension with your 3D printer. Click on the button and save the file on your computer to work, edit or customize your design. You can also find more 3D designs for printers on Galaxy Tab A 10.1 Sunshade Extension.