Galileo Pendulum clock Mk I - Updated
thingiverse
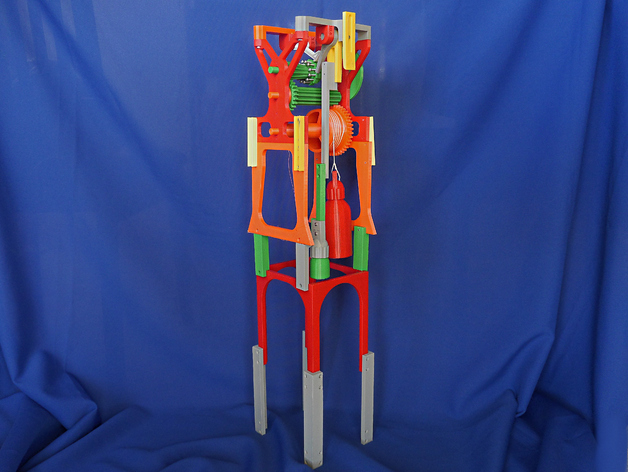
This is an update of thing:1618843. I've included all the files, not just the updated ones. The update falls into three categories: To provide a larger operating window. The original design worked, but too much less that 100% of the time to be fully satisfactory. The major factors in getting good operation, given that the parts have been made (close to) flat, are that the pawl and the pendulum assembly can rotate absolutely freely. To that end I've redesigned two support brackets and offer them with a selection of different size bores which are engraved on the side. These make assembly easier. I think that one bracket in each pair should be a neat fit to the shaft however I've found that it's impractical to expect the other bracket in the pair to also be a neat fit. For me the brackets marked 9.6 and 10.4 are the best ones. The other important change is to the peg stopper. I now offer several variants. The larger the number, the more it lags that pawl lifter. The variants 2.5 and 4.5 are 0.5 mm longer than 3 and 4. For me 4.5 is the best one. As for the pawl.... I'm still of the view that a slightly softer grade of PLA (or ABS) is better than standard PLA as it will bounce less. However, as an alternative I've designed pawls with holes in them to accept 3mm screws so that the head end can be made heavier. Not sure it helps - I don't need screws with my Polymaker's PolyMax pawl. Another change is an adjustable bracket to limit the starting position of the pendulum - this makes it easier, once set, to start the pendulum in a position most likely to work. To tune the tick interval to 'exactly' 1 second. To achieve this - without the whole thing becoming too tall - I've had to add a weight at the end of the pendulum. This has the effect of moving the centre of gravity of the pendulum further from the pivot point, without any increase in the overall length. Nonetheless, I've had to make the unit a little taller to get to 1 second. A drawback of this approach is that the pendulum now requires more input energy so a heavier weight is needed. The weights that work for me are 80g for the pendulum and 702g for the weight (both include the bottle weight but not the bottle cap). I'm using lead fishing weights in a variety of sizes for best packing efficiency. To increase the time of operation. To this end, the pendulum rod is now significantly offset so the weight can be brought up higher, and extension legs can be added to the (new) frame base. And extensions can be added to these legs for even more stability. I recommend using a brim on wider parts. I also recommend a tapered reamer to open the start of holes intended for screws. All screws are 3mm Button Head Caps Screws. Those in the ratchet are 15mm long - 12-off. The remaining screws are all 10mm long - about 40! Also, you'll need lead shot (fishing weights) for the bottle weight and the pendulum bob. I used assorted sizes to get as much weight into the bottle as possible. Weight of bottle and lead (excluding the cap) - 80g for the bob and 702g for the weight. I started with the photos of the metal models (I've uploaded those photos to thing:1618843) and went from there. All the design work was done in Moi (Moment of Inspiration). Once I had an escapement design, I ran it as a simulation (unsuccessfully) in SimLab Composer Mechanical and refined the design until it would simulate. I've provided a link to that simulation in thing:1618843. I cheated a little on the gear spacing. In the interest of making everything as 'free' as possible, the gears are 1mm further apart than the intersection of their PCDs.
With this file you will be able to print Galileo Pendulum clock Mk I - Updated with your 3D printer. Click on the button and save the file on your computer to work, edit or customize your design. You can also find more 3D designs for printers on Galileo Pendulum clock Mk I - Updated.