GAME OVER
prusaprinters
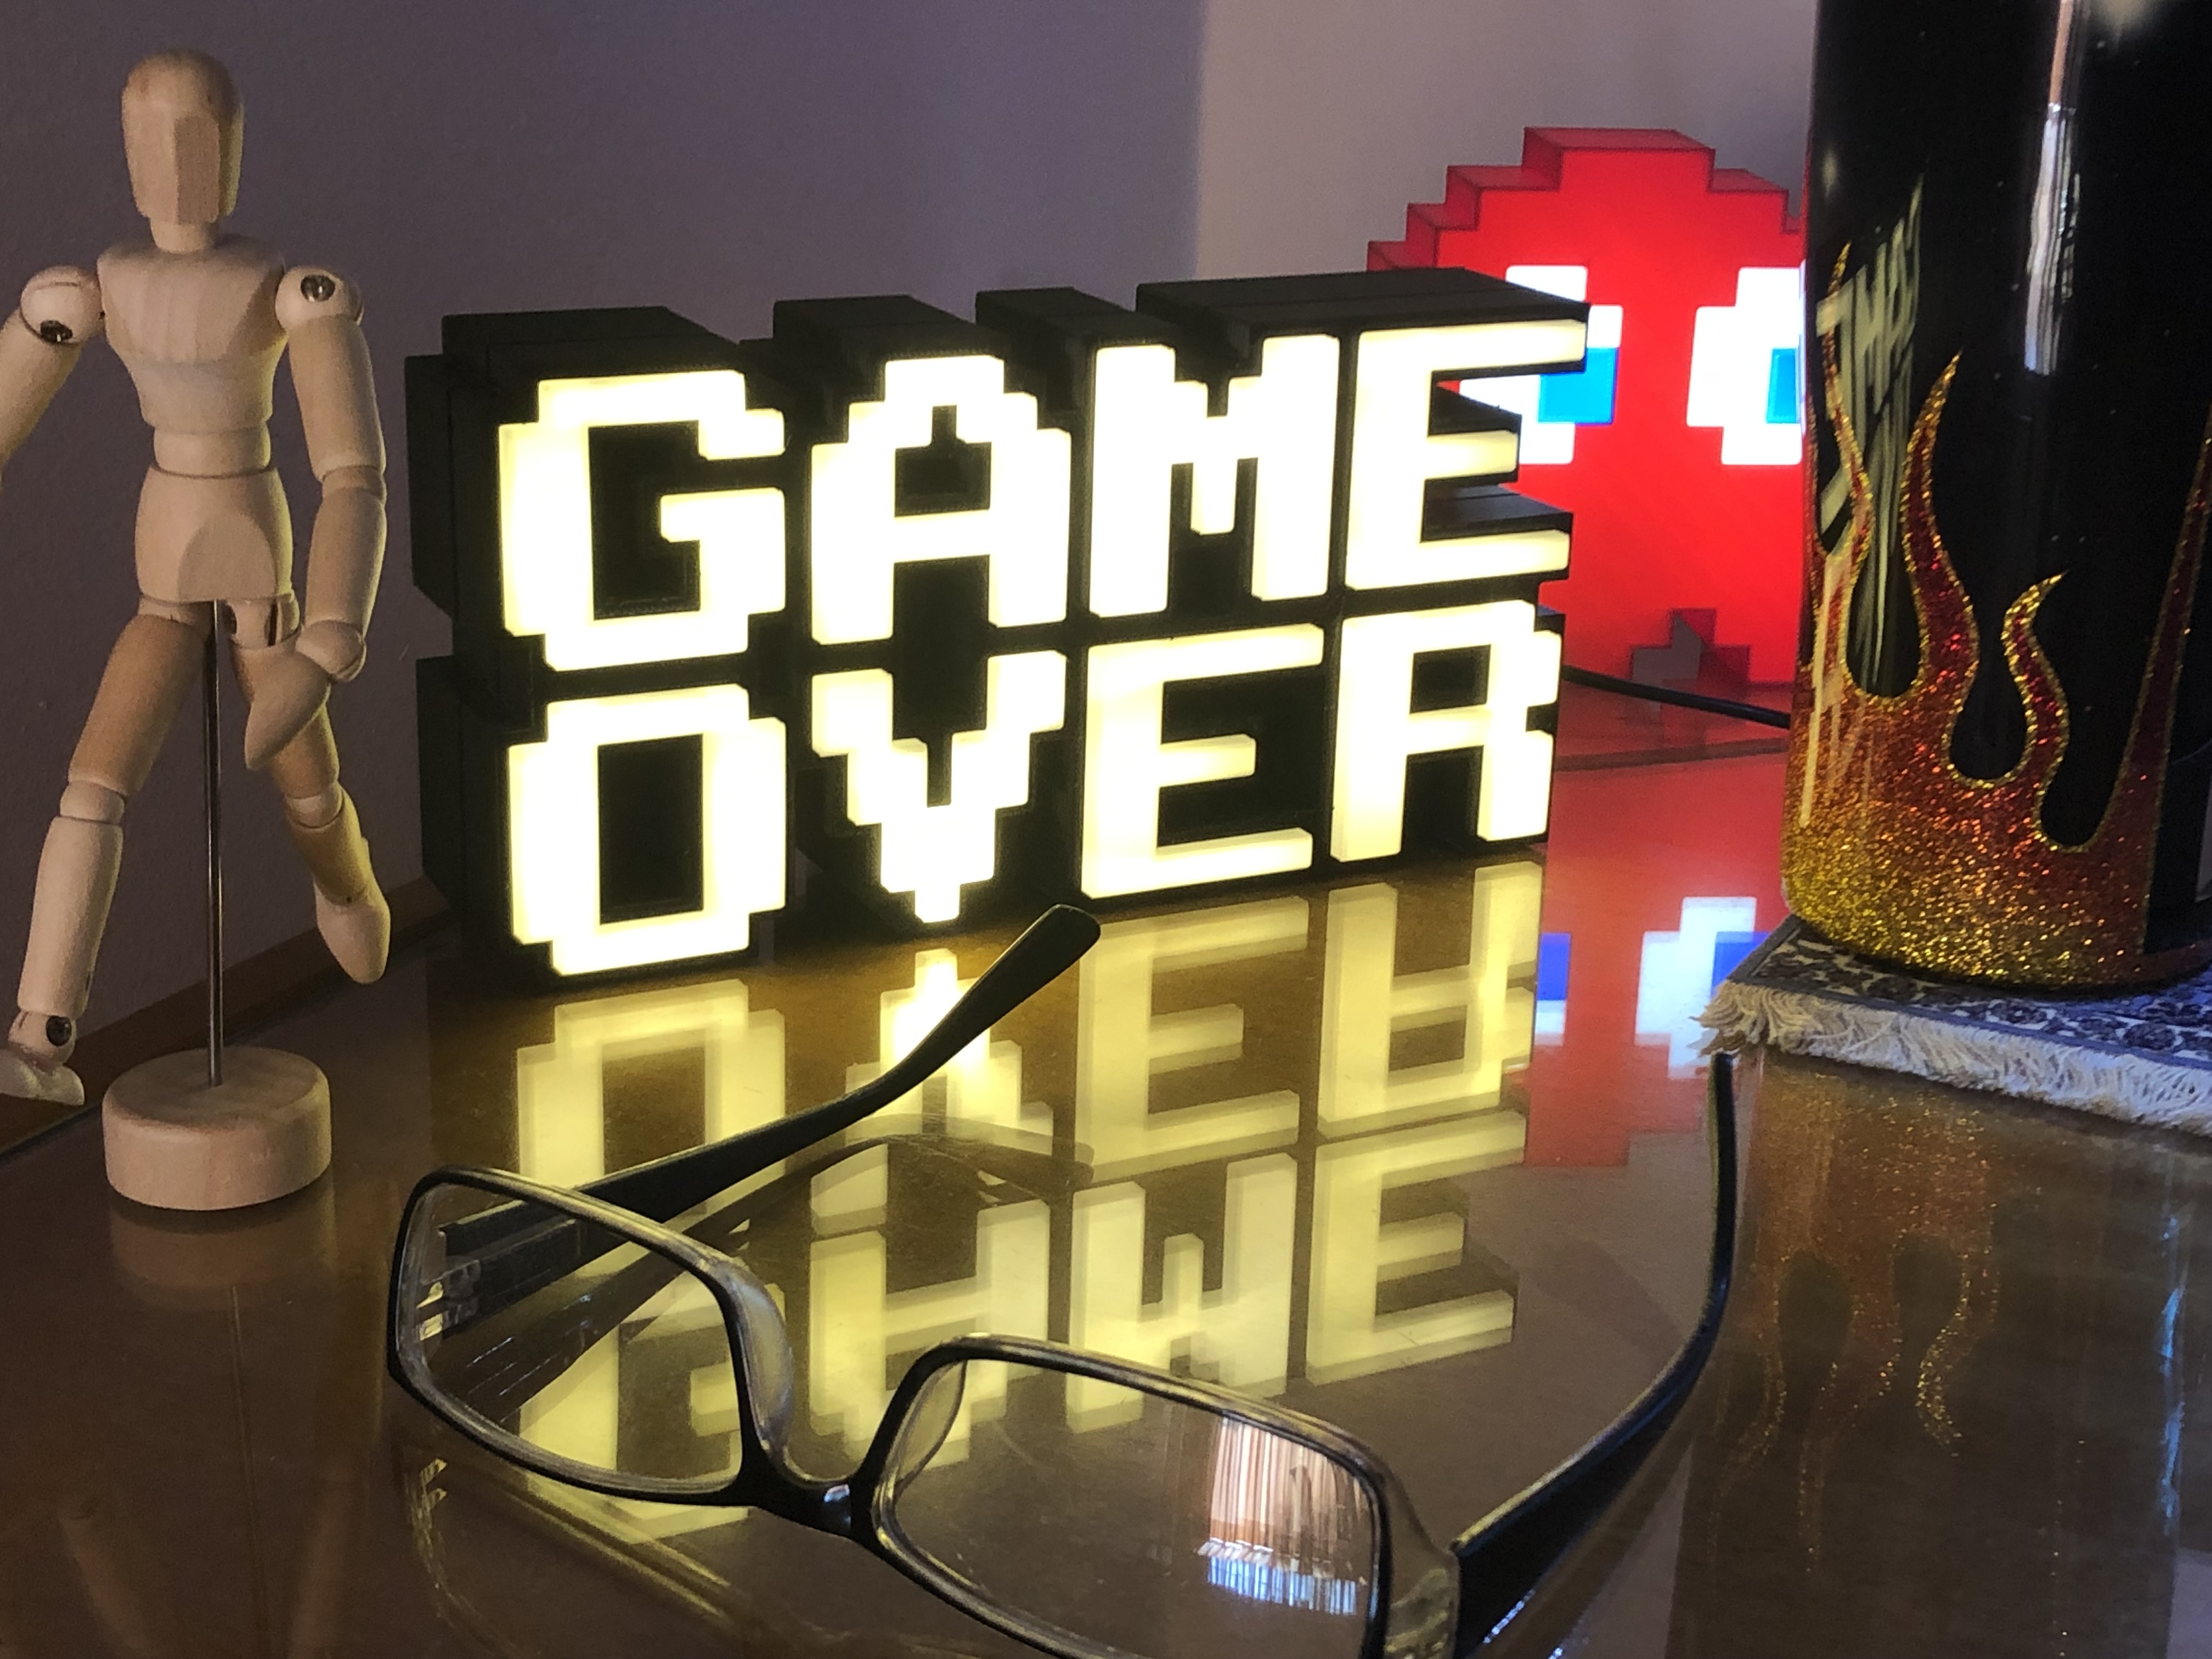
<figure class="image image-style-align-center image_resized" style="width:50%;"><img src="https://media.printables.com/media/prints/314443/rich_content/b63c34ab-5fda-4658-b630-0cb5b381b77e/game_over_led_pattern.gif#%7B%22uuid%22%3A%22ee9b9f10-34d8-47f7-aac4-f20abf1efa1f%22%2C%22w%22%3A256%2C%22h%22%3A144%7D"></figure><p> </p><p>This is an 8bit decoration light of classic <strong>GAME OVER</strong> sign.</p><p>It's a retro feeling printout of the sign that tells you that the fun is ended <strong>:(</strong></p><p>With 200mm width and 100mm Height will make your printer to fill the bed from side to side (almost). The Decoration only model comes in two depths. The first one is 35mm to match <a href="https://www.printables.com/model/279820-pac-mans-ghosts">PAC-MAN's Ghosts</a> model, the second one is 25mm. And the electric one is 40mm so the electronics could fit nice.</p><p>The letters are printed with white filament and thin in case you want to light it up. And the body is printed with black filament to make contrast. Of course you can print it in any color you want. Will be great to see different color variations like red body and orange letters or even green body with yellow letters.</p><p> </p><h5>Printing</h5><p>For the “easy” decoration only models use lite settings like: 2 walls, 2 bottom layers, 4 top layers, 10% infill because there is no need to be a strong structure as its for decoration only. It takes about 25 hours for the 35mm edition and about 19 hours for the 25mm edition to print, depends the settings you choose, plus the letters which is about 2 hours more and you're done!</p><p>For the “heavy” model use a bit more rigid settings like 4 bottom/top layers, 3 walls, 15% infill… it depends on how gentle you will be during the electronics installation.</p><p>I used the 4 bottom/top layers, 2 walls and 10% infill settings, with a bit bit of extra care in electronics installation and took about 17 hours for the body and about 12 hours for the back cover plus 2 hours for the letters.</p><p>Also a point of extra attention is the "elephants foot" effect/symptom for the body part as it fits precise in the back cover, and a problem like this will take some time to sand it or scratch it down…</p><p>The parts are fit together a bit tight so you don't have to use any glue</p><p>Other than that, there is not any difficulty as the printing part.</p><p> </p><h5><strong>Electronics </strong></h5><p>There is NO holes for the leds to the models, to chose the place and the density you want to.</p><p>The holes are made with a pointy 3mm round file one by one and the leds are lightly sanded to diffuse light a bit.</p><p>You can use 3mm or 5mm led diodes at any position and density you want. Also it might fit a side emitting led stripe (not tested) as the common led stripes DON'T fit.</p><p>An idea is to use 5mm addressable RGB leds like WS2812 for more flexibility in installation and more options in effects. Its up to you. I might use 'em in the future.</p><p>For now, I chose the “hard” way, using 3mm led lights, in warm white color to have the retro feeling of the incandescent lamp. All this are driven by an Arduino Nano using a “2n7000 n-channel mosfet” per letter as the Arduino could not power handle too much leds. Also I use a “female micro USB breakout board” to power up and control the Arduino Nano, and its epoxy glued at the back of the back cover.</p><p> </p><p><strong>Make - Like - Comment</strong></p><h5><strong>And…</strong></h5><p>Of course you can chose the most easy way to <strong>Print and enjoy ! </strong> <strong>; )</strong></p><p> </p><p> </p>
With this file you will be able to print GAME OVER with your 3D printer. Click on the button and save the file on your computer to work, edit or customize your design. You can also find more 3D designs for printers on GAME OVER.