Garage Door Seal Trimmer
thingiverse
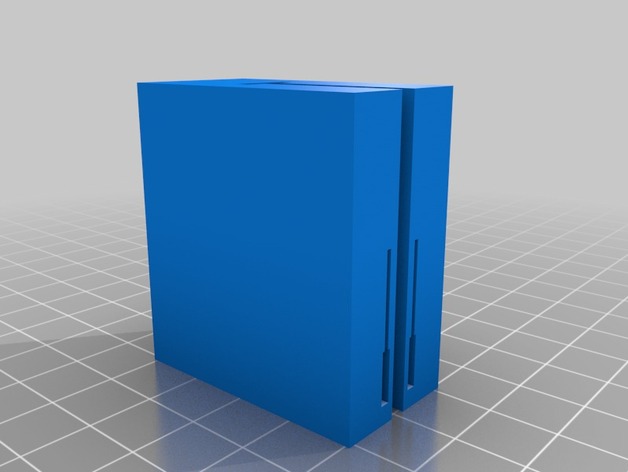
The garage doors that I have are old enough that the current weather seals for the bottom do not fit. The only seals that I have found for the 'T' channels are 5/16". My garage door needs a 1/4". I made this trimmer to remove 1/16" (1/32" from each side). After it is printed, clean the insides of the 'T' channel so the rubber seal can pass through without any resistance. You need two single edge razor blades. You will have to modify the razor blades for it to work. Using a rotary tool, cut away the center part of the razor blade stiffener so that only the razor blade itself is visible in the seal path. With the thicker stiffener in the way, the seal will not easily pass through the trimmer. Be sure to leave some stiffener on the ends to fit snugly in the slots. To use, push the seal into the trimmer towards the sharp side of the razor blades. Once the seal starts to exit the back, start pulling the seal and the cuttings. The cutting isn't exactly equal on both sides of the 'T', but it will be 1/4" and it should slide into the 'T' channel on the bottom of the door. Be very careful, the razor blades are very sharp and due to differences in 3D printers, the razor blades could slide out while using the trimmer.
With this file you will be able to print Garage Door Seal Trimmer with your 3D printer. Click on the button and save the file on your computer to work, edit or customize your design. You can also find more 3D designs for printers on Garage Door Seal Trimmer.