GBS (8200) Control - mini cocktail arcade cab housing
thingiverse
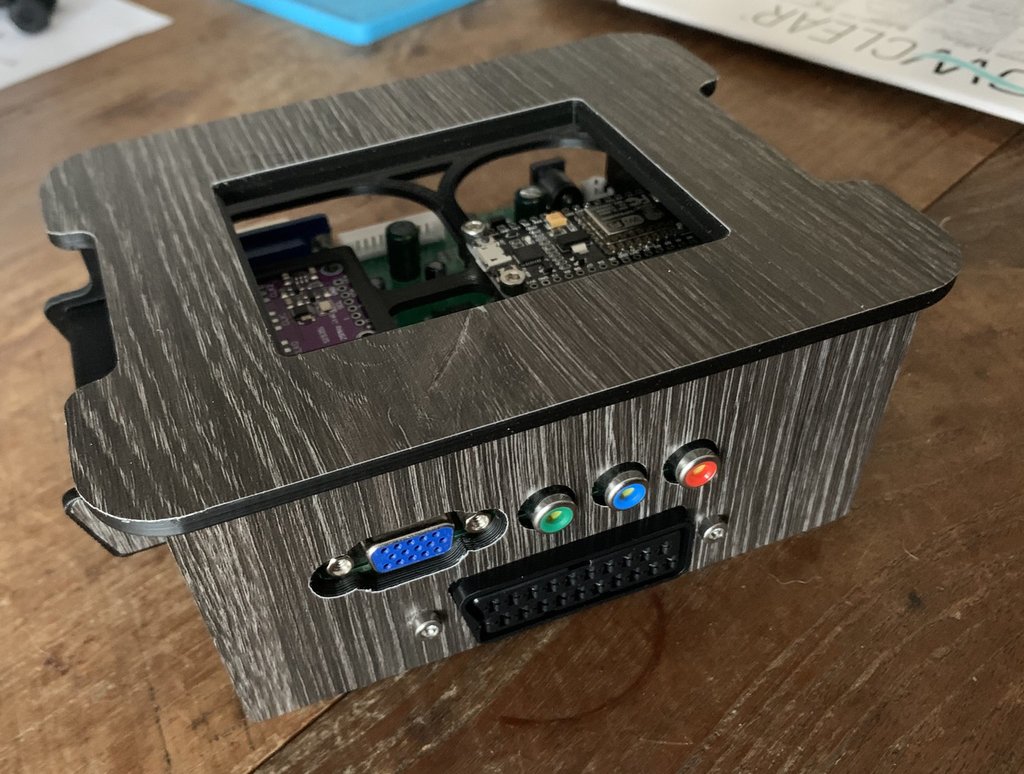
<h3> Design </h3> After seeing Voultar's install video of this, I had an idea to make a housing for it myself, which was inspired by original cocktail arcade cabs. Video can be found here: https://www.youtube.com/watch?v=1AVXhiTlmgo <h3> Hardware </h3> Most the info from the video applies, with some expansion I added. <i>See "Parts" section later for links to the ones I used.</i> First of all, there is a dedicated mounting bracket for the NodeMCU and the clock generator, no need to mount it to the board itself. Second, I added 2 mini-breakout board for audio, and power (USB), to connect to the VGA-HDMI adapter easily. Audio wiring: https://i.pinimg.com/originals/4e/72/72/4e72729dba13164ad78586395fe11873.png (need Tip, Ring1 & Sleeve) Scart wiring: http://domoticx.com/wp-content/uploads/2015/01/scart-pinout.png Third, I added a SCART port. This is fully optional, and there's a version without it available as well. (Print "FrontPanel_input_noSCART" instead of "FrontPanel_input") <i>If you connect Component or VGA, you can use a SCART breakout to pass through audio in a clean way, without ever having to swap the plug on the back.</i> Last, you'll need 8mm M3 hex bolts, and M3 square nuts, to secure the whole thing down. <h3> Install </h3> If you wanna do like I did in the preview images and apply vinyl laminate, do that first before anything else! Make sure to have done the mods to the GBS board before installing (caps, etc). Add the wiring for the NodeMCU and the Clock Generator to the GBS side, but don't connect them yet. First screw the controllers to the sidepanels. Make sure you have wires coming from the breakout boards and then slide them into place on the "BackPanel_ouput". Now secure the GBS8200 to the sidepanels, and attach _only_ the backpanel. Wire up the power (and audio only if you aren't gonna grab that from SCART) to USB. Now slide in the clock gen, and screw the NodeMCU in place on the "Top_Bracket". This assembly can go into the slot above the GBS, sliding it in from the front. You can go ahead and wire all these up, and program the NodeMCU. Once this is done, add the SCART socket to the "FrontPanel_input", and secure that in place with the screws. Flip it over, and add wiring from the bottom for SCART (I removed the "big" RGBS header in the corner for easy access). Last you can click into place the "Top_Panel_open" (or the "Top_Panel_open_holes" variant, you only need 1 of them). <i>The holes variant is there so you can add a layer of acrylic and secure that to the top, for that ultimate arcade cab look.</i> That's it! <h3> Parts </h3> I ordered these in bulk myself, as I'll often use them for other projects as well. If you don't need that many, just shop around for a similar one, but I can't guarantee they'll fit as neatly. USB breakout (non-affiliate): https://www.amazon.nl/gp/product/B07R6HLVJ7/ Audio breakout (non-affiliate): https://www.amazon.nl/gp/product/B08SM46DWW/ I also used a slightly different VGA to HDMI adapter, as I preferred a non-solid heavy object sticking out from the back: https://www.amazon.nl/gp/product/B07D51QCFF/
With this file you will be able to print GBS (8200) Control - mini cocktail arcade cab housing with your 3D printer. Click on the button and save the file on your computer to work, edit or customize your design. You can also find more 3D designs for printers on GBS (8200) Control - mini cocktail arcade cab housing.