GDEMU Remote SD Card Mount
thingiverse
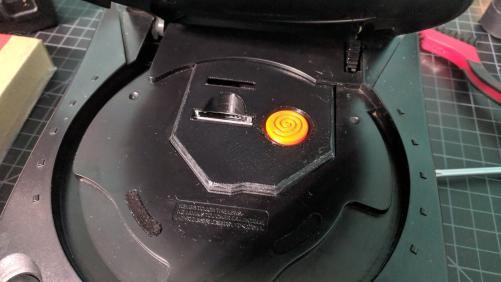
Update March 17th 2020 New version with some screw hole placement fixes v1.4 Also the release of the back lit button fit a normal 5mm led into the holder and wire it up. My remote SD mount consists of three pieces. GDEMU SD Mount 1.2.stl GDEMU SD Mount Bracket 1.2.stl GDEMU SD Mount Button 1.2.stl GDEMU SD Mount Bracket Clone Height addresses some of the new GDEMU clones that sit lower than the official unit. In addition to the printed parts you will need some additional parts. https://www.ebay.com/itm/263799110208 The 15cm one will be more than long enough https://www.ebay.com/itm/183392137874 M2x8mm (You will need 2 to secure the SD card extension to the mount.) M3x8mm (You will need 6 of these to assemble the parts) M3x16mm (you only need one for the front most screw hole) Everything should print without supports. Assembly is simple, uses two M3x8mm thread forming screws to attach the GDEMU board to the SD mount bracket. Screw the SD extension into the SD Mount. Plug the SD Extension into the GDEMU. Place the Button into the SD mount, and attach the bracket to the SD mount. Use 4 M3x8mm screws to attach the parts together,\ Install the GDEMU just like the original drive, use an original drive screw to attach the back mounting hole, and use one of the M3x16mm screws to attach the front screw through the GDEMU board into the Dreamcast. Thank you to Marcus9199 and bpv6ja for testing the design and providing images of their finished products. I have complete kits of this mount available on my website https://laserbear.net/shop?olsPage=products%2Fgdemu-remote-sd-card-mount-kit
With this file you will be able to print GDEMU Remote SD Card Mount with your 3D printer. Click on the button and save the file on your computer to work, edit or customize your design. You can also find more 3D designs for printers on GDEMU Remote SD Card Mount.